Enterprise Network Setup with Windows Server
A step-by-step guide to setting up an enterprise-level network environment using Hyper-V, Windows 10, and Windows Server 2022. Includes AD domain setup, DHCP, DFS, PowerShell automation, and more.
View the Project on GitHub hexwarrior6/Enterprise-Network-Setup-with-Windows-Server
Chapter 1: Creating Virtual Machines Using Hyper-V
This tutorial will guide you through the process of creating virtual machines using Hyper-V and installing Windows Server 2022 and Windows 10.
1. Enabling Hyper-V
Step 1: Enable the Hyper-V Feature
Hyper-V is a virtualization platform in Windows used to create and manage virtual machines. First, ensure that Hyper-V is enabled in your system.
Steps:
-
Search for and open “Turn Windows features on or off”
TypeWindows Featuresin the Windows search bar, then select “Open”.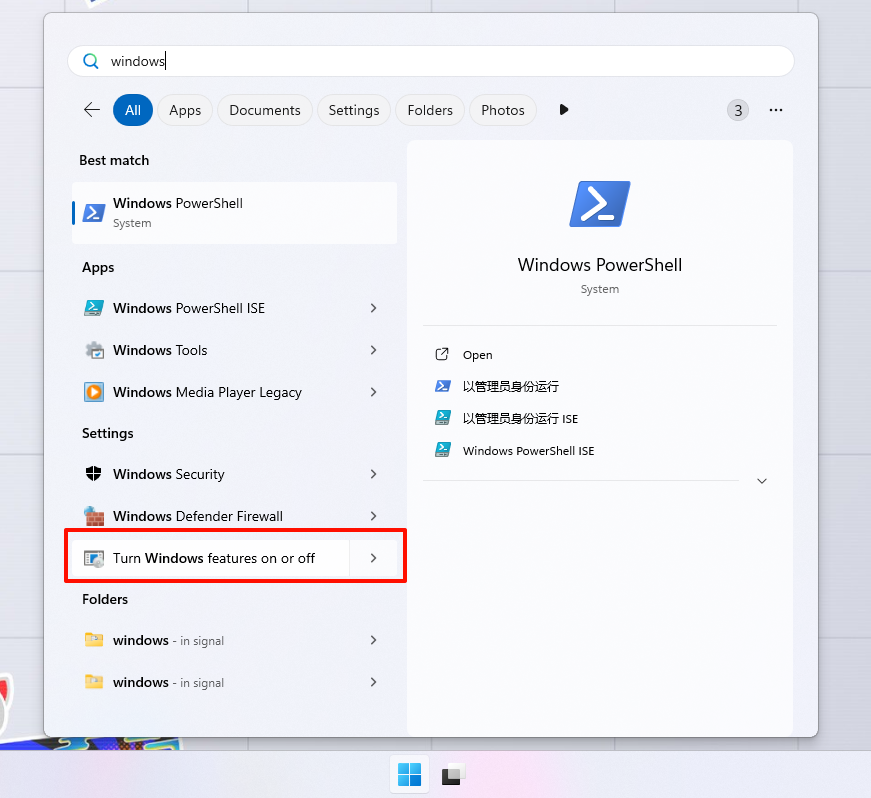
-
Check the box for Hyper-V
In the window that appears, locate and checkHyper-V, then click “OK”.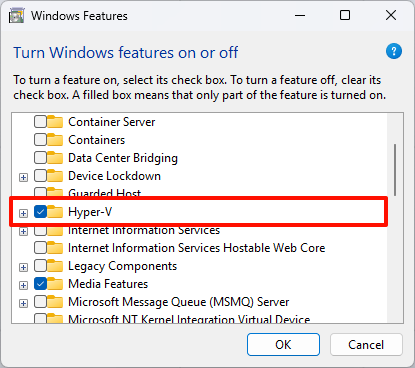
-
Restart your computer
You will be prompted that a restart is required to apply changes. After restarting, Hyper-V will be fully enabled. -
Open Hyper-V Manager
After rebooting, search for and open “Hyper-V Manager” from the Start menu.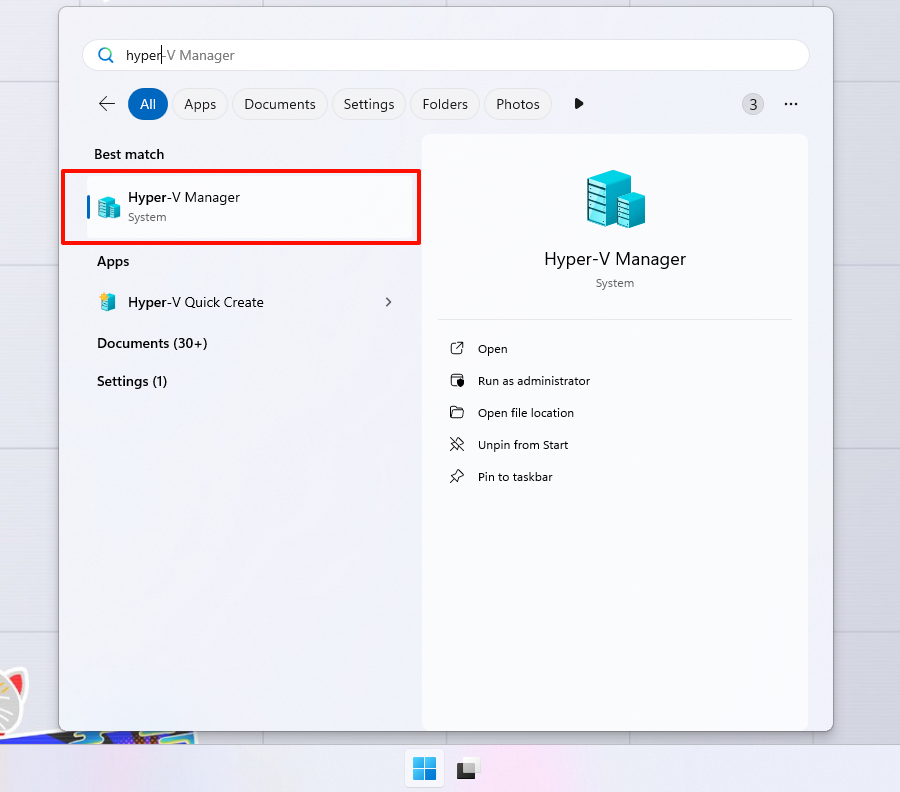
2. Download ISO Images
When setting up an enterprise network environment, we’ll need ISO image files for Windows Server 2022 and Windows 10. Below are the download links (Note: If these links are no longer valid, please visit Microsoft’s official website for the latest download addresses):
-
Windows Server 2022 ISO
Download Windows Server 2022 -
Windows 10 ISO
Download Windows 10 ISO
Notes:
- If you cannot access the above links directly, try obtaining the images through Microsoft’s official download center or other trusted sources.
- Ensure that the downloaded ISOs are legitimate and genuine to avoid installation and licensing issues later on.
3. Create a Virtual Switch
A virtual switch is essential for communication between virtual machines and between virtual machines and the host machine. We need to create a virtual switch of the Internal type.
Steps:
-
Open Hyper-V Manager
In Hyper-V Manager, click “Actions” -> “Virtual Switch Manager” on the right-hand side. -
Create a new virtual switch
In the window that appears, click “New virtual network switch”, select “Internal”, and click “Create Virtual Switch”.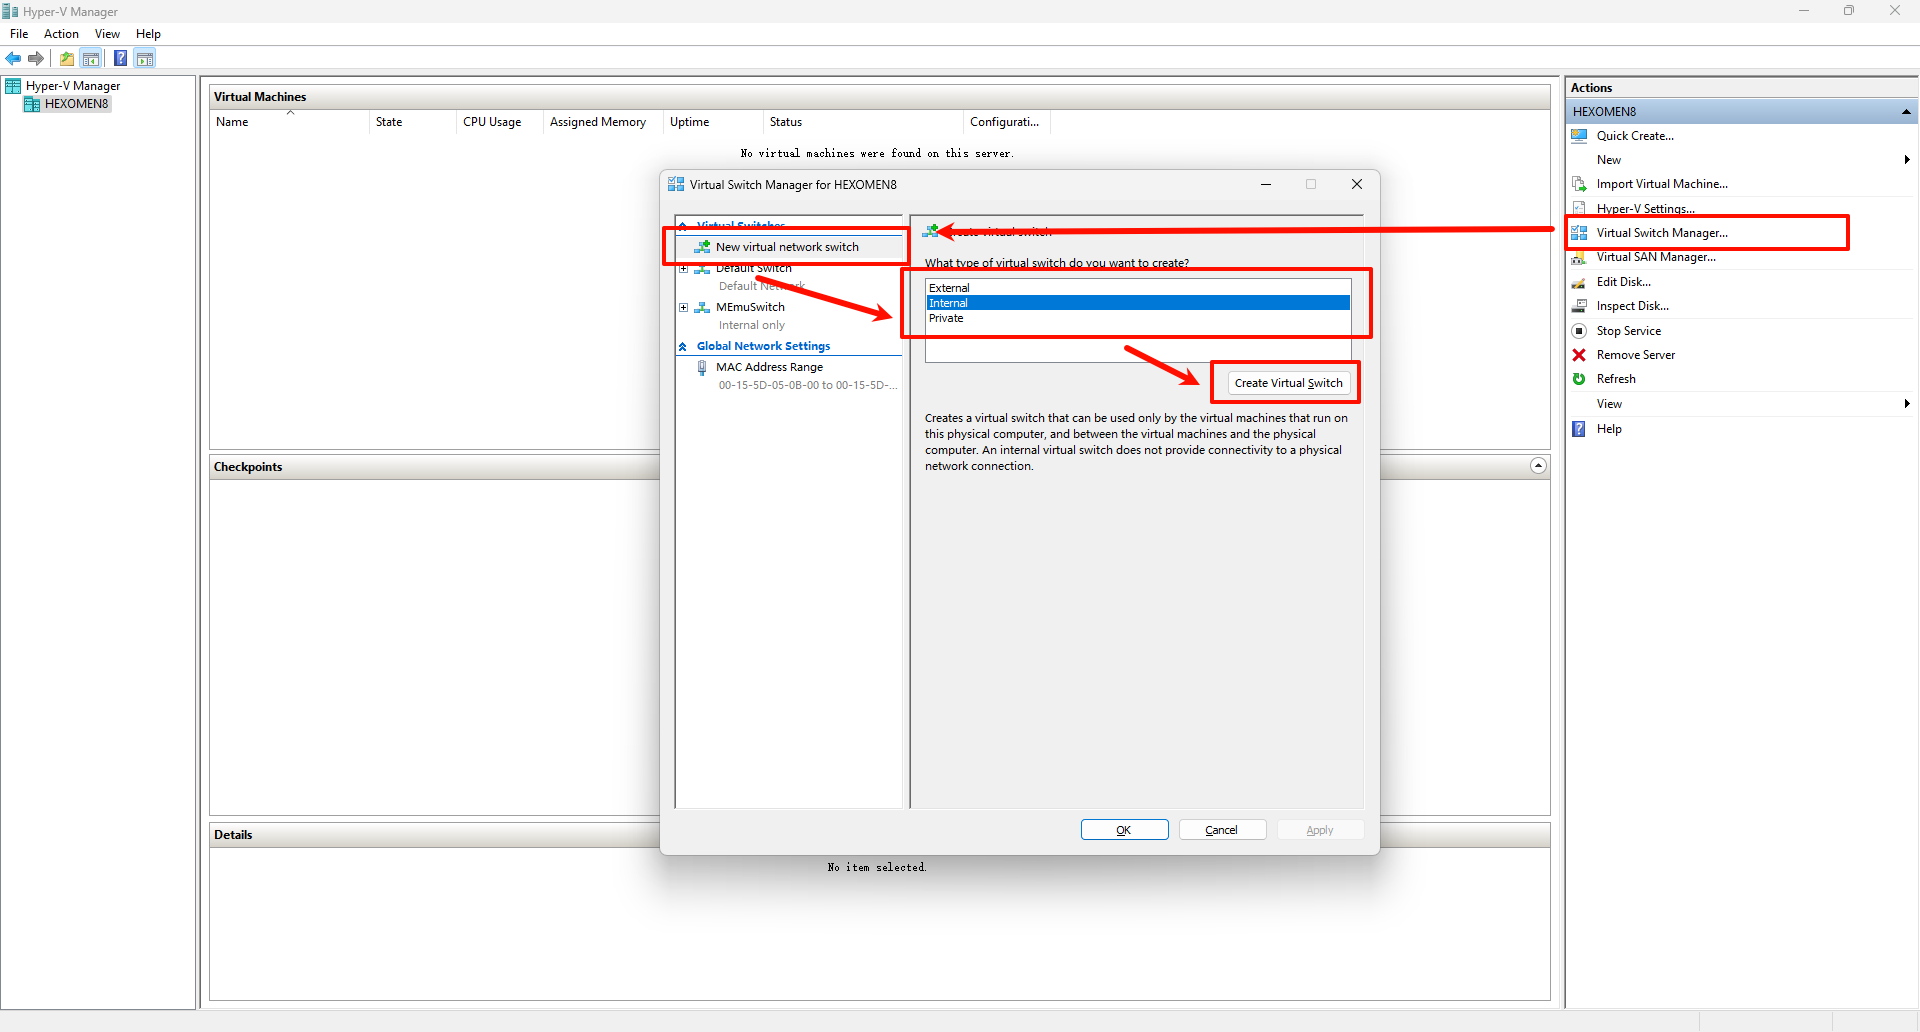
-
Configure the switch name
Enter a name for the switch, such asBread-Makers.nz, then click “OK”.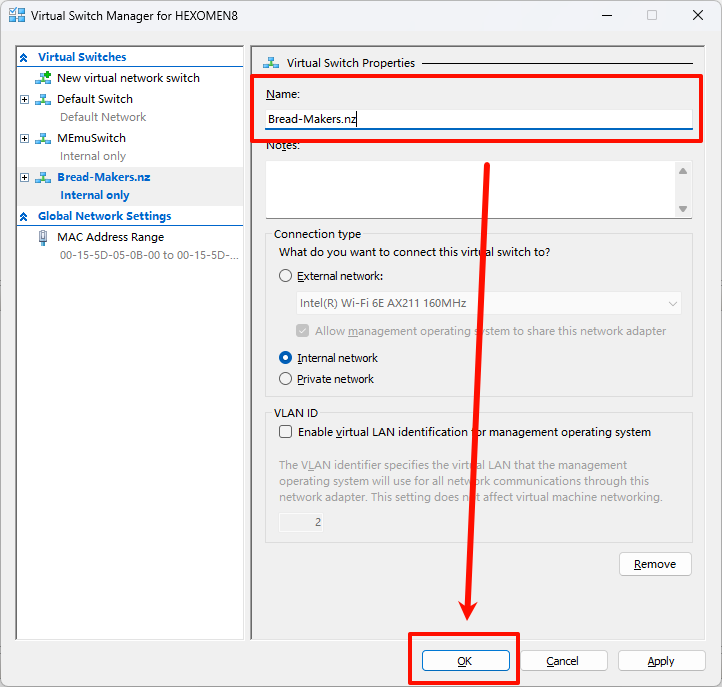
Explanation:
- The internal network type is suitable for communication between virtual machines but does not connect to the physical network.
- The switch name can be customized according to your needs, but it is recommended to use a meaningful name for easy identification.
4. Create Virtual Machines
Next, we will create two Windows Server 2022 virtual machines (DC01 and DC02) and two Windows 10 virtual machines (PC01 and PC02). Here are the detailed steps:
Step 1: Create the first virtual machine (DC01)
-
Click “New” -> “Virtual Machine”
In Hyper-V Manager, click “New” on the left side, then select “Virtual Machine”.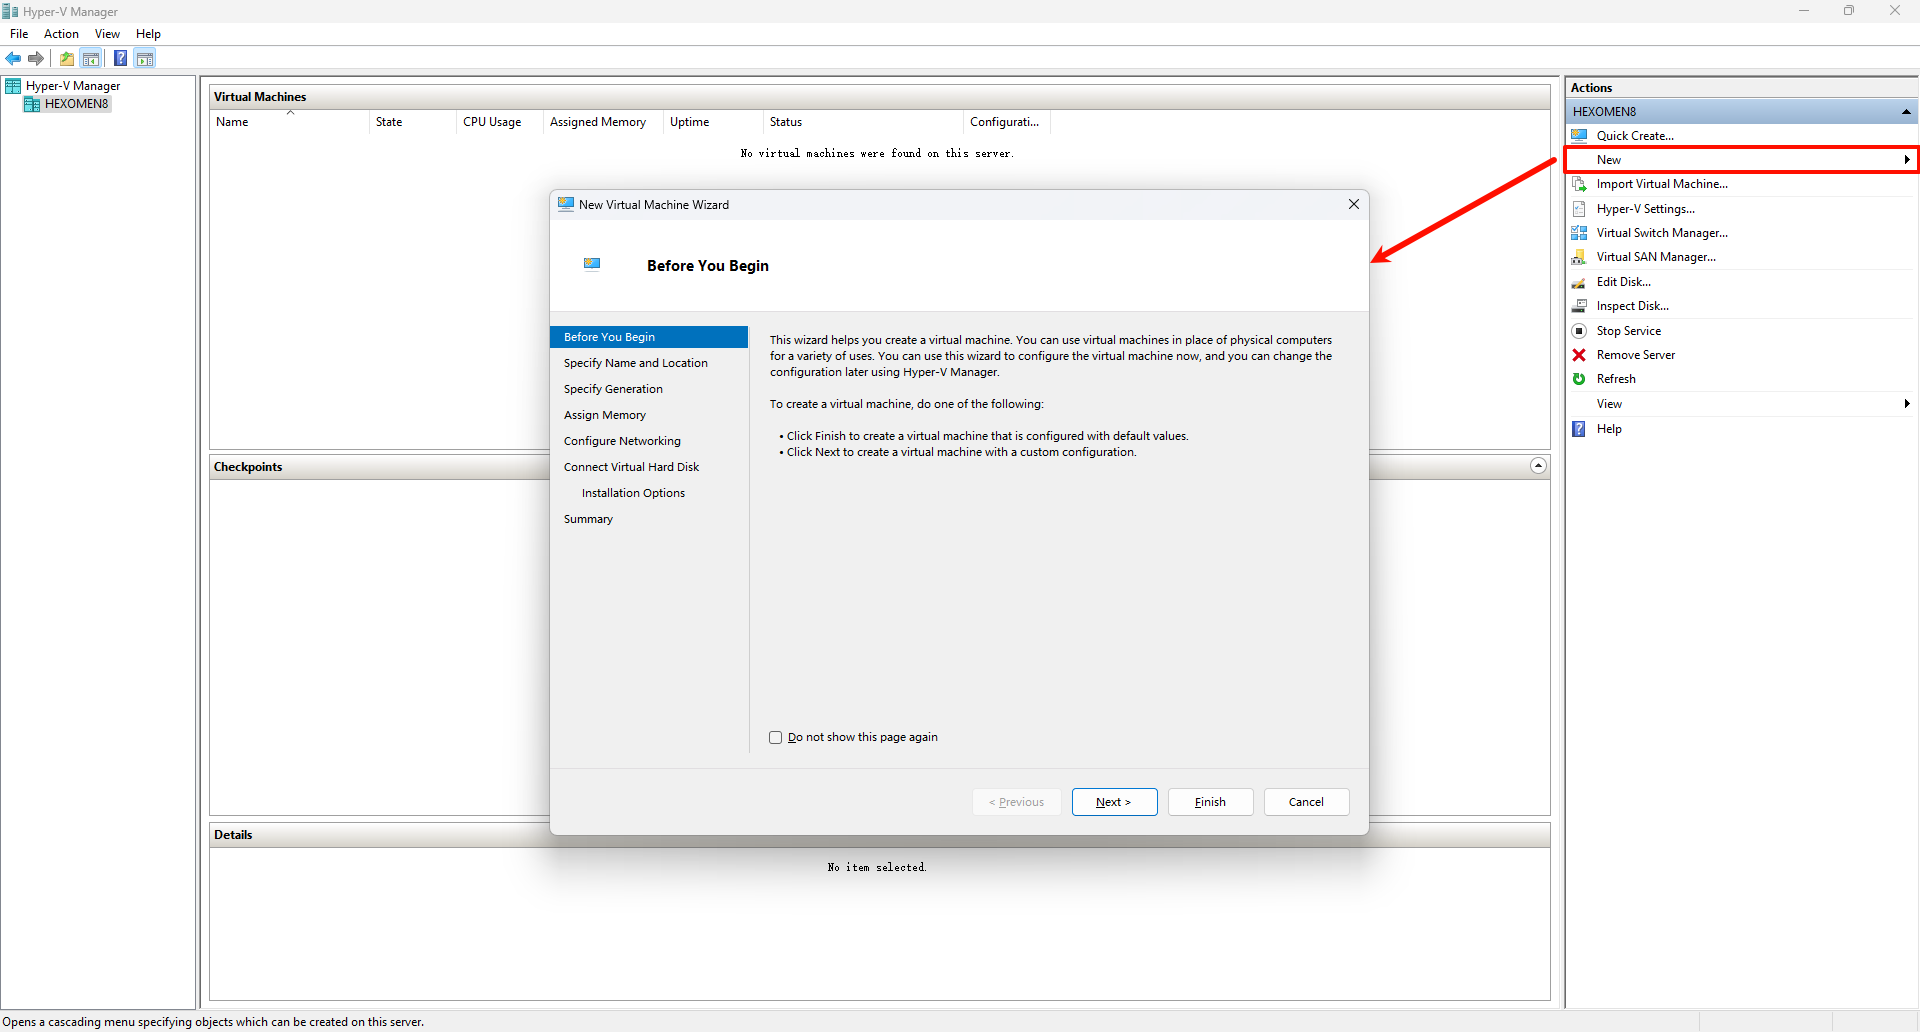
-
Set the virtual machine name and storage location
Enter a name for the virtual machine (e.g.,DC01) and choose a location for storing the VM files.
-
Keep the default generation setting
Usually, keeping the default generation is fine.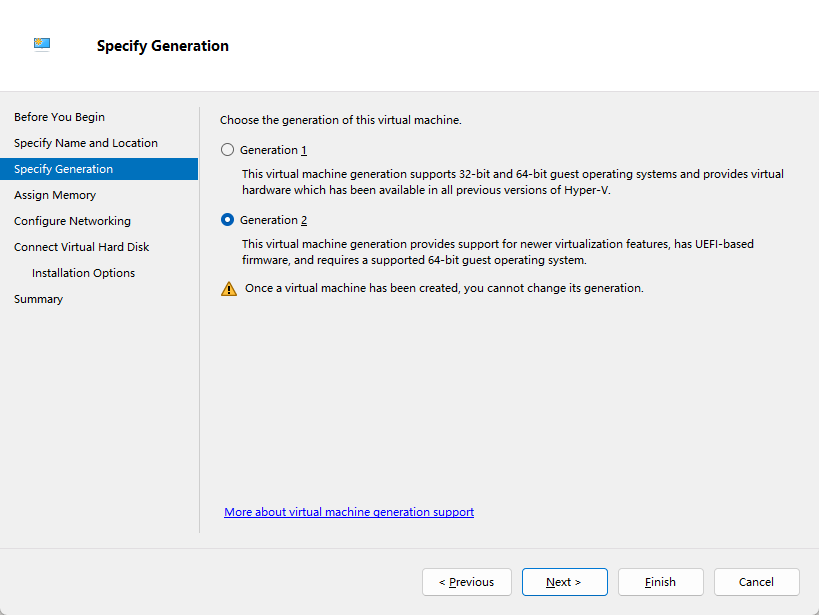
-
Set the virtual machine memory
The default memory settings are typically reasonable and can be adjusted based on actual needs.
-
Select network connection
Under the “Connection” option, select the previously created virtual switch (e.g.,Bread-Makers.nz).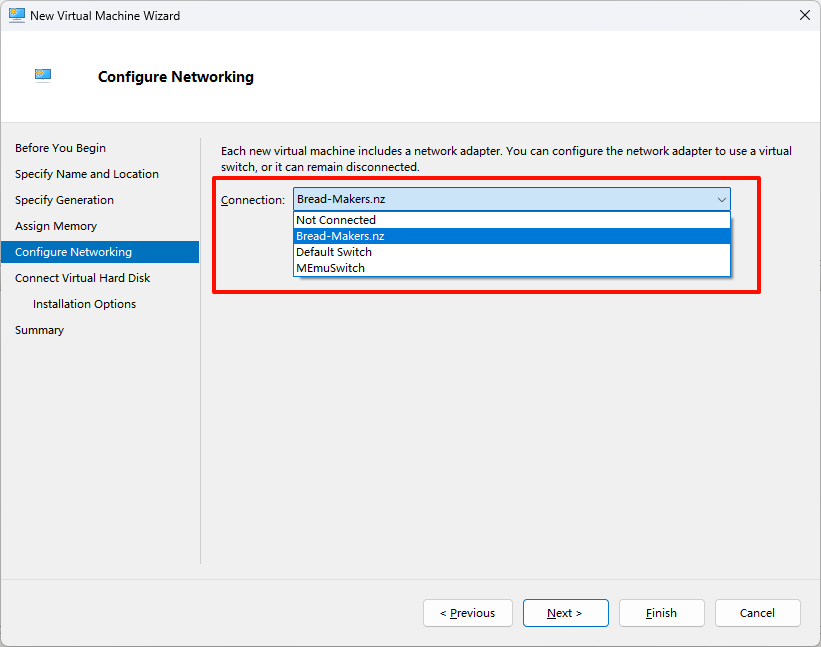
-
Set the virtual hard disk size
It is recommended to allocate 40GB of disk space for the virtual machine (30–40GB is sufficient; adjust based on requirements).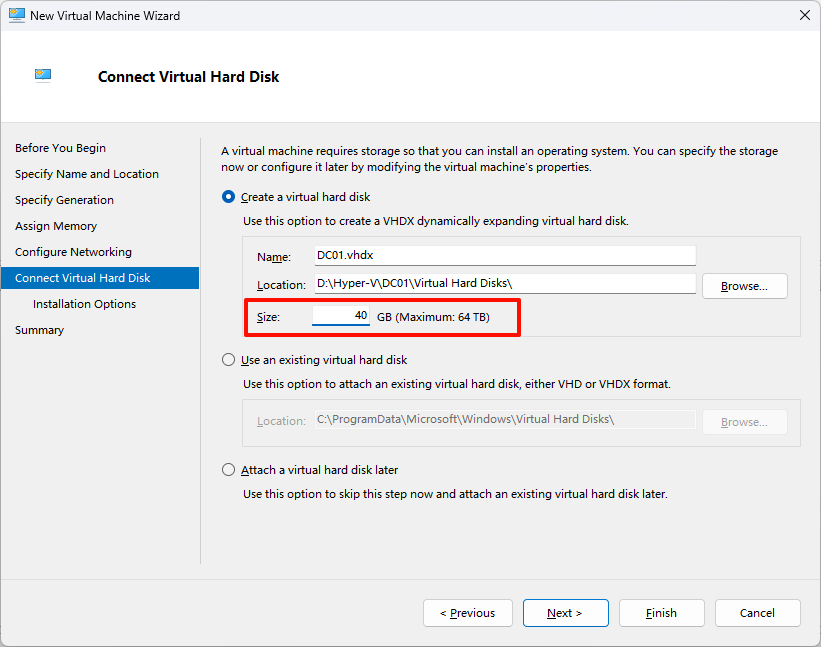
-
Select the ISO image file
Under the “Installation options”, select the previously downloaded Windows Server 2022 ISO file.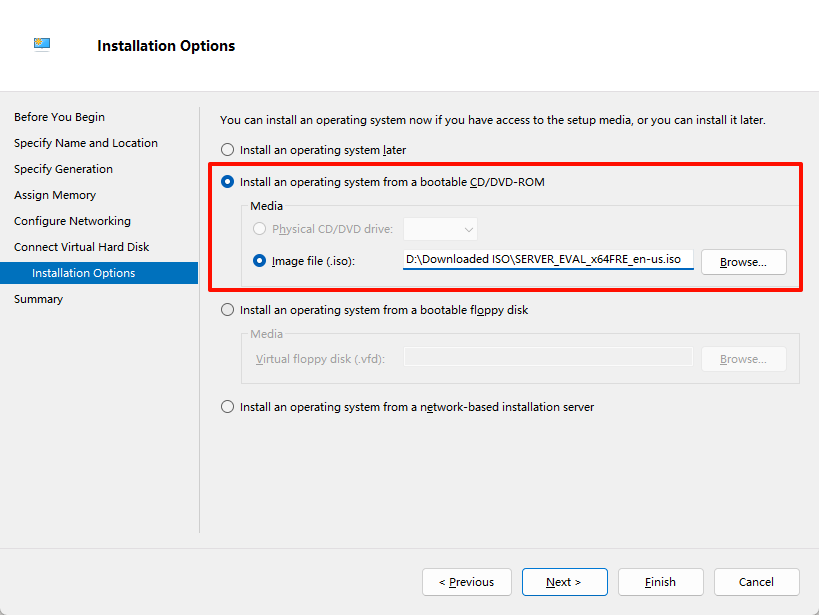
-
Complete the virtual machine creation
Confirm everything is correct, then click “Finish”.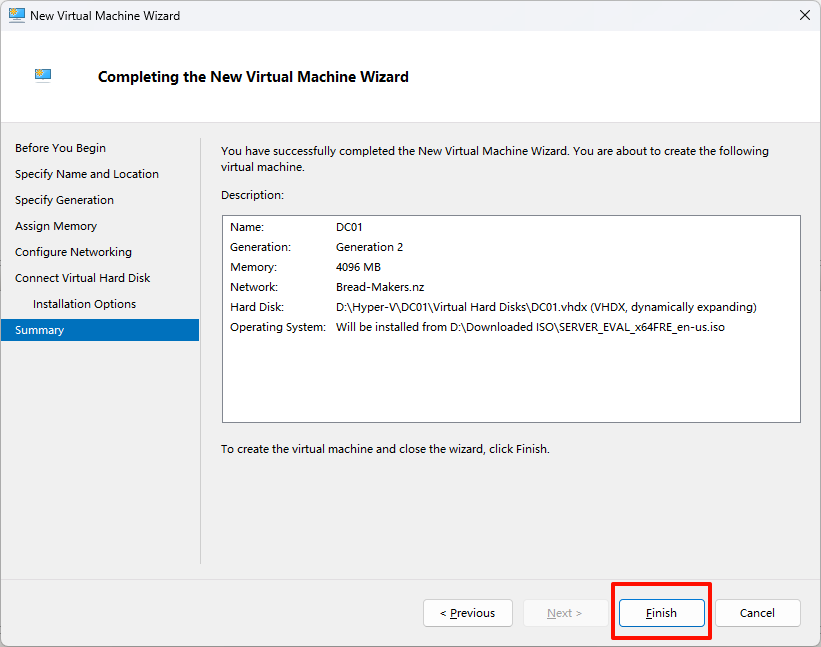
-
Repeat the steps to create additional virtual machines
Follow the same steps to create another Windows Server 2022 virtual machine (DC02) and two Windows 10 virtual machines (PC01 and PC02). If resources are limited, you may choose to create only one Windows 10 virtual machine.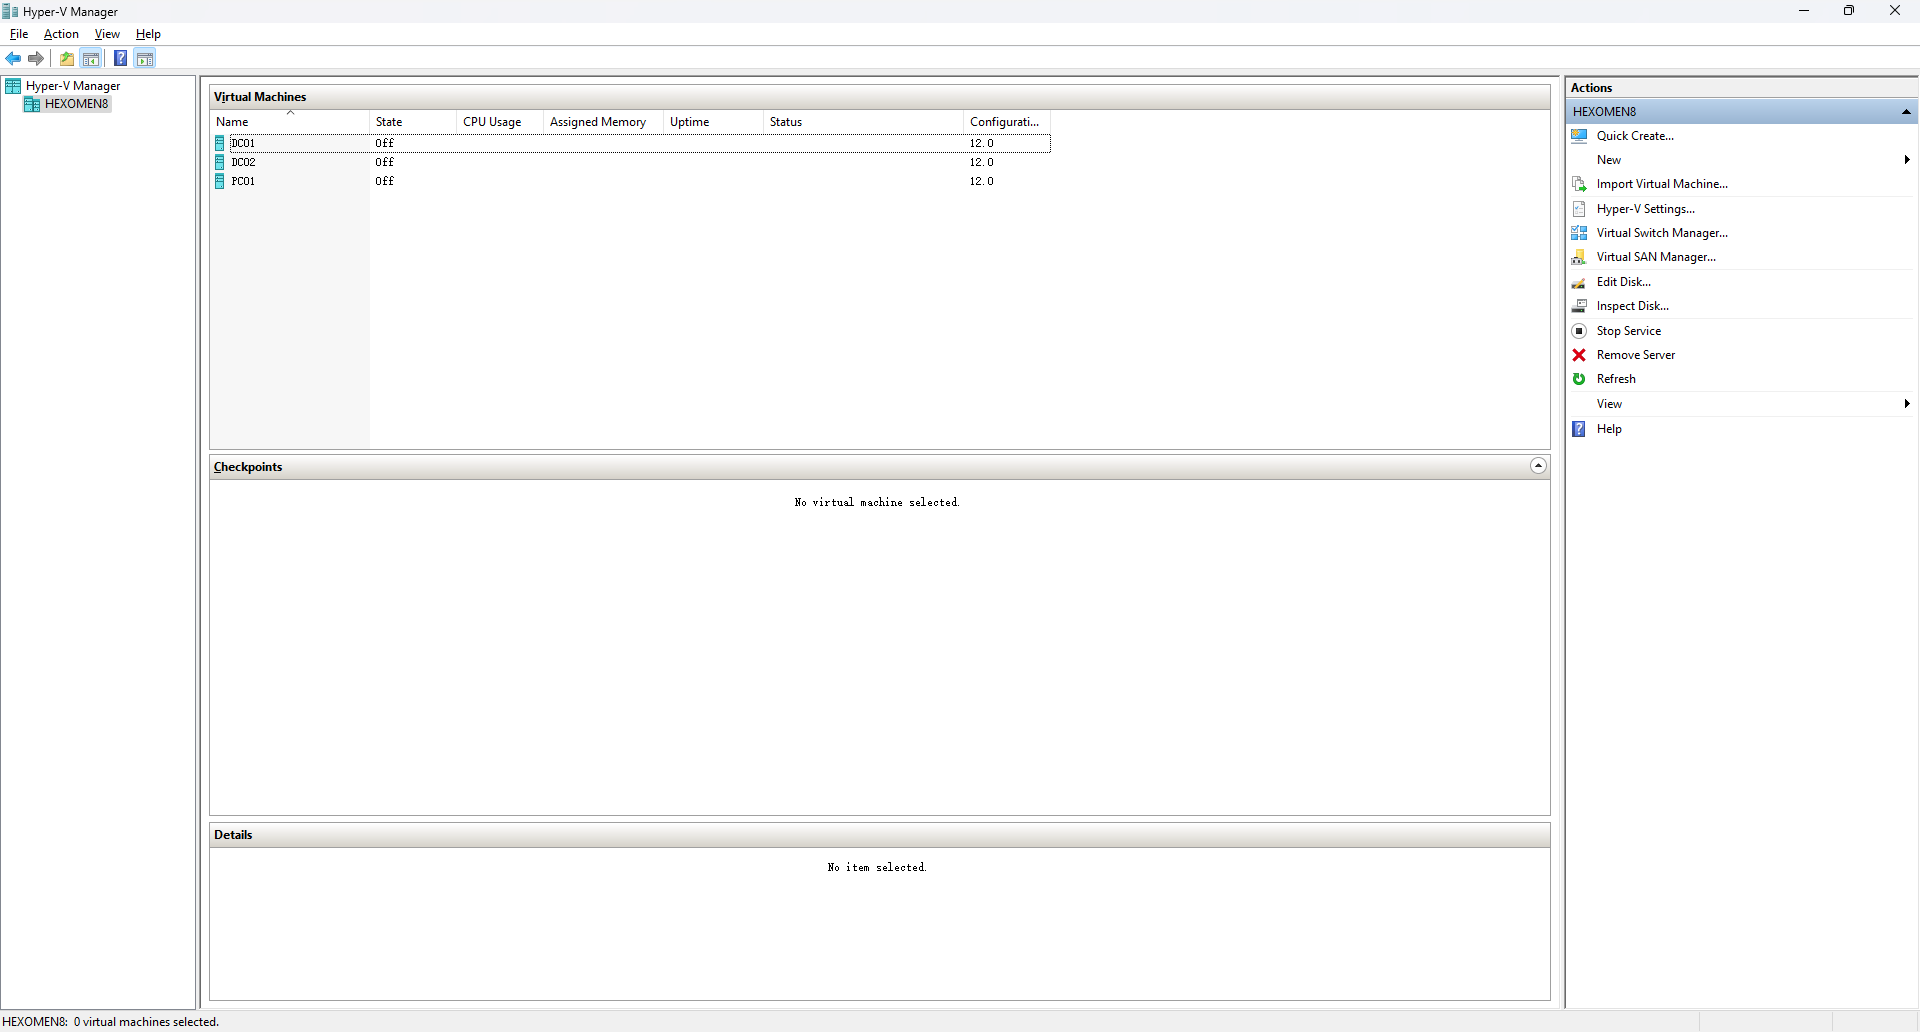
5. Install Operating Systems
5.1 Installing Windows Server 2022
Step 1: Start the virtual machine
-
Double-click DC01 and start the VM
On the first boot, press and hold theSpacebarto avoid error prompts.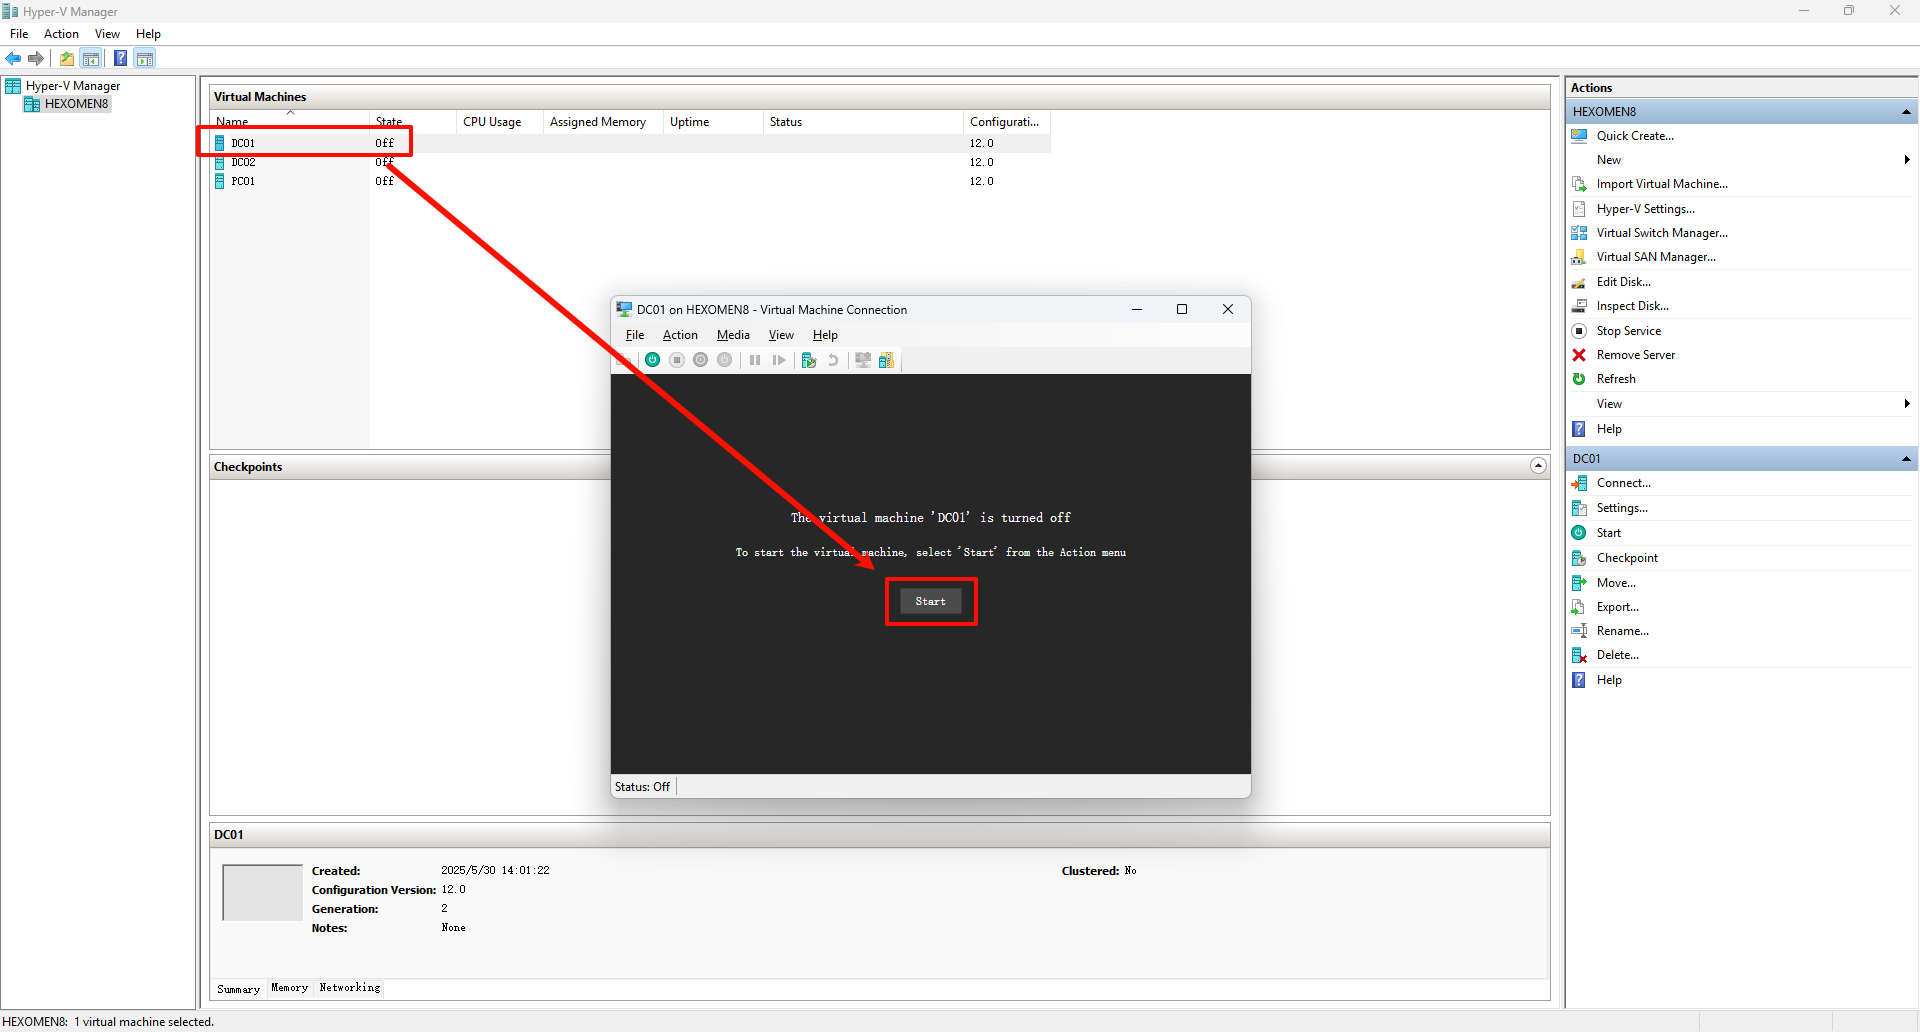
Common Issue: If you don’t press the
Spacebar, you might encounter the following error message: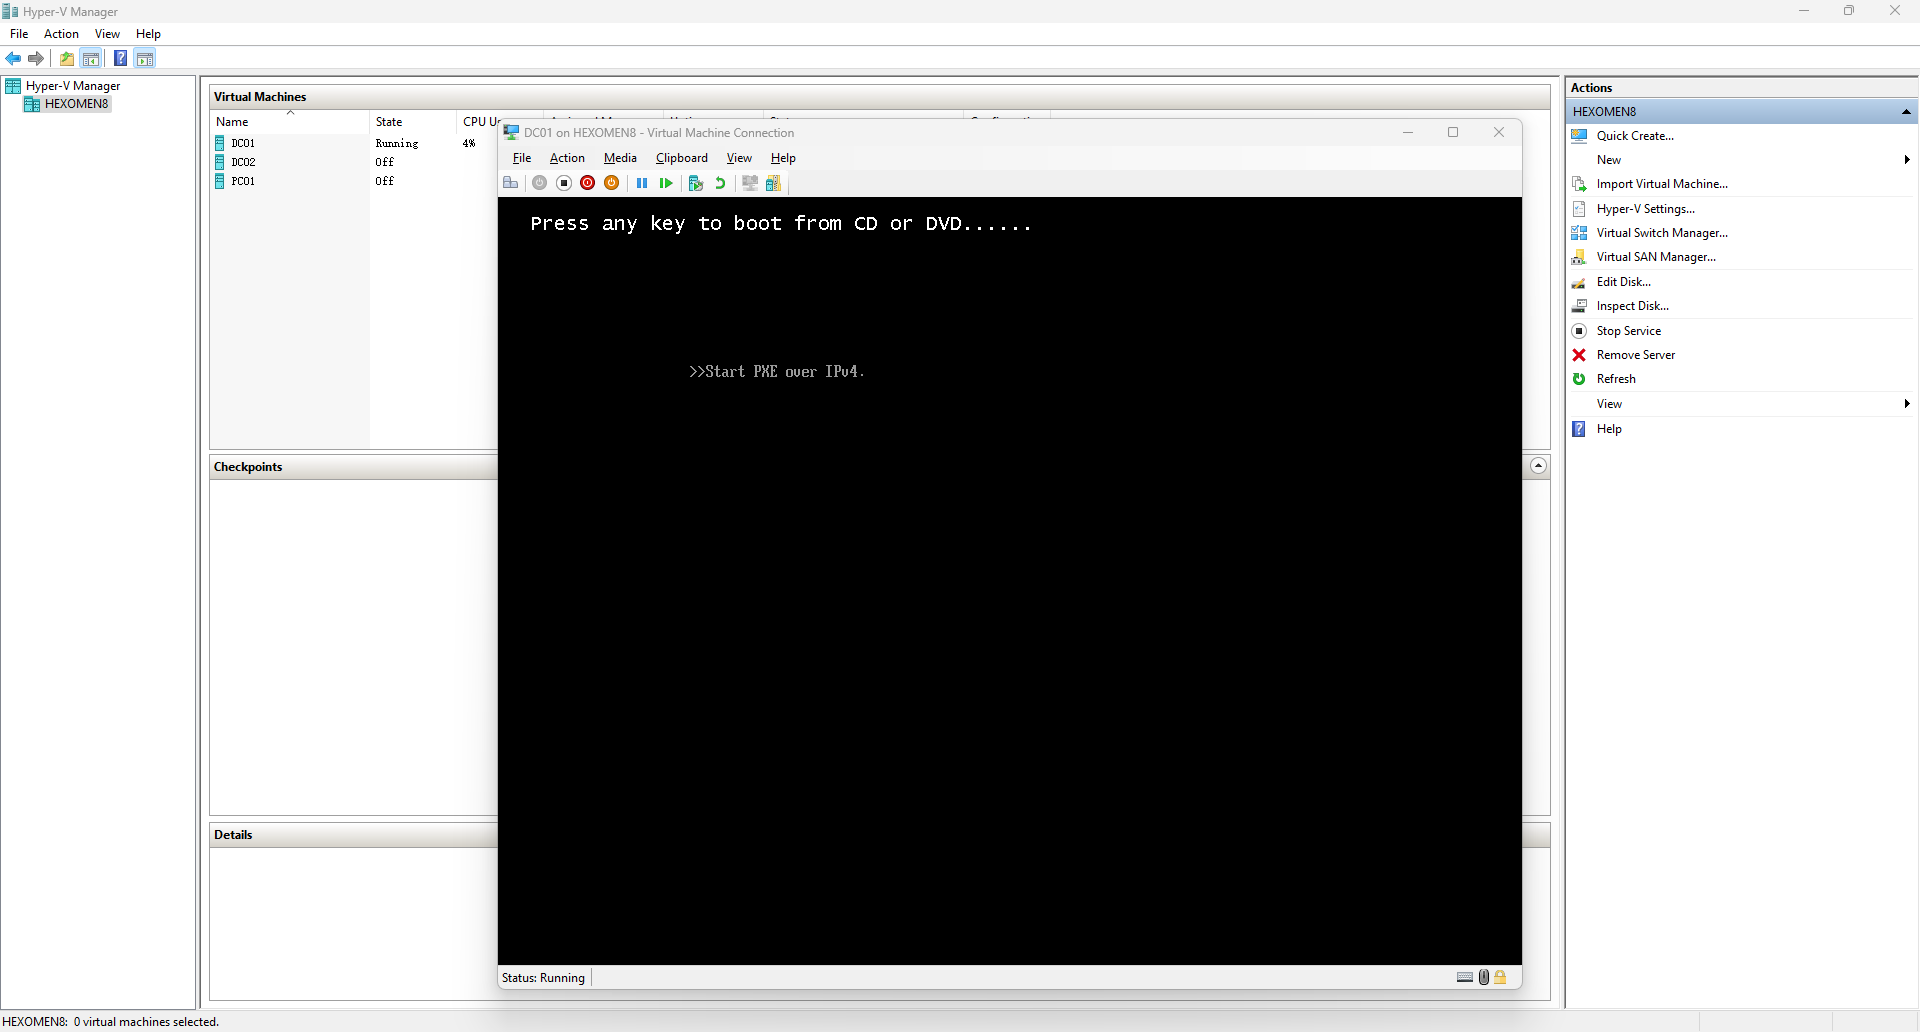
If this occurs, shut down the VM, restart it, and continue holding the
Spacebaruntil you reach the installation interface.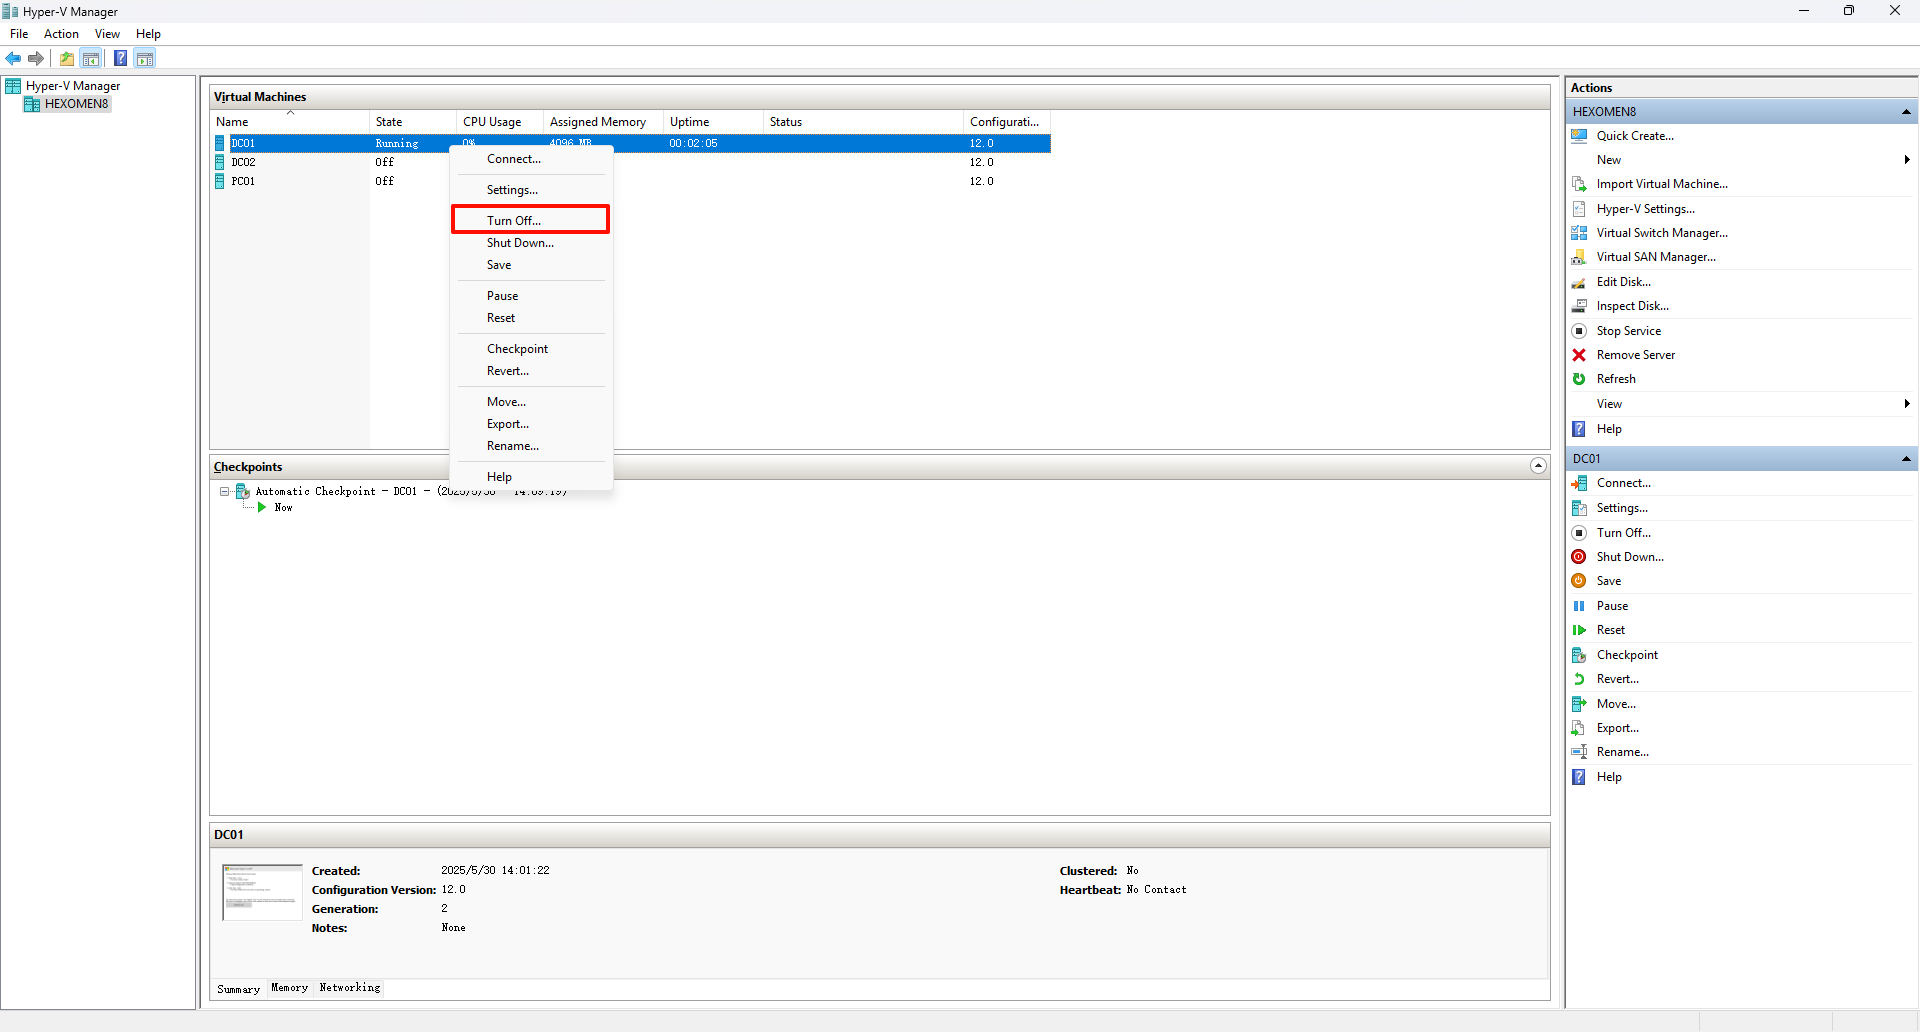
-
Enter the installation interface
Press theEnterkey to enter the Windows Server 2022 installation interface.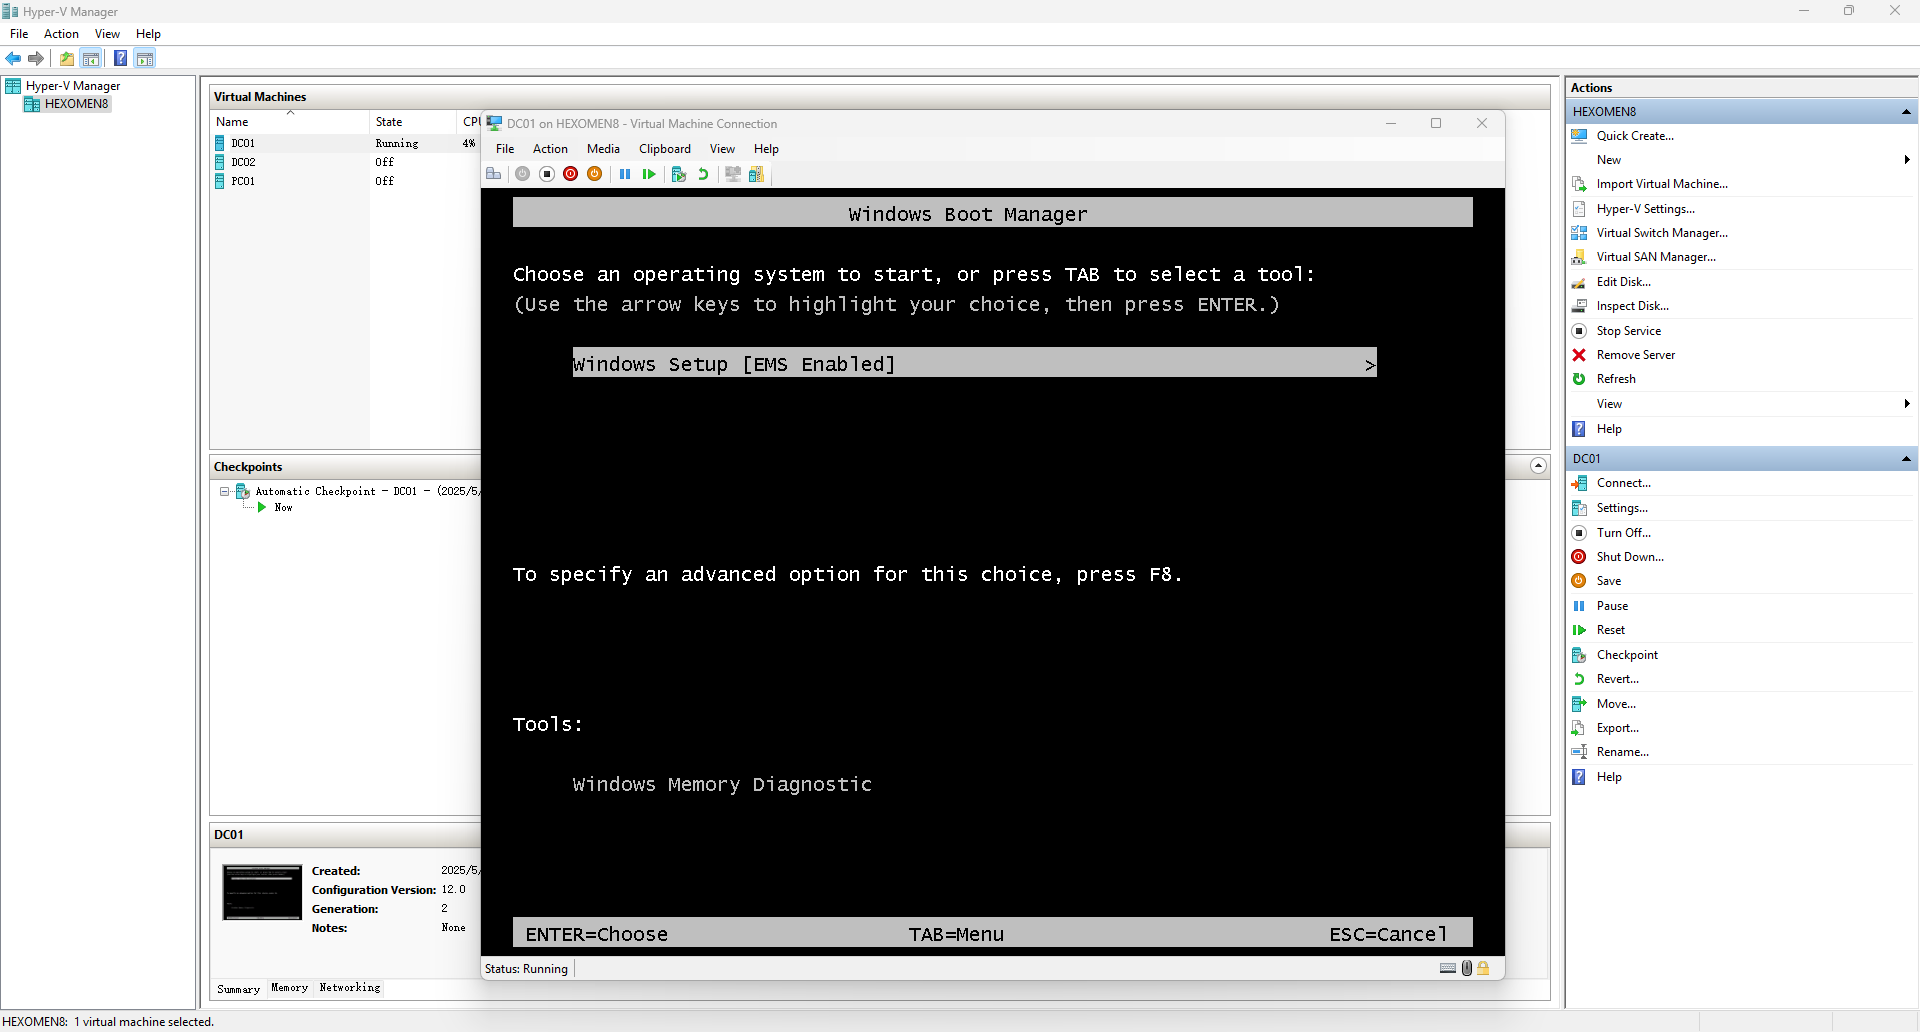
Step 2: Language and license agreement setup
-
Confirm language version and proceed
Select the appropriate language version, then click “Next”.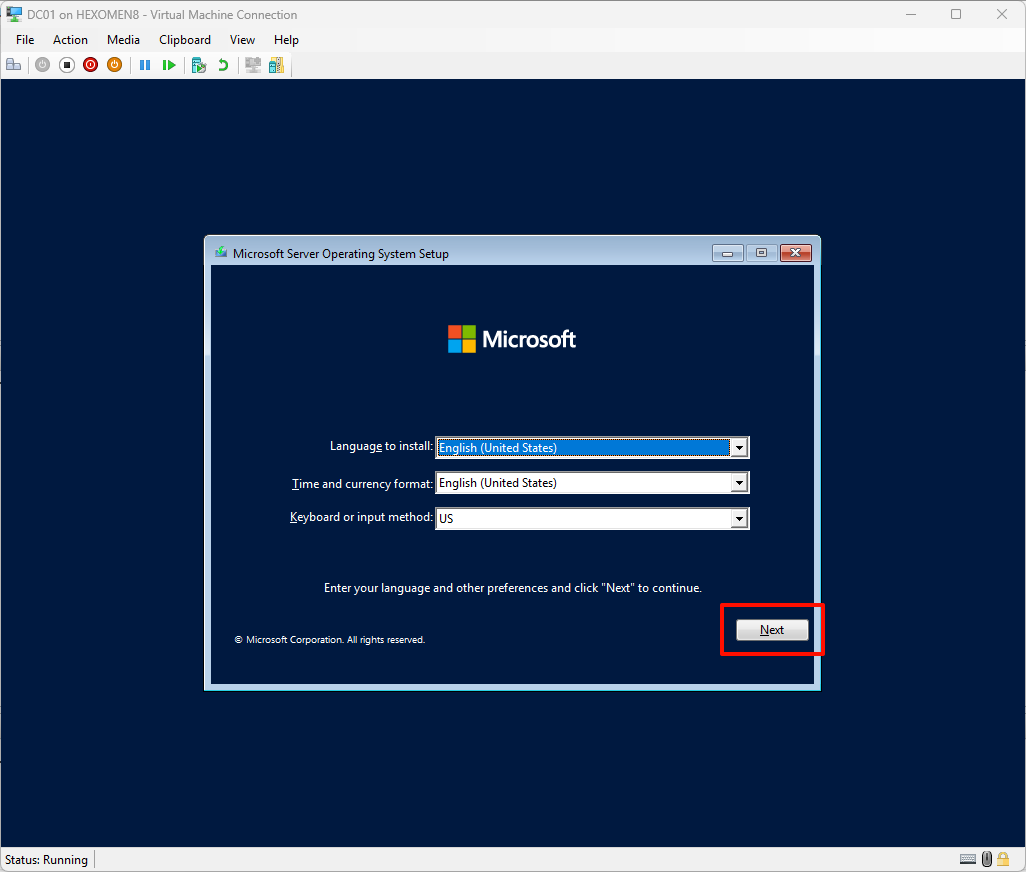
-
Click “Install Now”
Proceed to the installation mode selection screen.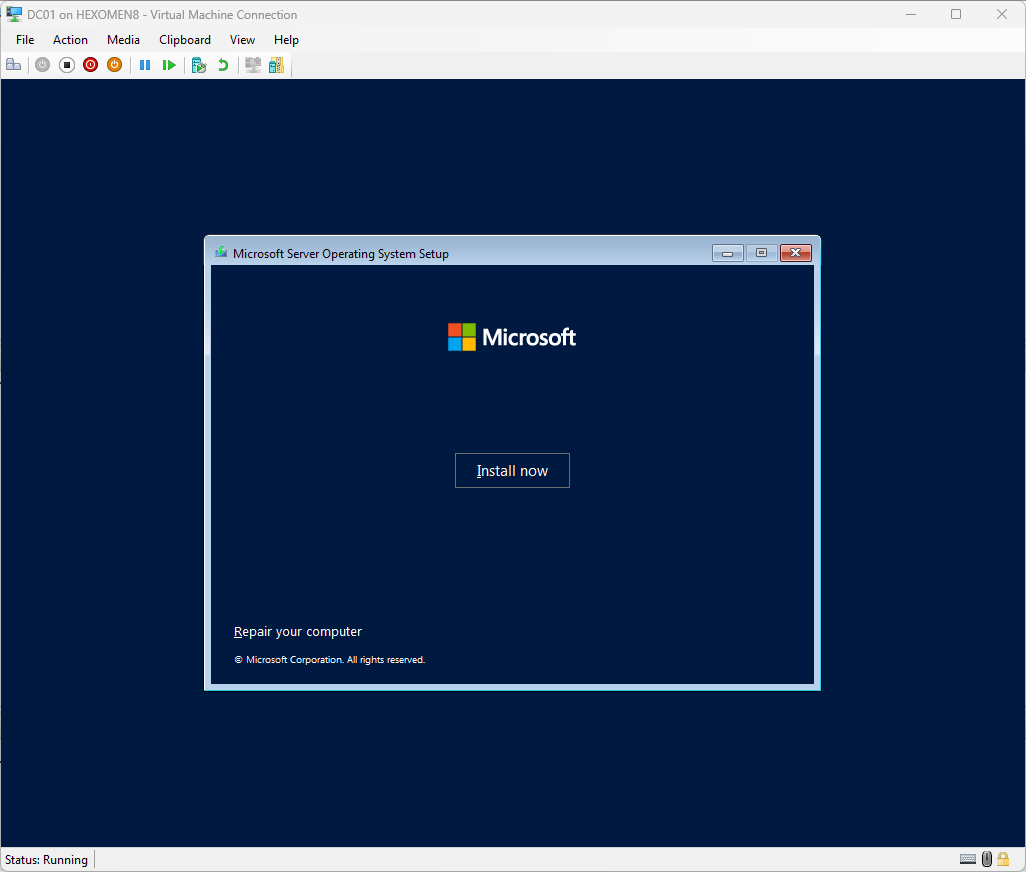
-
Select the graphical interface version
Choose the “Graphical Interface Version” for easier operations.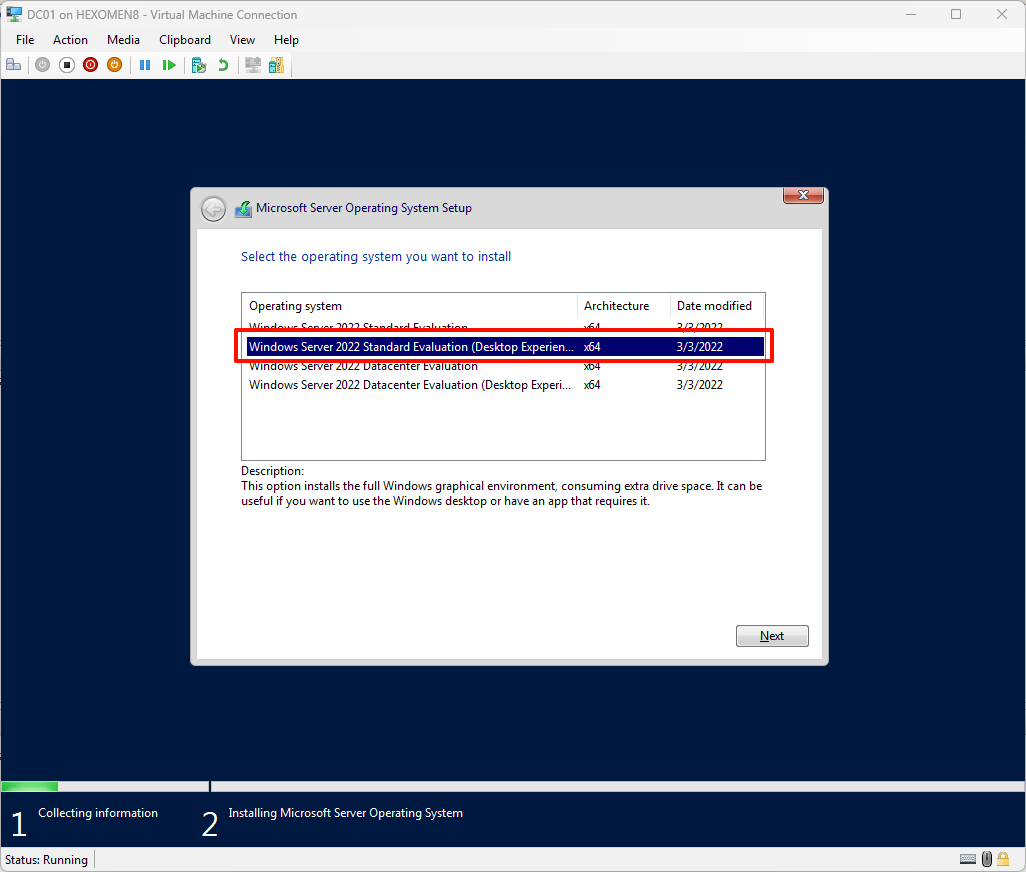
-
Accept the license agreement and proceed
Read and accept the license terms, then click “Next”.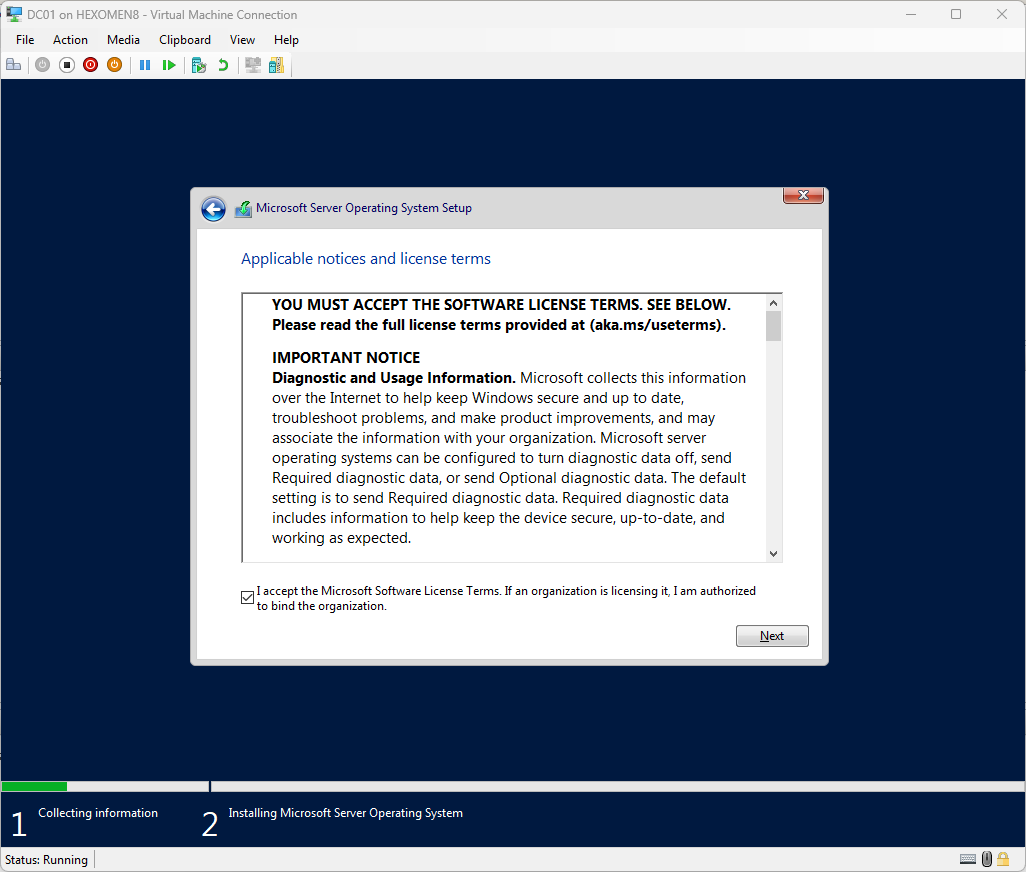
Step 3: Installation mode and disk selection
-
Select the installation mode
For testing purposes, choose the “Clean Install” mode.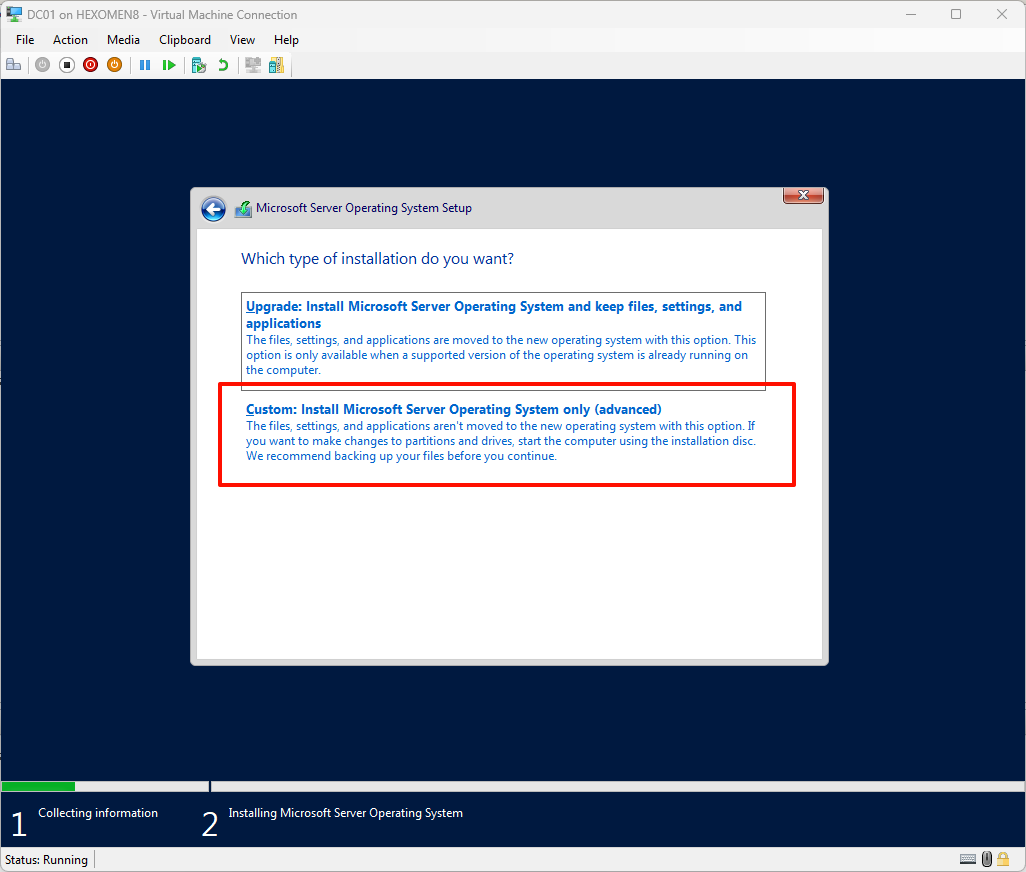
-
Choose the disk location for installation
Typically, the default partition settings are acceptable.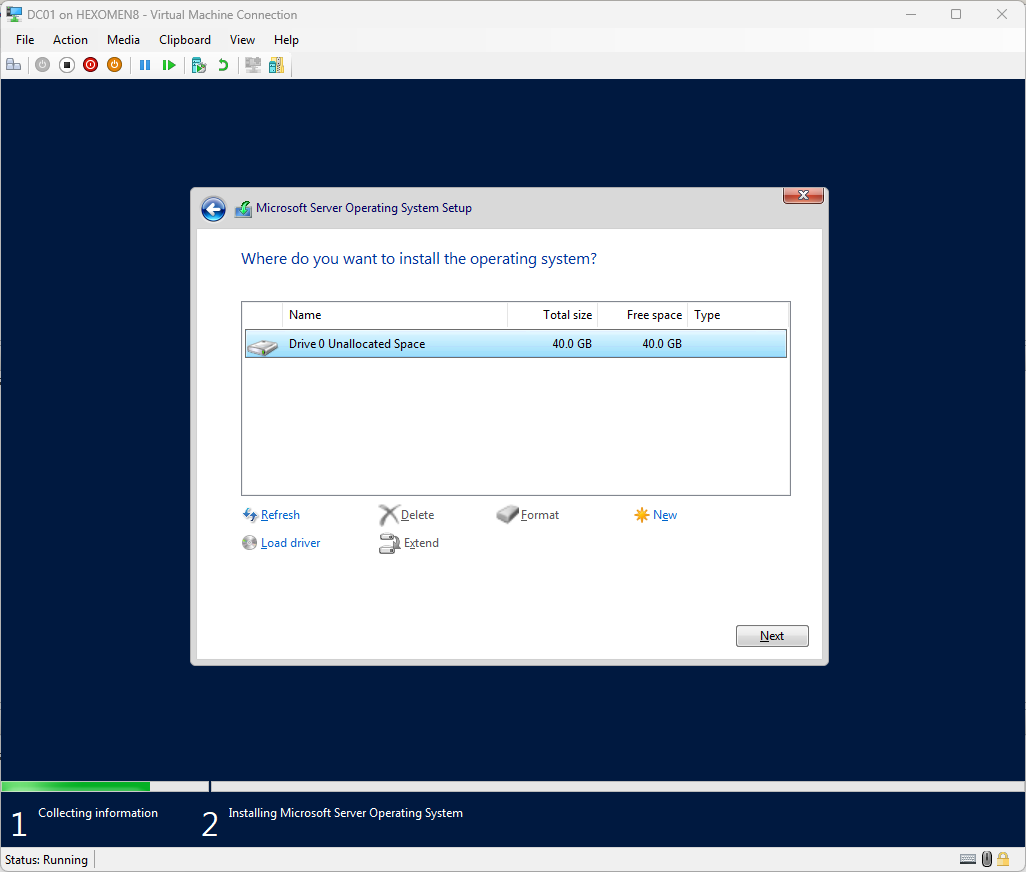
Step 4: Wait for installation to complete
-
Wait for the installation process to finish
This step may take several minutes—please be patient.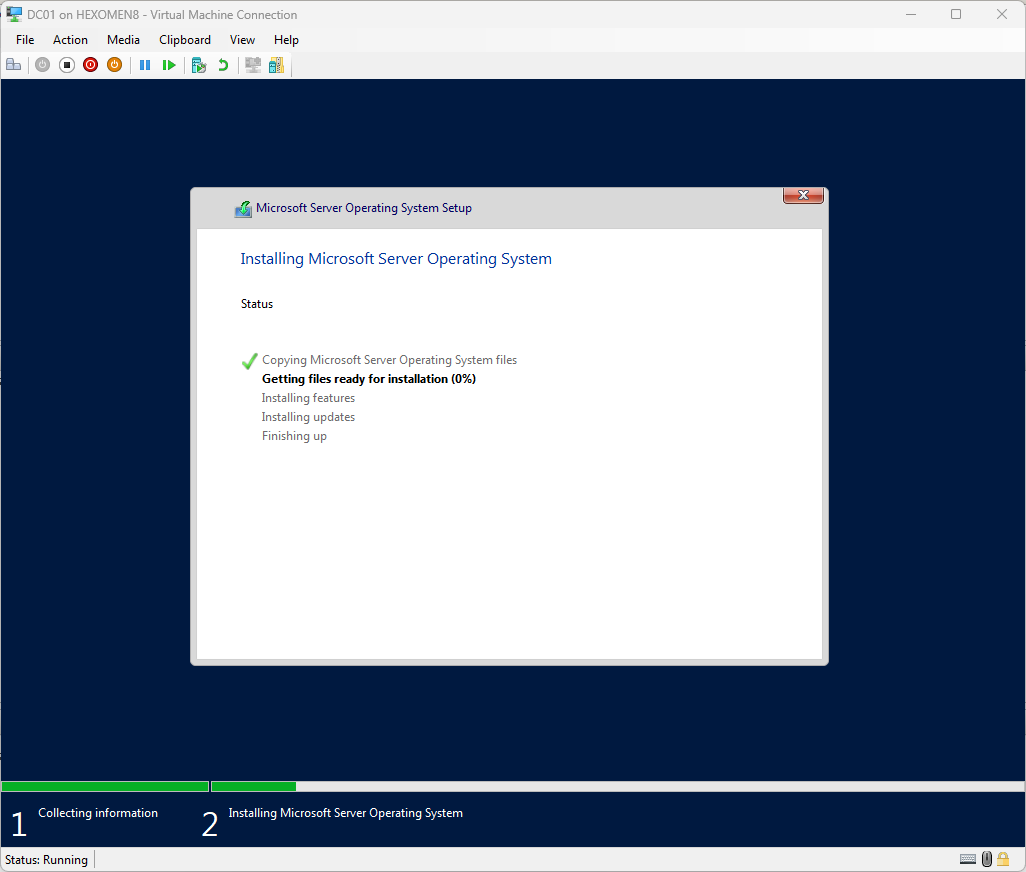
Step 5: Set the administrator account
-
Set a strong password for the administrator account
Make sure the password is secure and not too simple.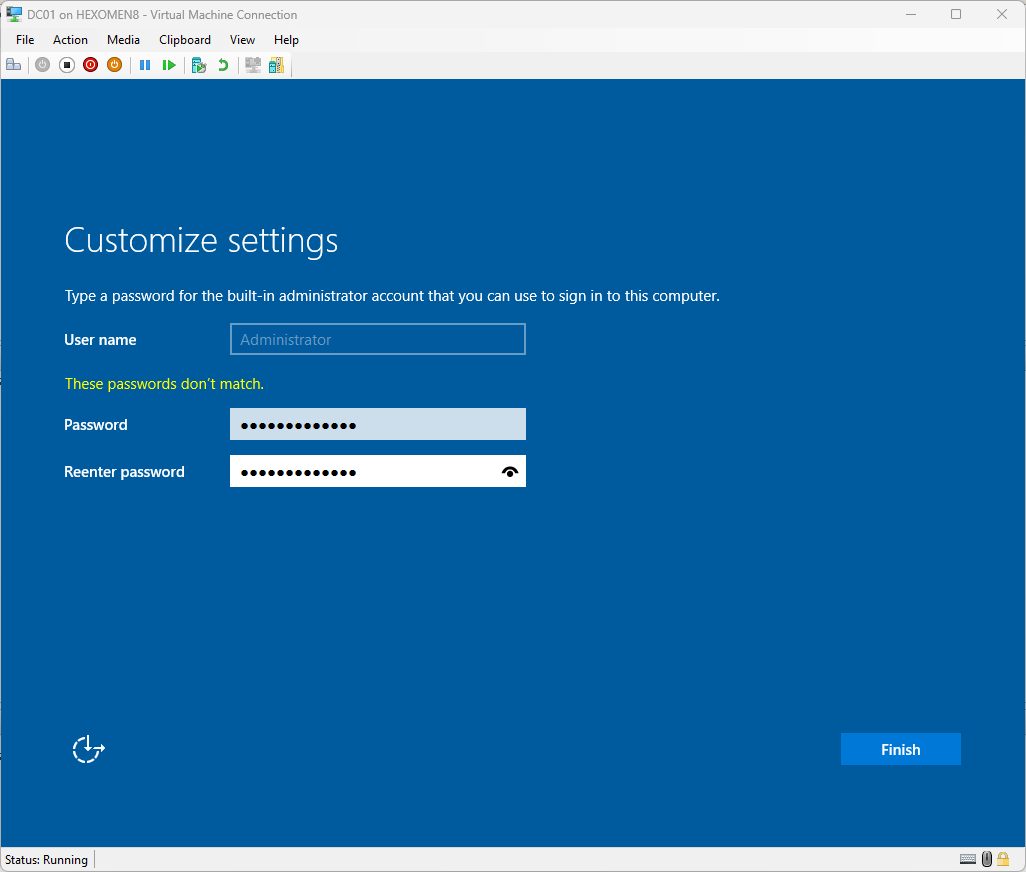
-
Log in to the system
Use the administrator account you just set up to log in.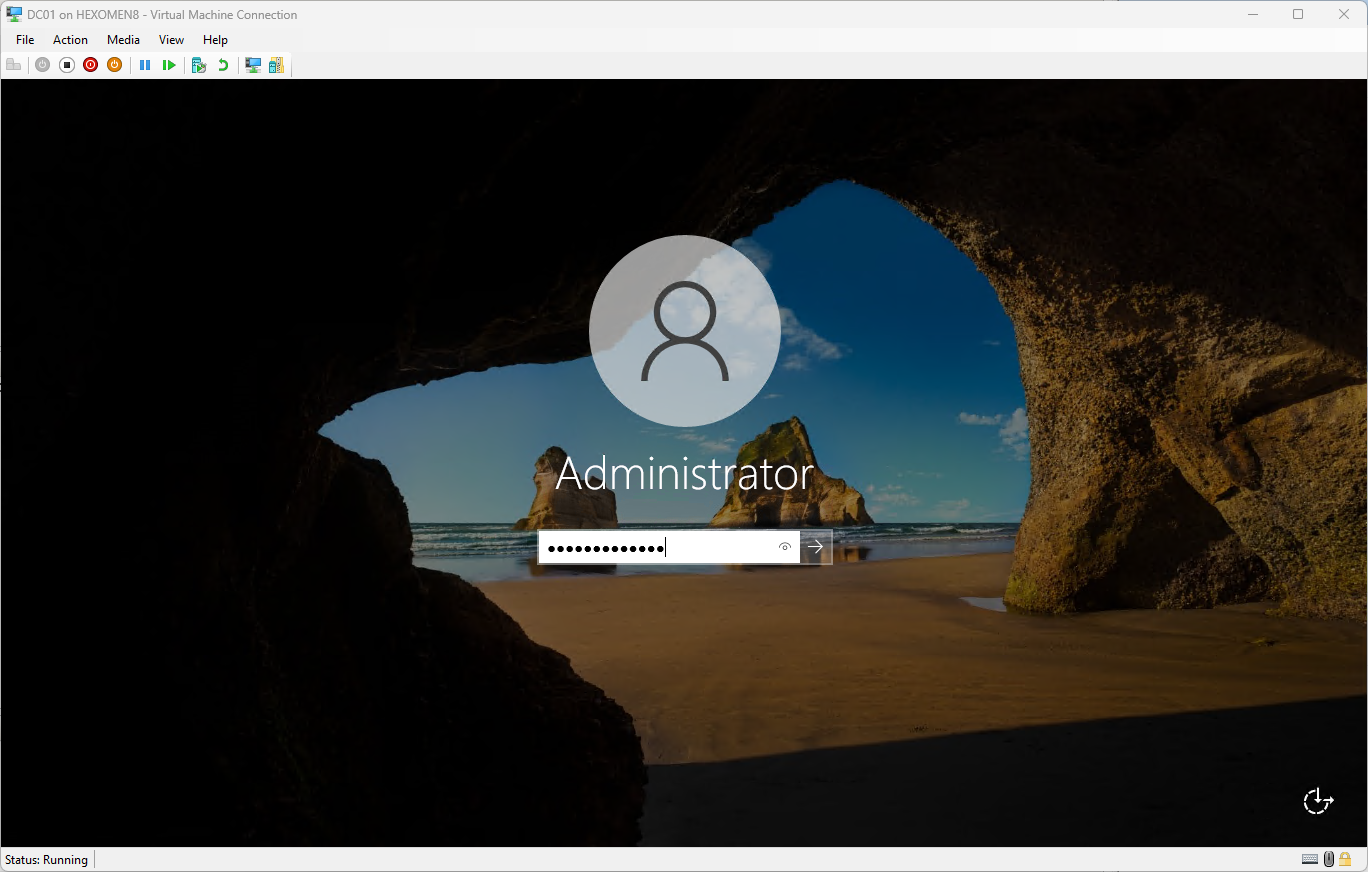
Step 6: Change the computer name
-
Change the computer name
Open “Server Manager” -> “Local Server”, click on “Computer Name”, change the name toDC01orDC02, and click “OK”. You will be prompted to restart—click “Restart Now”.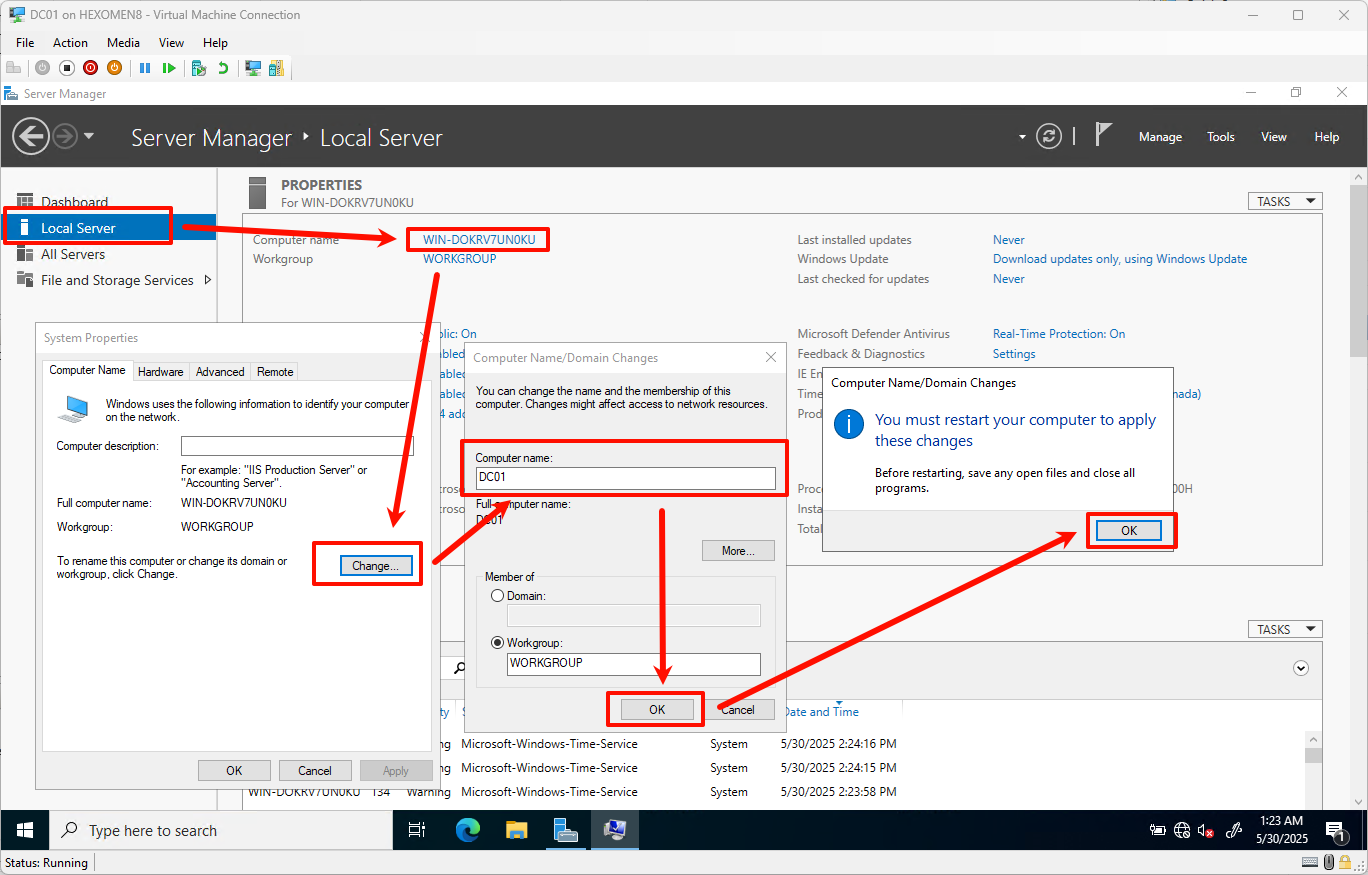
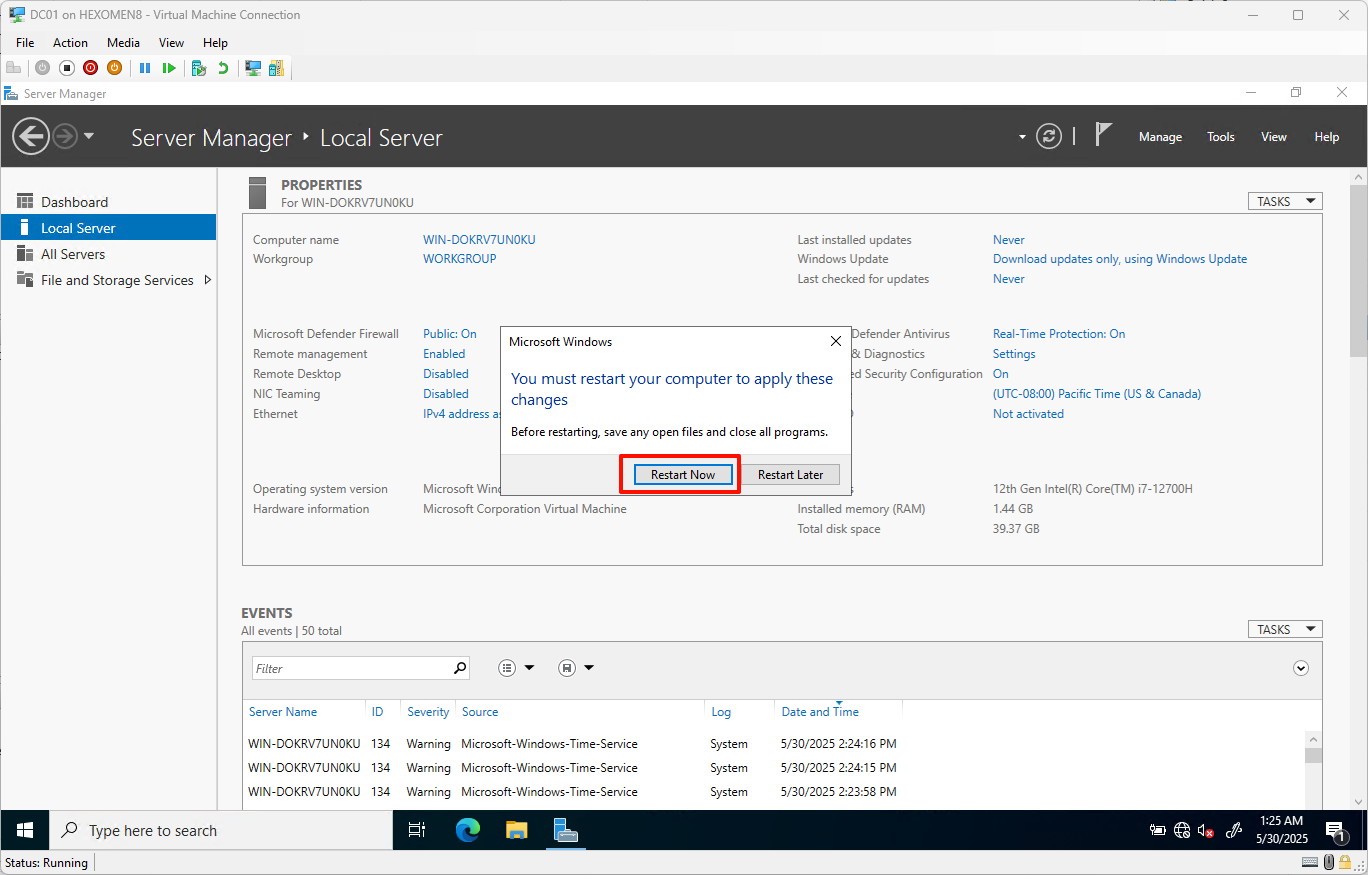
-
Re-login after the restart
After the restart, log back into the system and confirm that the computer name has been successfully changed.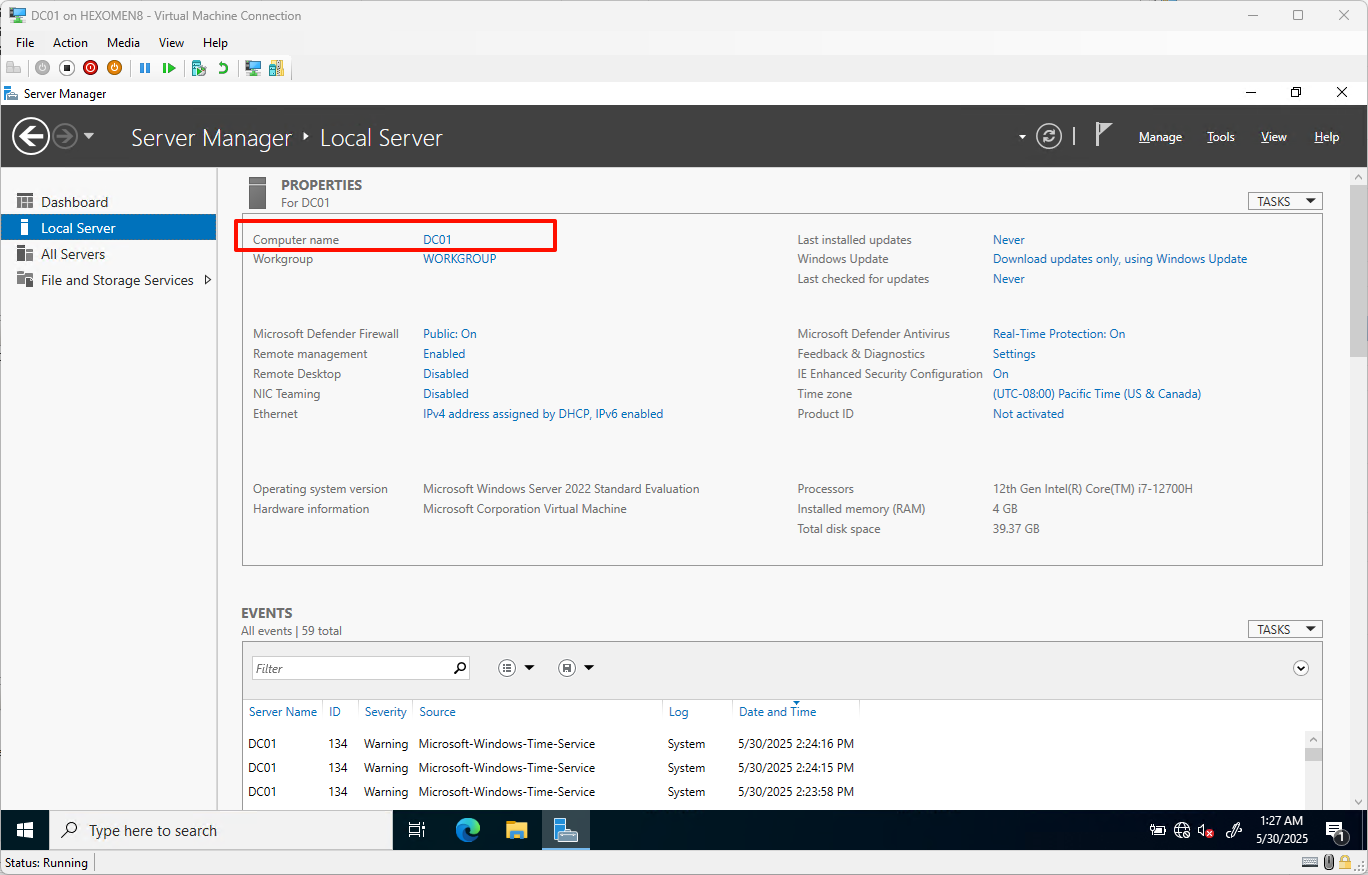
5.2 Installing Windows 10
Step 1: Start the virtual machine
-
Double-click PC01 and start the VM
Similarly, press and hold theSpacebarduring the first boot.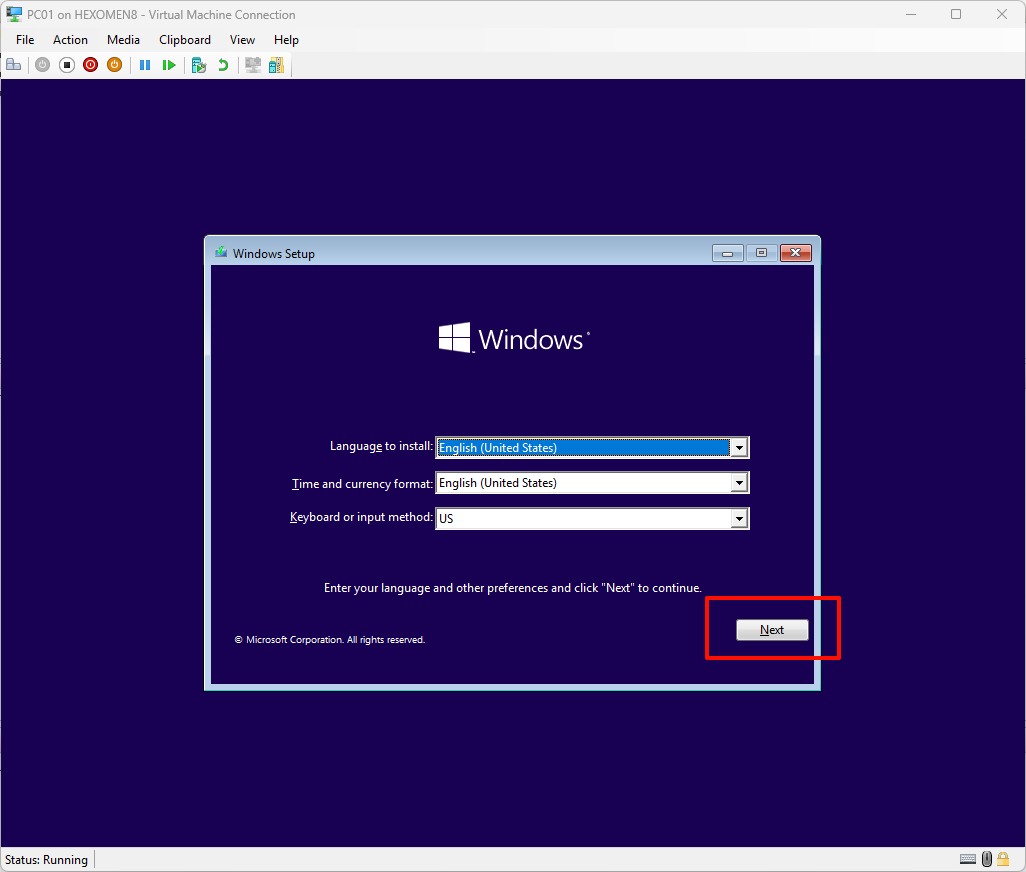
Step 2: Language and license agreement setup
-
Confirm language version and proceed
Select the appropriate language version, then click “Next”. -
Click “Install Now”
Proceed to the installation mode selection screen.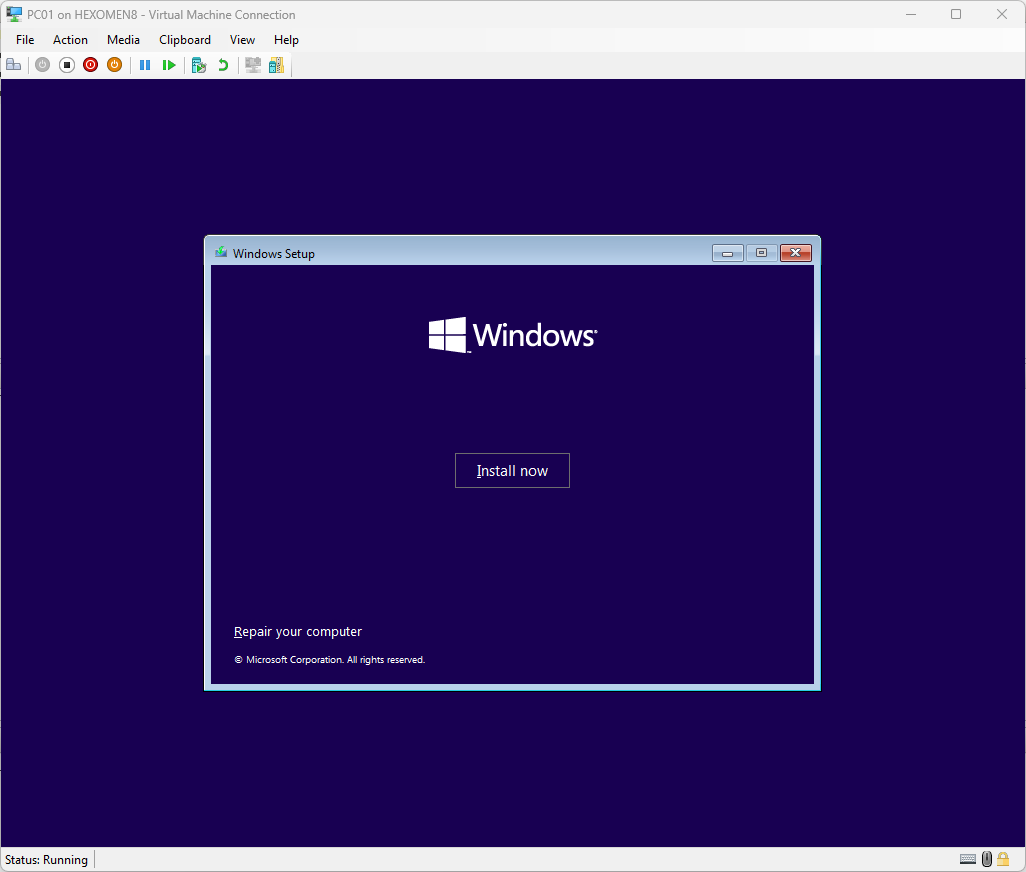
-
Click “I don’t have a product key”
Choose this option if you do not have a product key.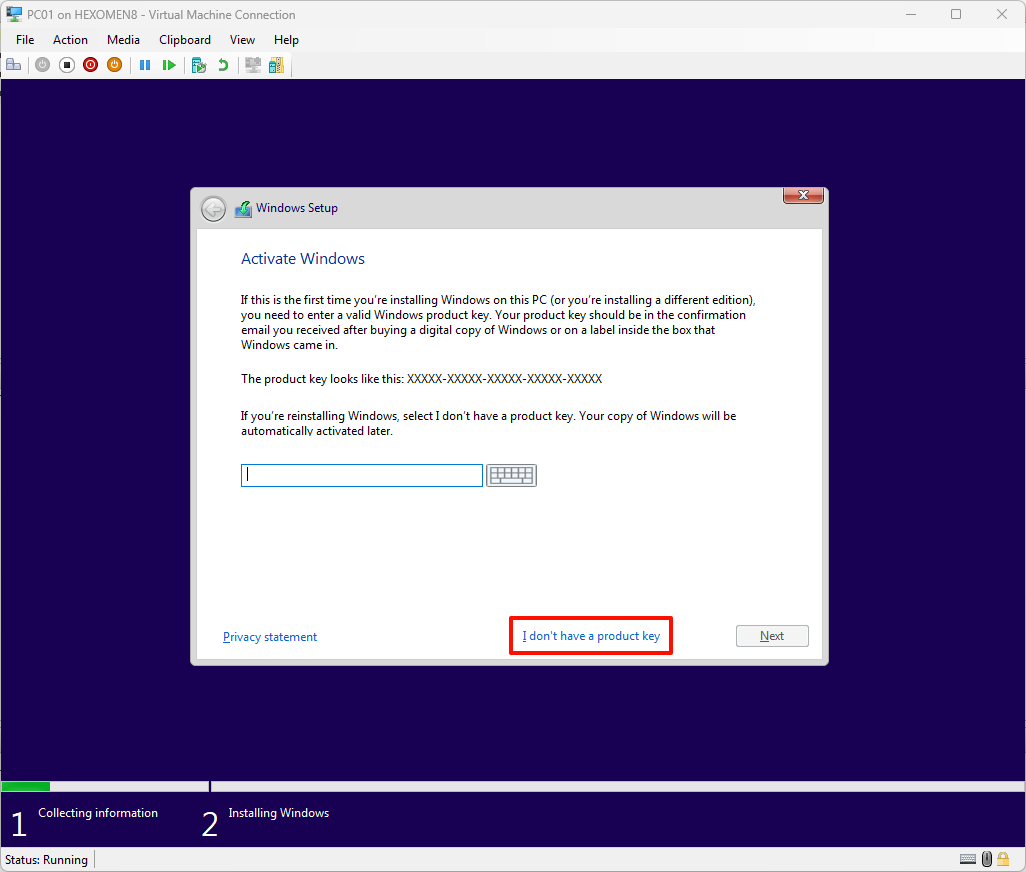
-
Select Windows 10 Pro
Choose the appropriate edition (e.g., Pro).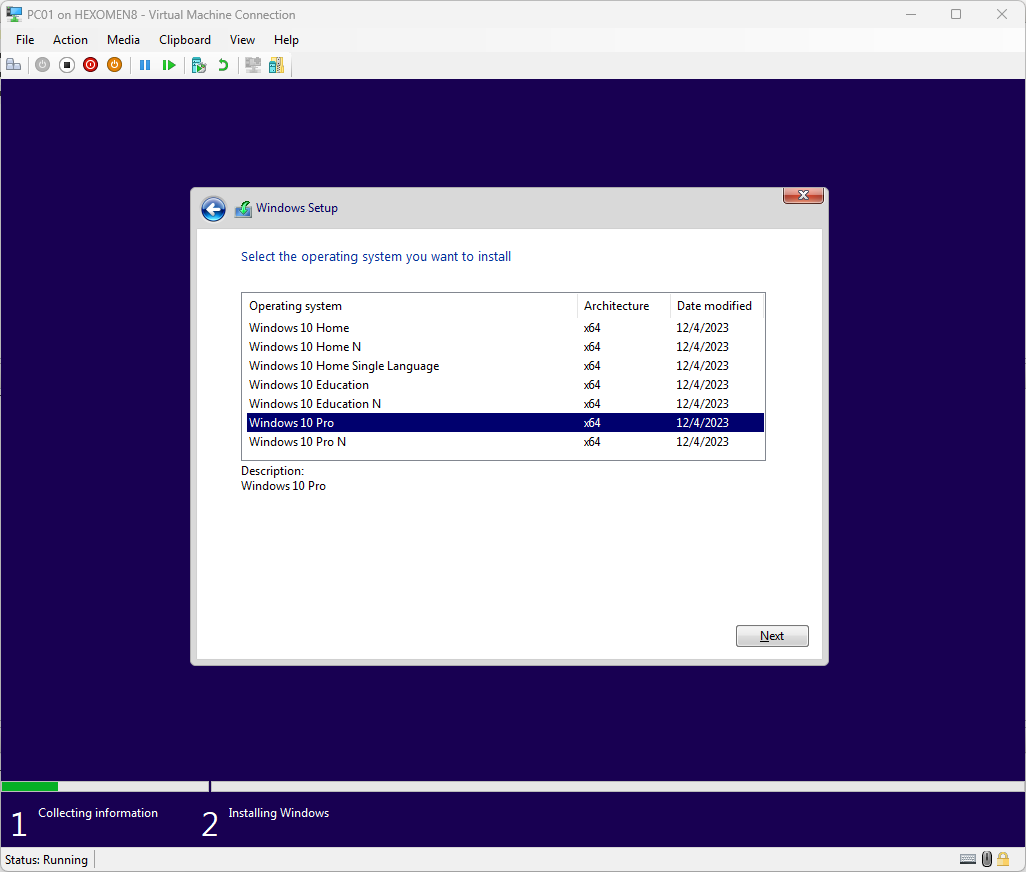
-
Accept the license agreement and proceed
Read and accept the license terms, then click “Next”.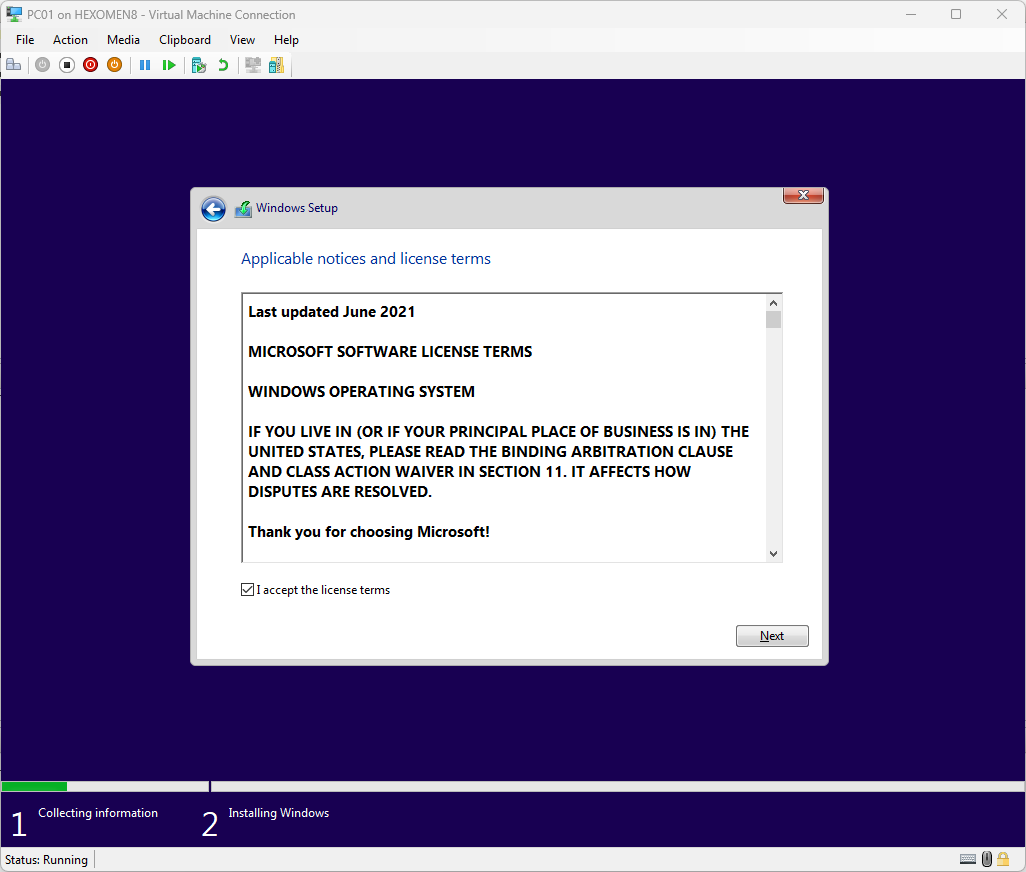
Step 3: Installation mode and disk selection
-
Select the installation mode
For testing purposes, choose the “Clean Install” mode.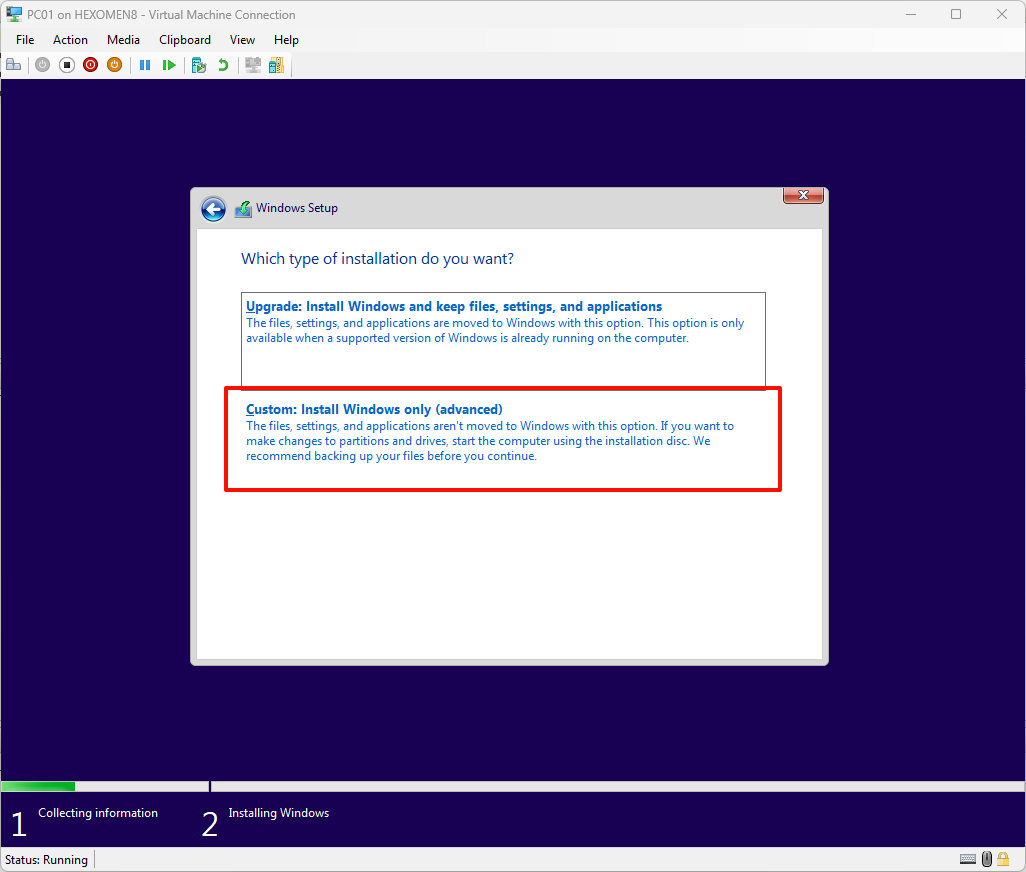
-
Choose the disk location for installation
Typically, the default partition settings are acceptable.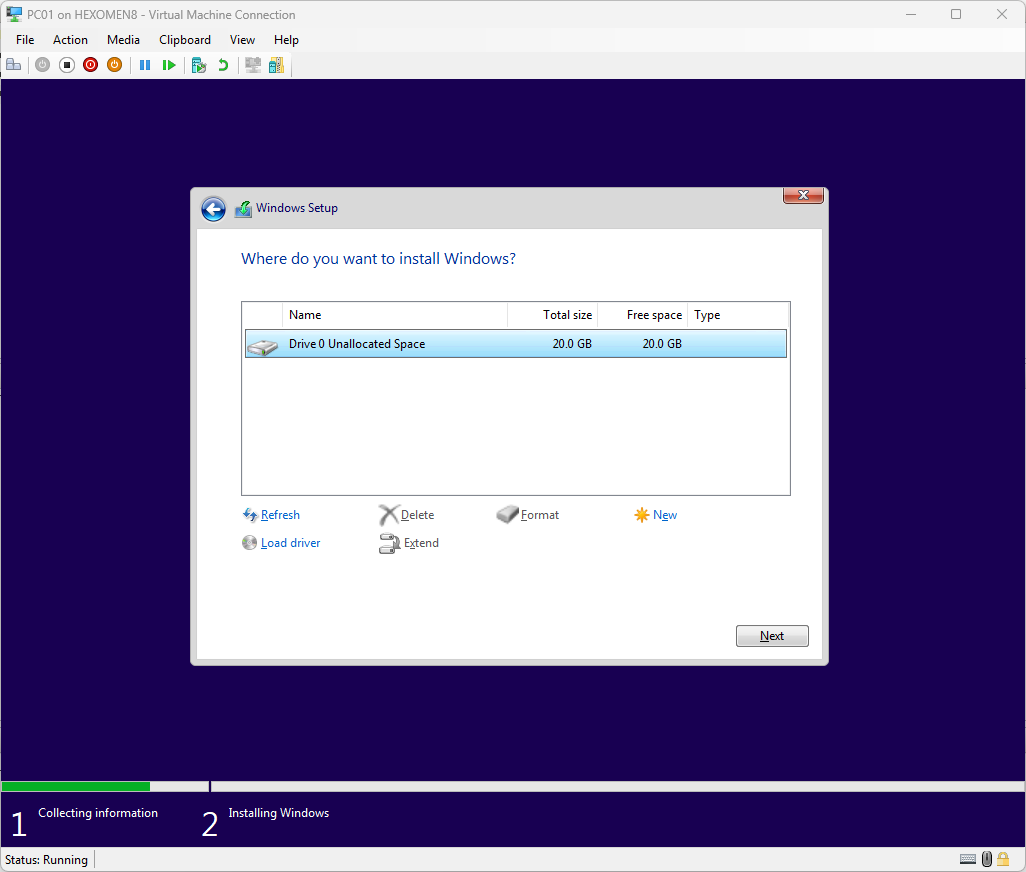
Step 4: Wait for installation to complete
-
Wait for the installation process to finish
This step may take several minutes—please be patient.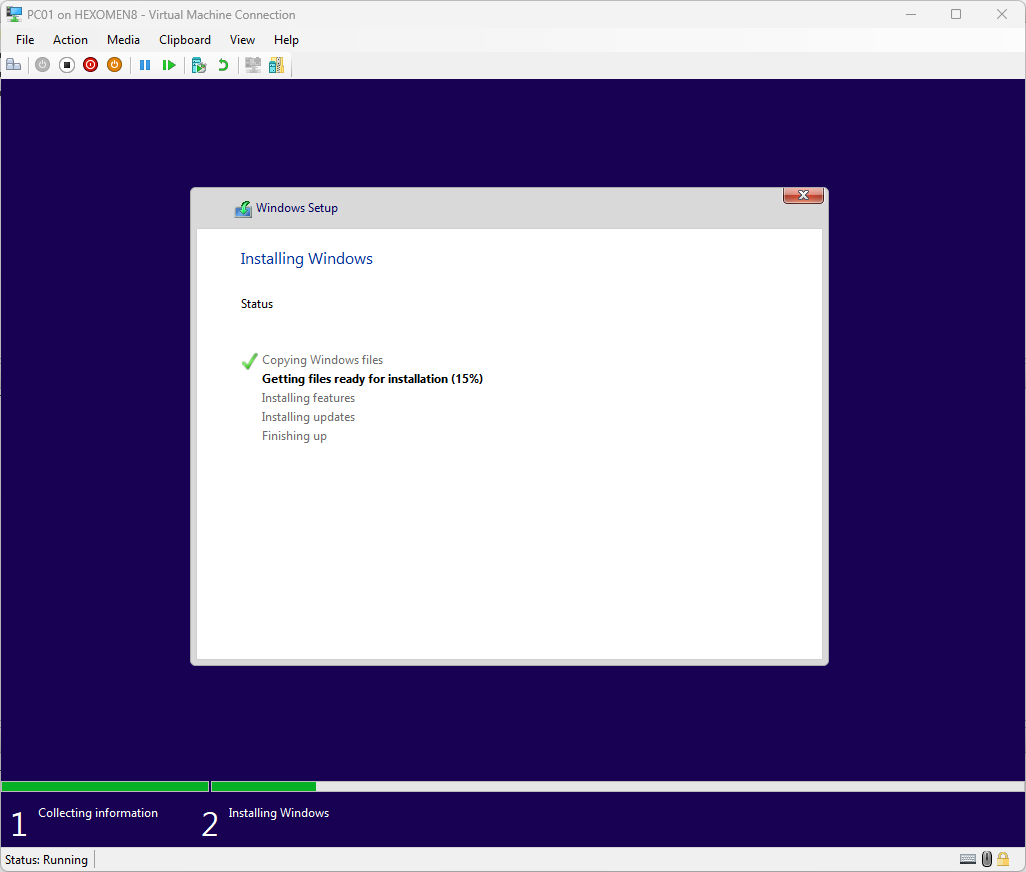
Step 5: OOBE page setup
-
Select region and click “Yes”
On the OOBE page, select the appropriate region.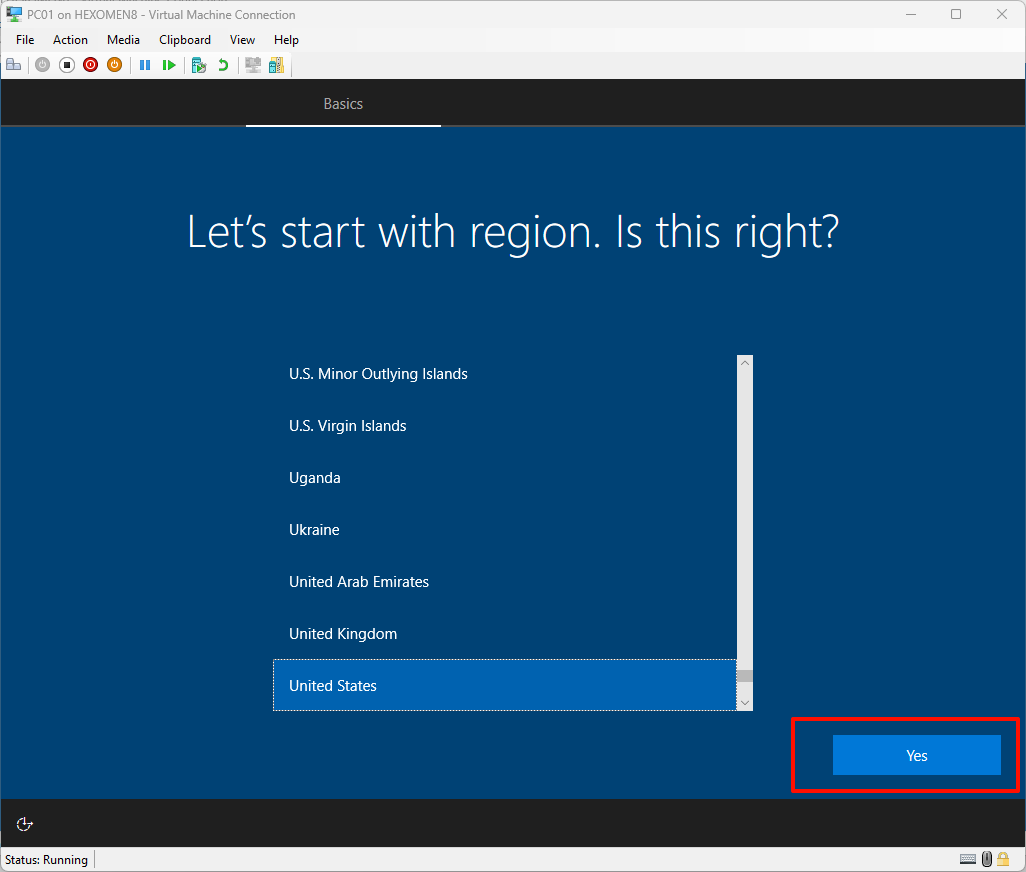
-
Select keyboard layout and click “Yes”
Choose the desired keyboard layout.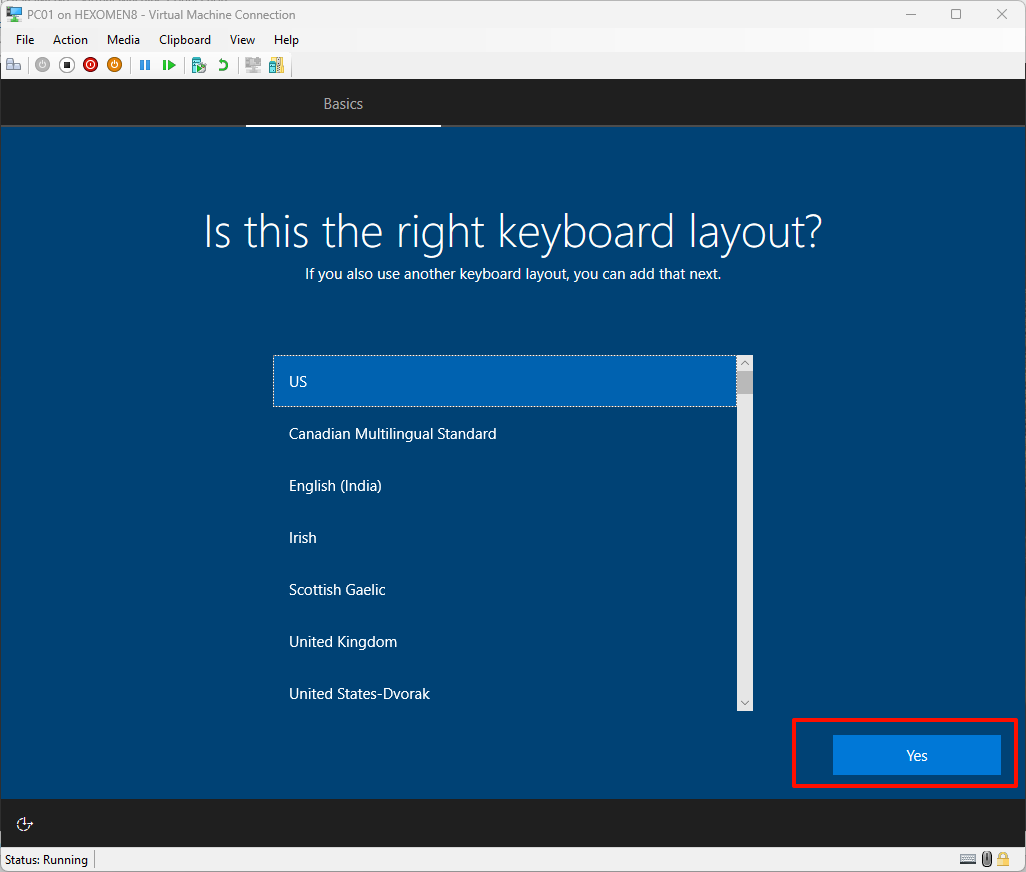
-
Skip additional keyboard layouts
If you don’t need additional keyboard layouts, click “Skip”.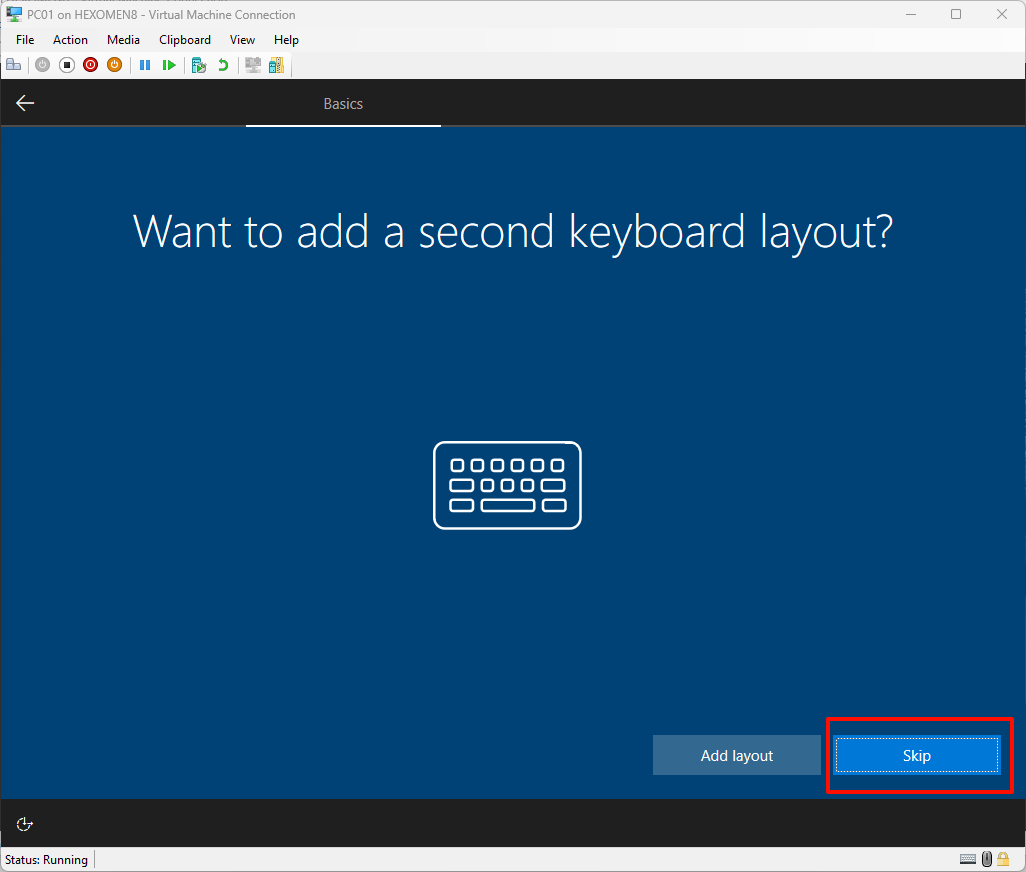
-
Select network connection
If there is no internet connection available, choose “I don’t have a network connection”.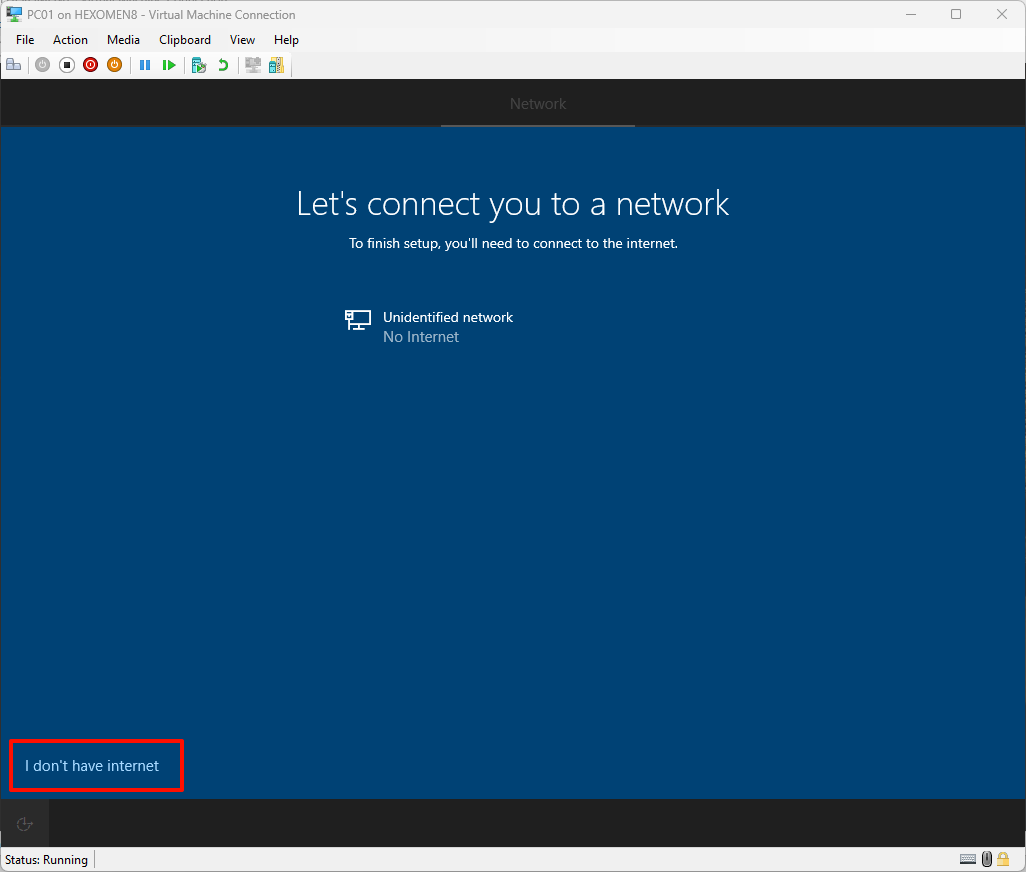
-
Select restricted mode installation
Choose “Continue with restricted mode” without connecting to the internet.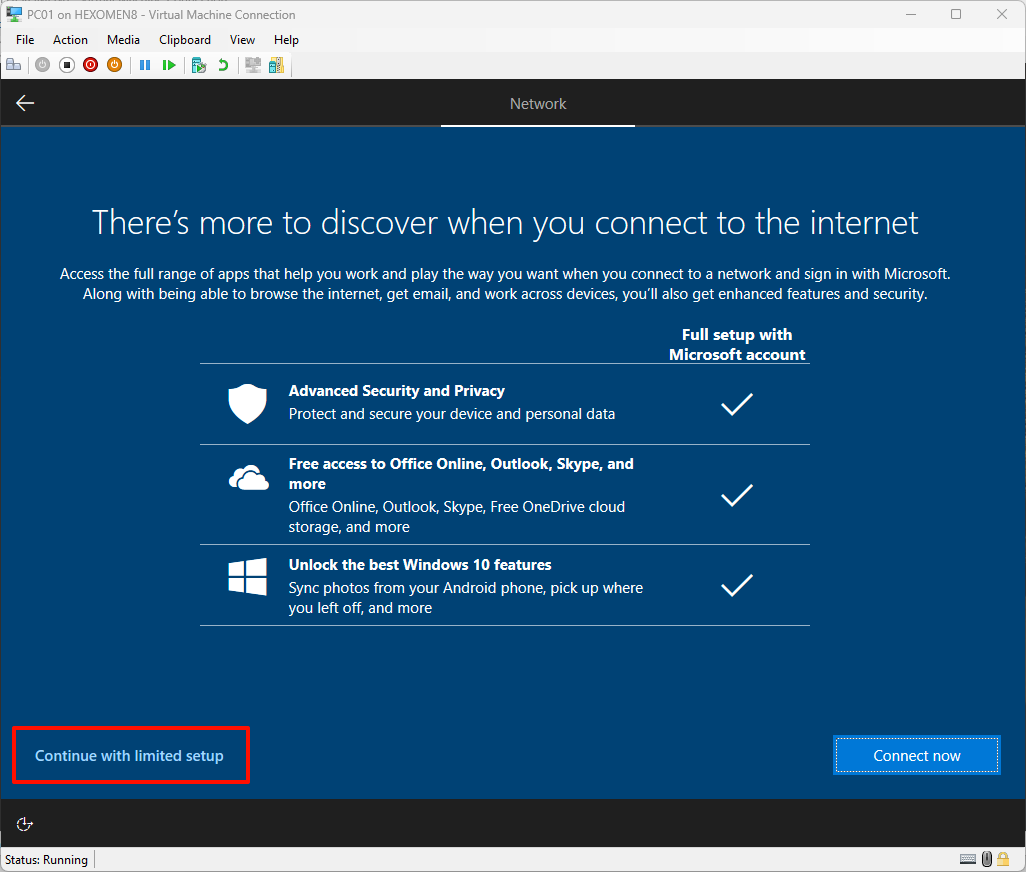
Step 6: Create a local account
-
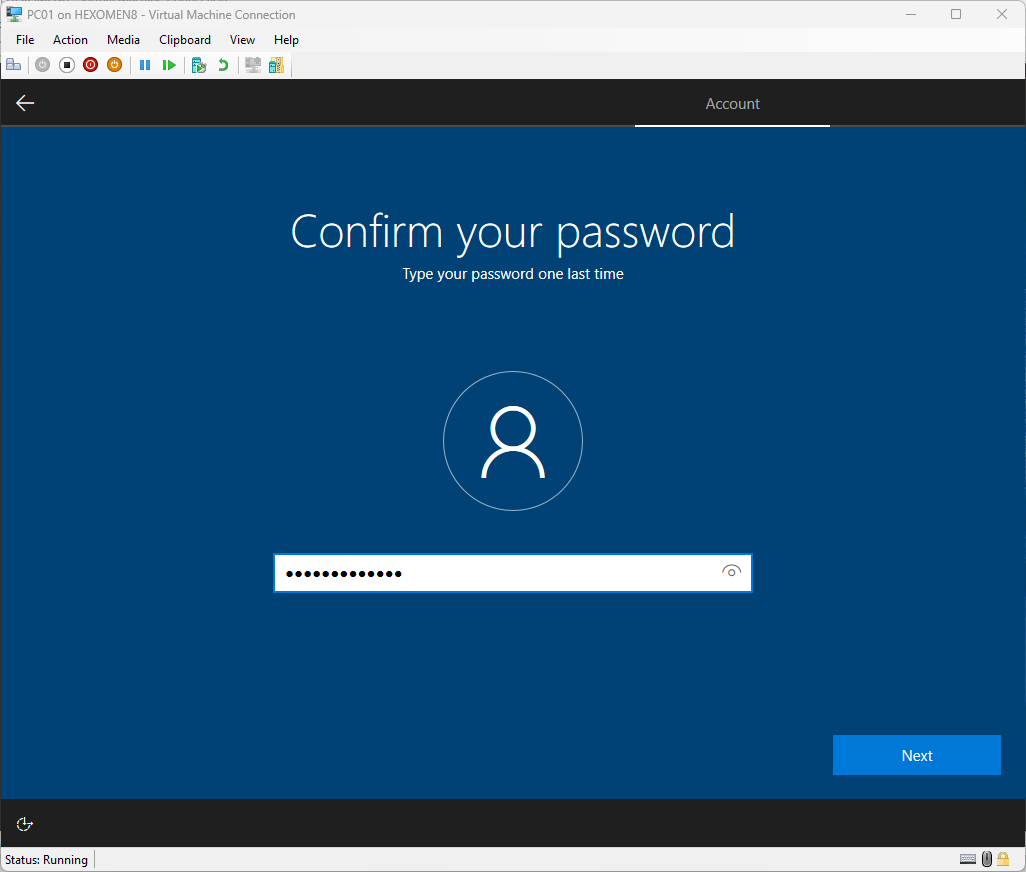
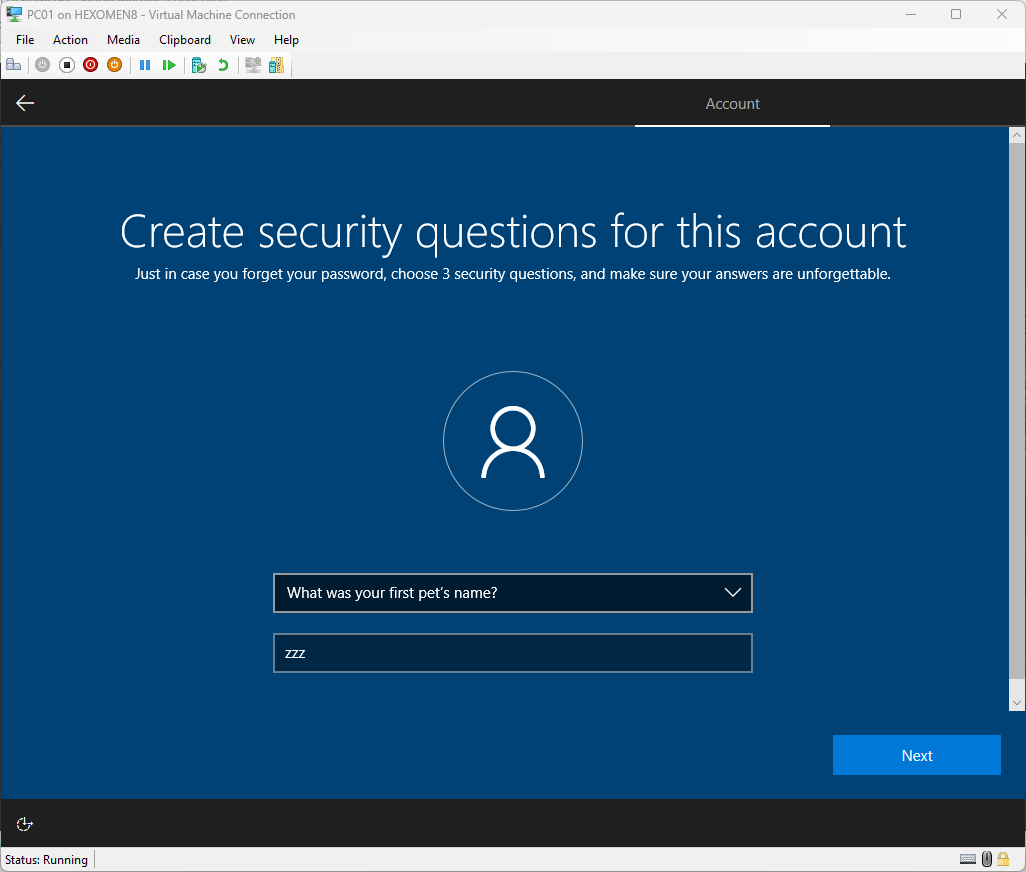
Create a username and password
Enter a username and password, and set up security questions.
Step 7: Privacy settings and Cortana
-
Disable all privacy settings and accept
You can disable all privacy settings if desired.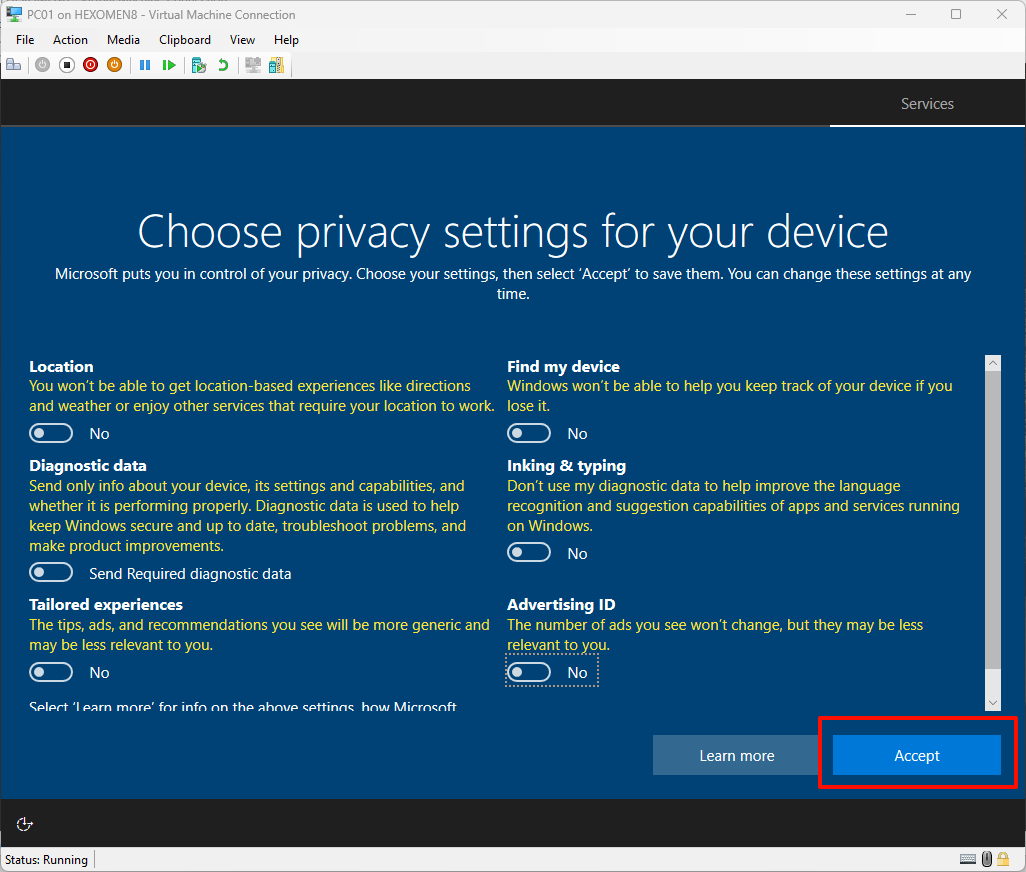
-
Do not enable Cortana
Click “Not now”.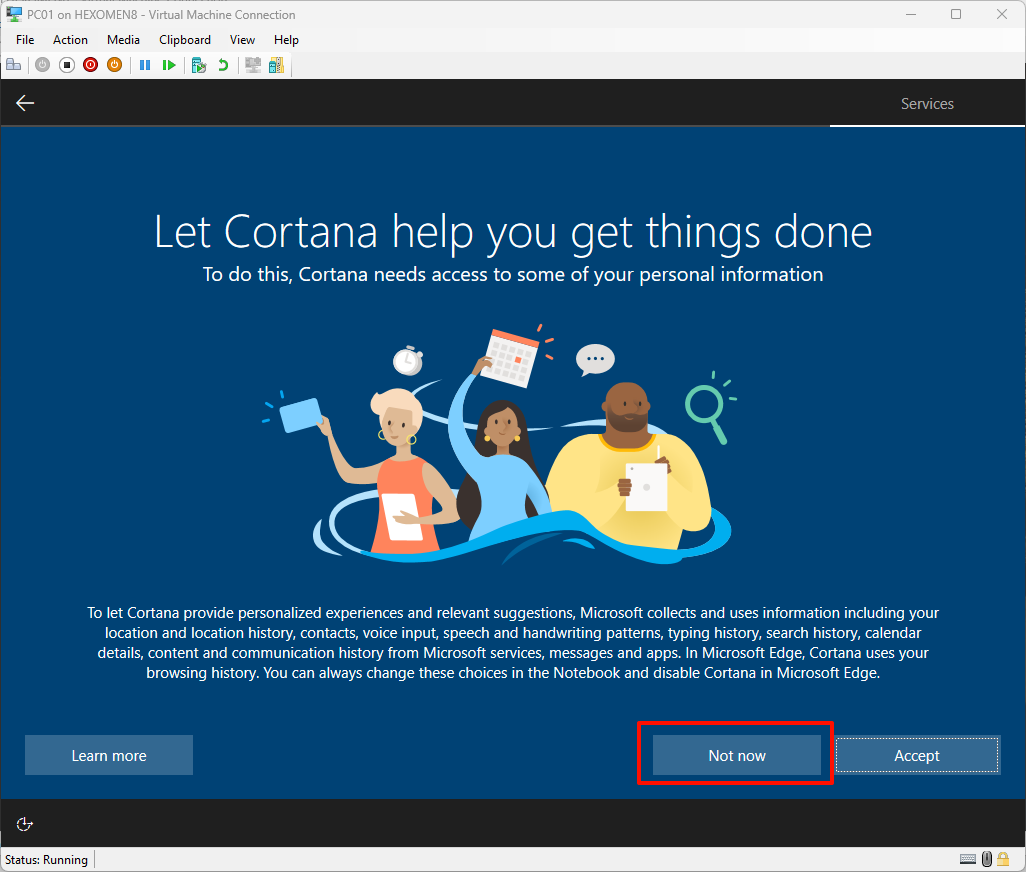
Step 8: Log in to the system
-
Enter your password and log in
Use the account you set up earlier to log in.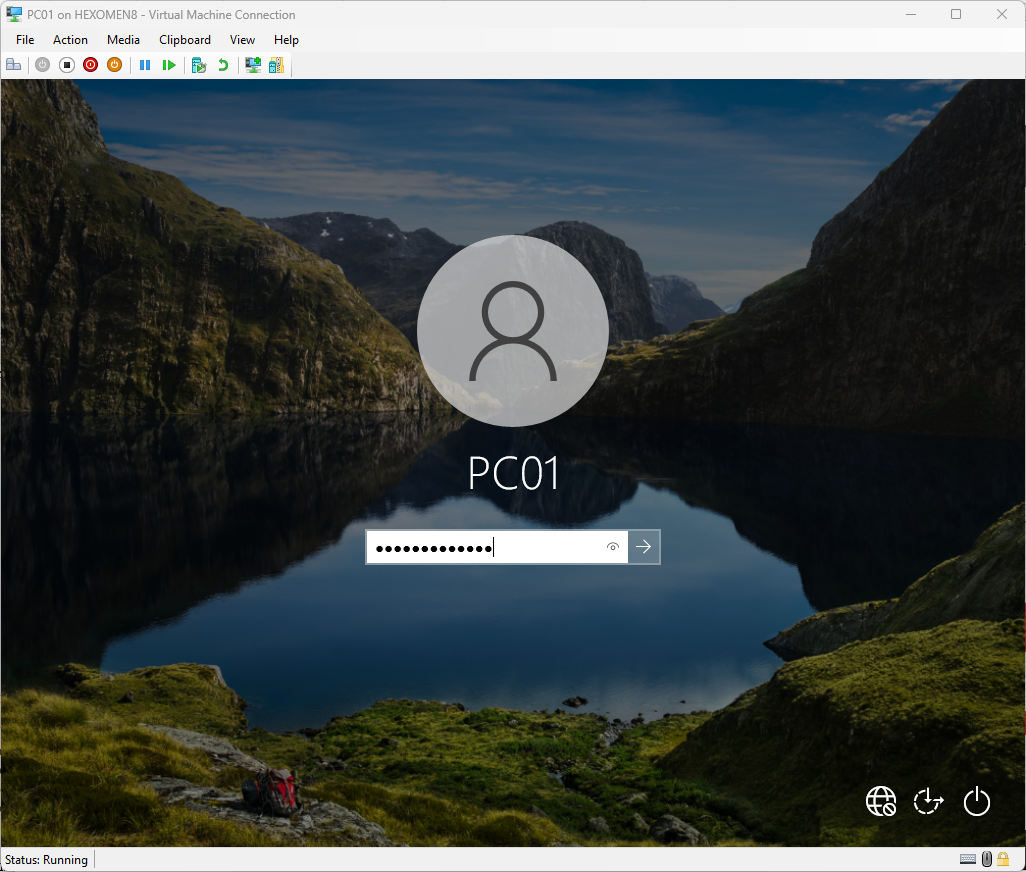
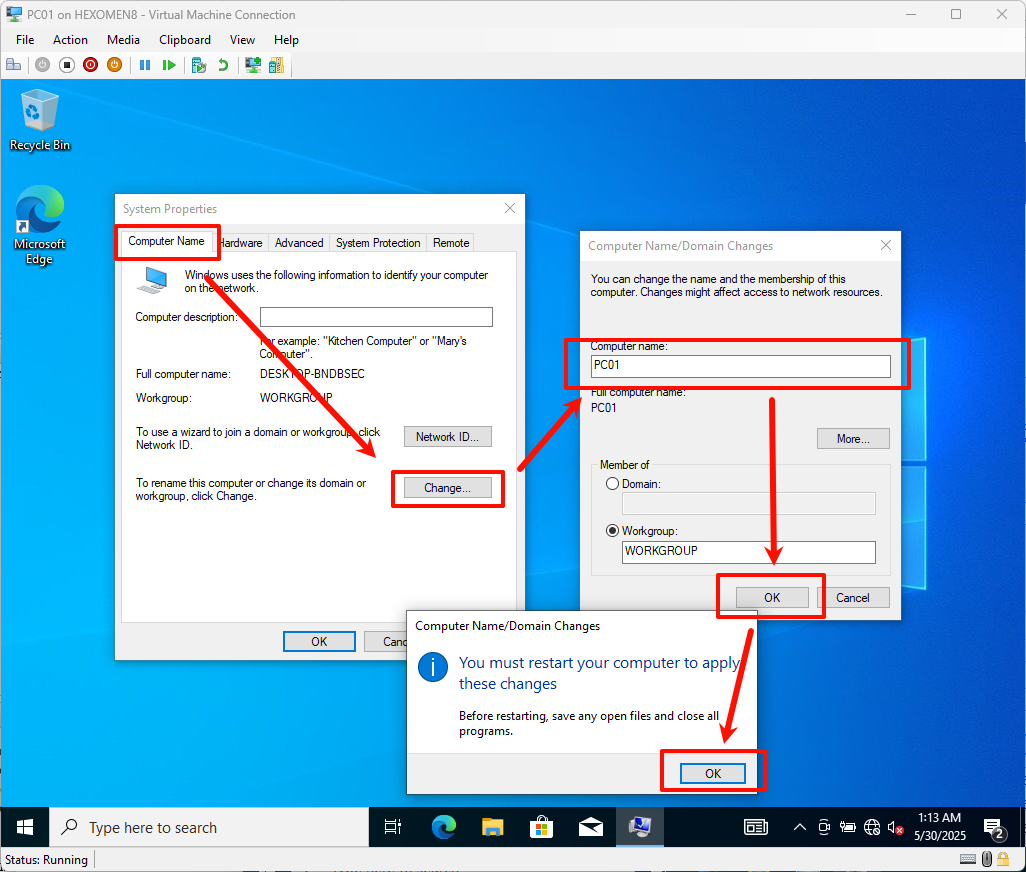
Step 9: Change the computer name
-
Change the computer name
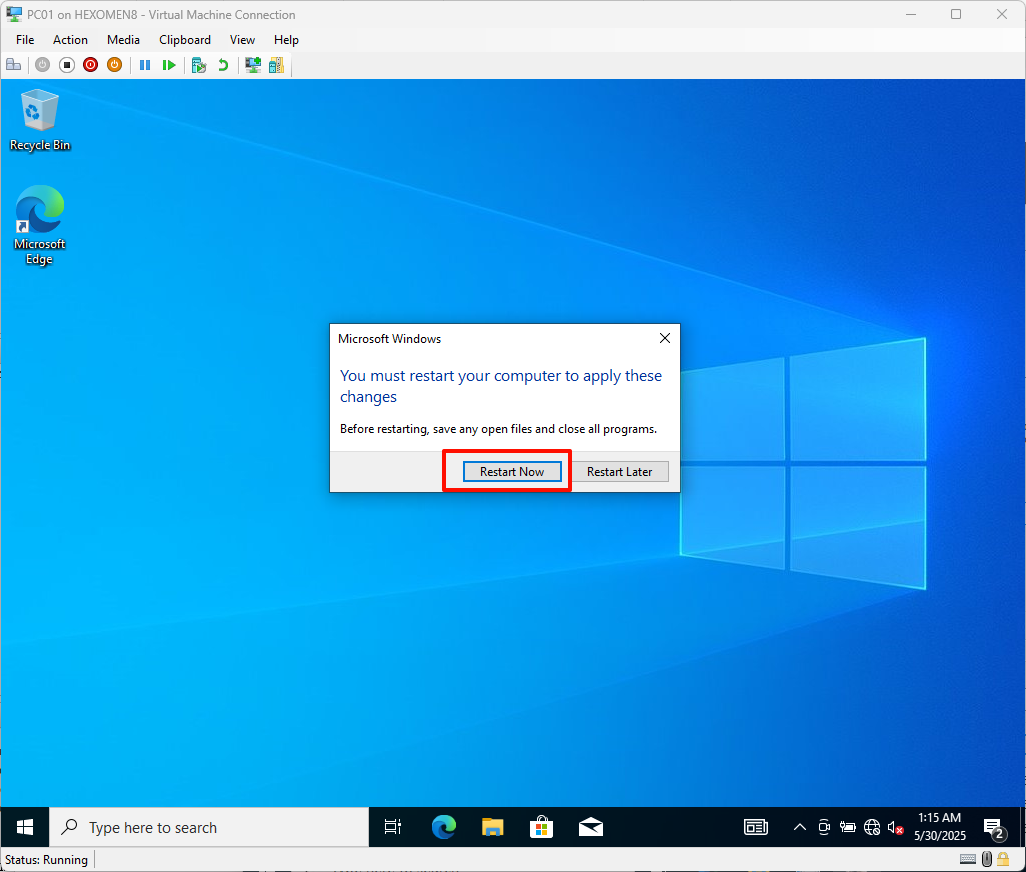
Search for “Advanced System Settings”, go to the “Computer Name” tab, change the name toPC01orPC02, and click “OK”. You will be prompted to restart—click “Restart Now”.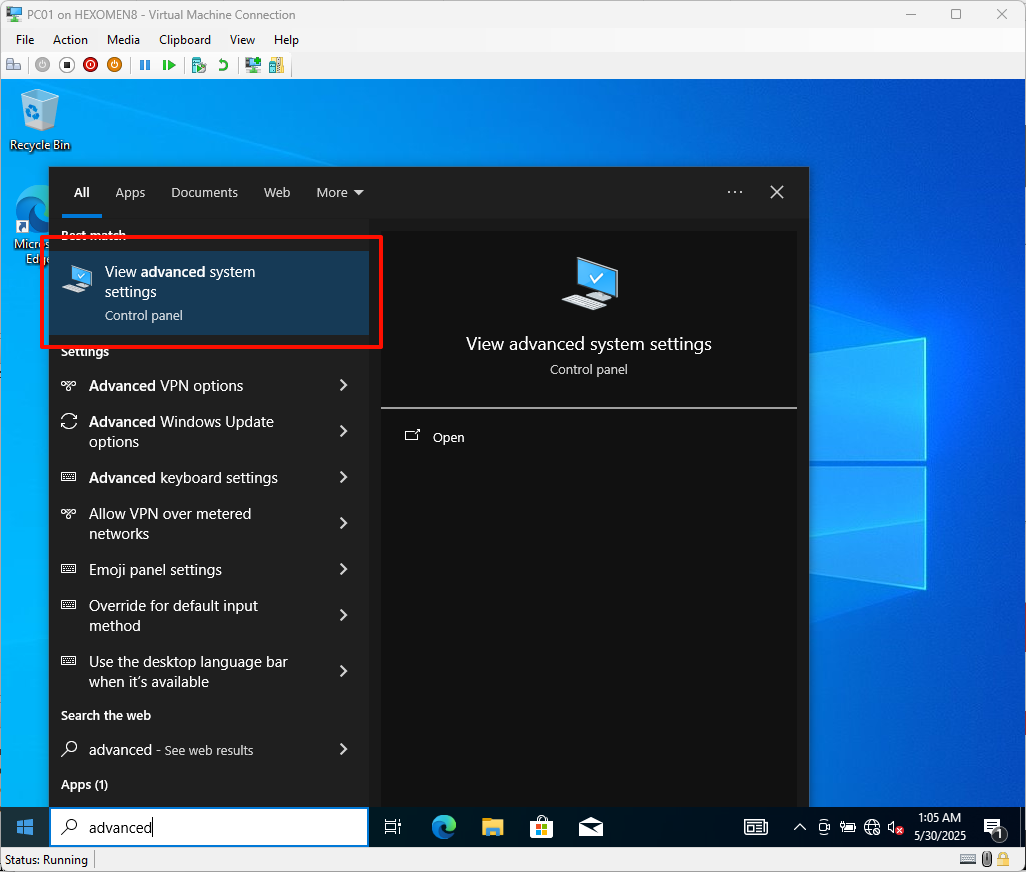
-
Re-login after the restart
After the restart, log back into the system and confirm that the computer name has been successfully changed.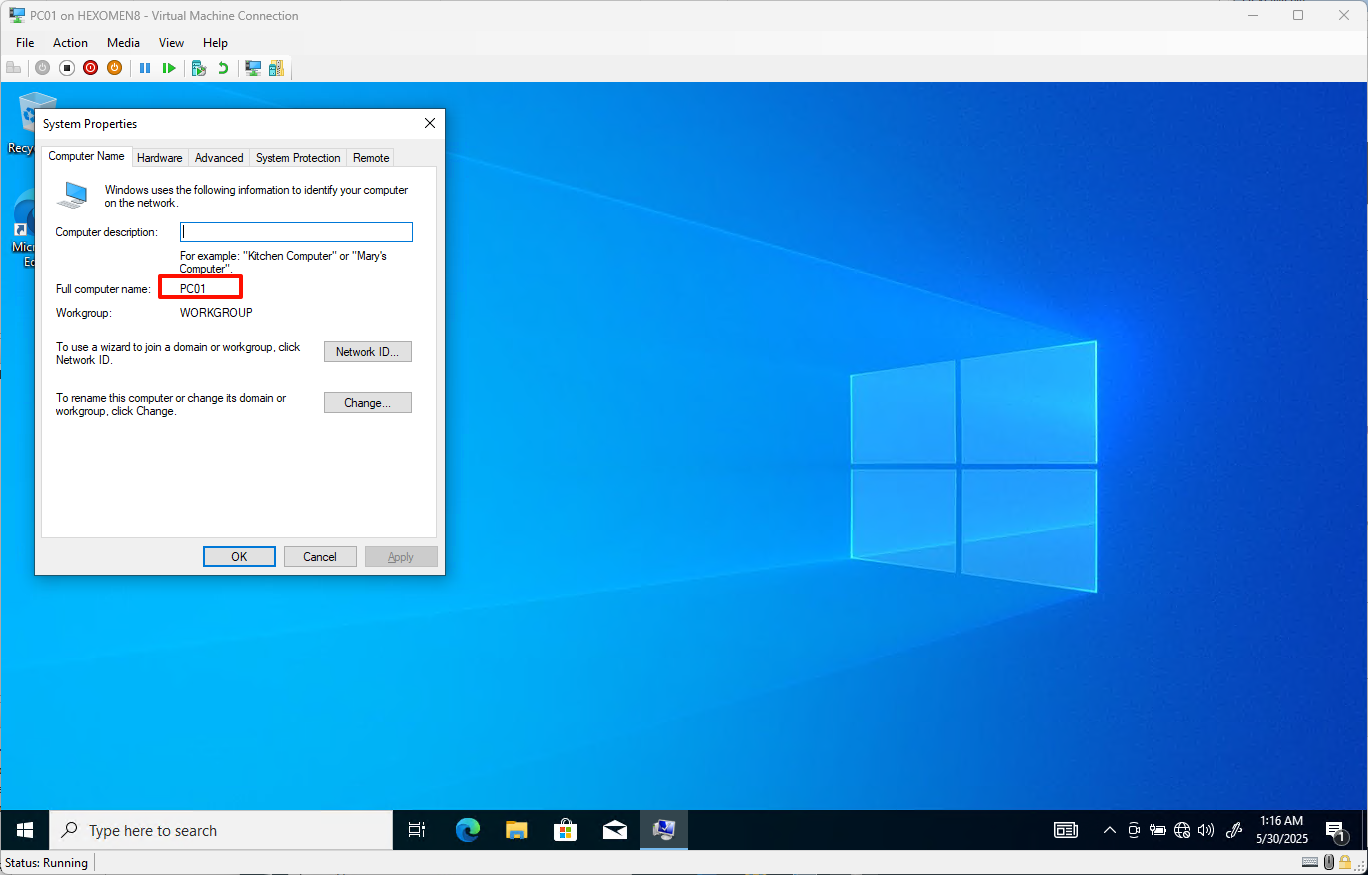
Summary
This chapter covered how to enable Hyper-V, download ISO images, create a virtual switch, create virtual machines, and install operating systems. With these steps completed, we have laid the foundation for our test environment. In the next chapters, we will move on to more advanced configurations, such as Active Directory Domain Services (AD DS), DHCP, DFS, and more.