Enterprise Network Setup with Windows Server
A step-by-step guide to setting up an enterprise-level network environment using Hyper-V, Windows 10, and Windows Server 2022. Includes AD domain setup, DHCP, DFS, PowerShell automation, and more.
View the Project on GitHub hexwarrior6/Enterprise-Network-Setup-with-Windows-Server
Chapter 2: Installing and Configuring Active Directory Domain Services
This chapter will guide you through the process of installing and configuring Active Directory Domain Services (AD DS) on Windows Server 2022, and joining two Windows 10 virtual machines to the same domain.
The DNS service will be automatically installed along with AD DS, so no additional configuration is required.
Assign Static IP Addresses to Both Domain Controllers
Setting static IP addresses for domain controllers is essential to ensure proper operation of DNS and AD services in an enterprise network environment.
Steps:
-
Open
Control Panel->Network and Internet->Network and Sharing Center->Change adapter settings
Right-click the current local connection ->Properties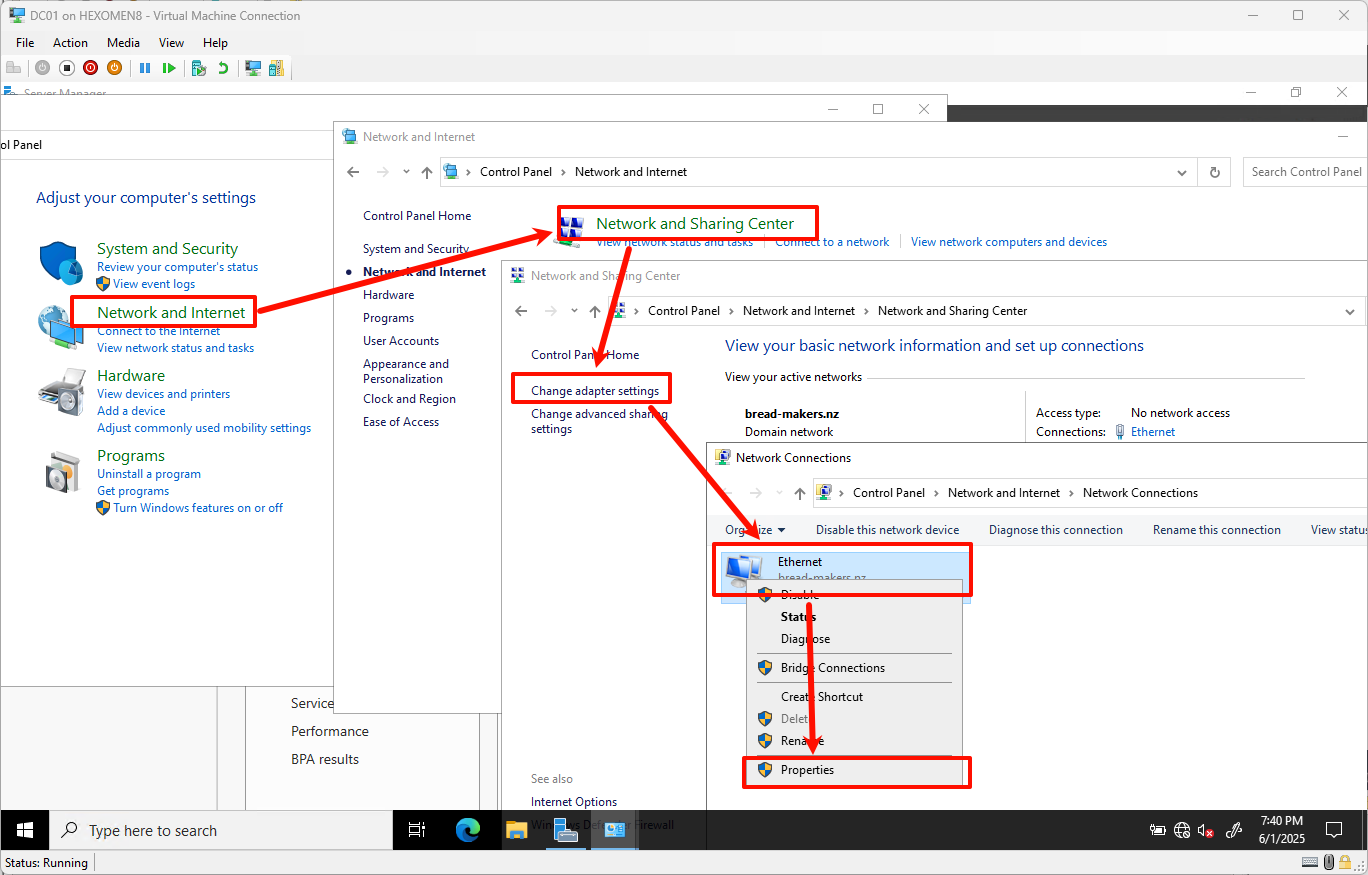
-
In the pop-up window, double-click
Internet Protocol Version 4 (TCP/IPv4)and configure the following settings:Device IP Address Subnet Mask Default Gateway Preferred DNS Alternate DNS DC01 192.168.1.100255.255.255.0192.168.1.101Self DC02 DC02 192.168.1.101255.255.255.0192.168.1.100Self DC01 PC01 192.168.1.120255.255.255.0192.168.1.100DC01 DC02 PC02 192.168.1.121255.255.255.0192.168.1.100DC01 DC02 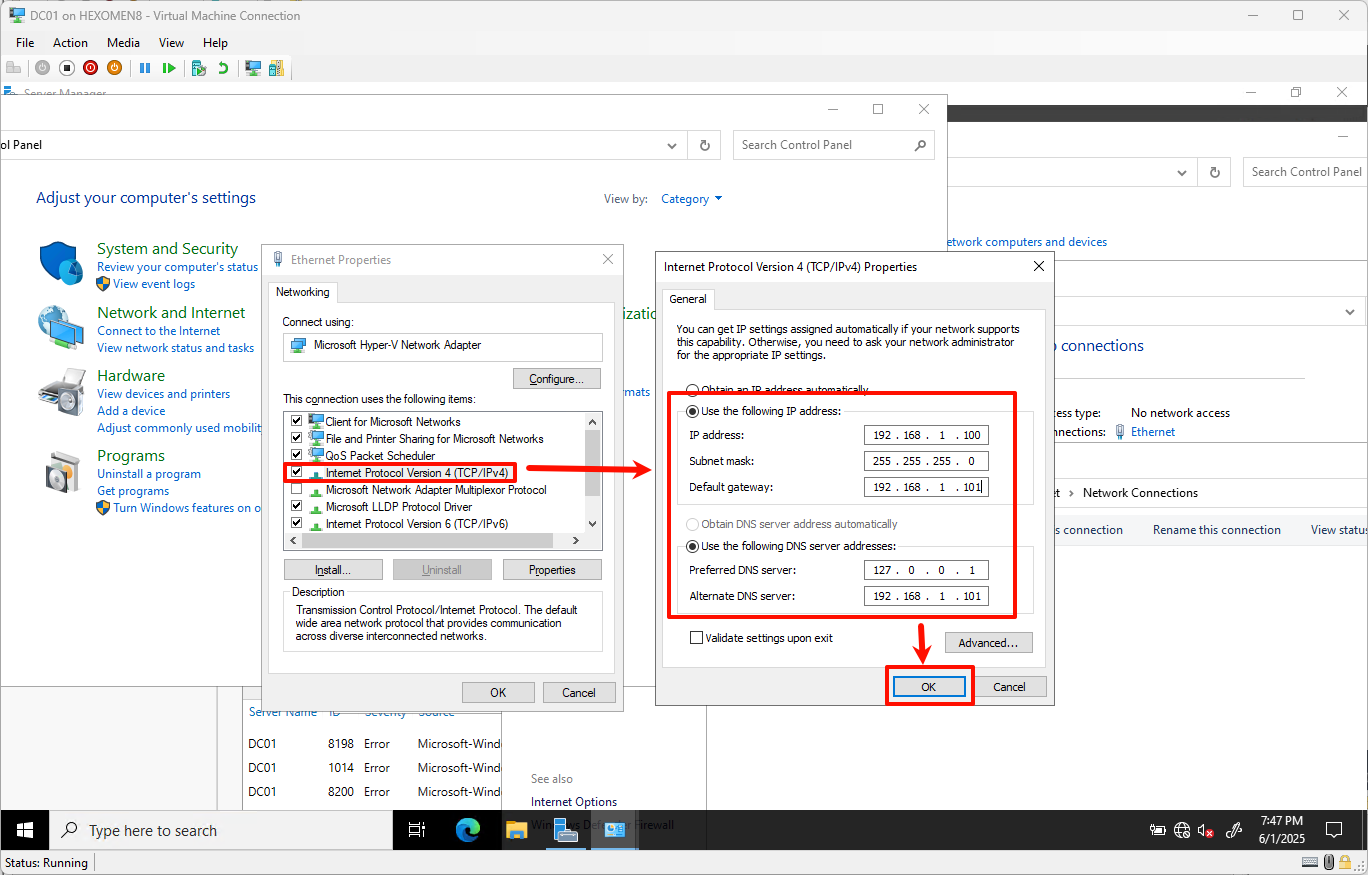
-
Click OK to save the settings, then open Command Prompt and enter the following command to verify the IP address configuration:
ipconfig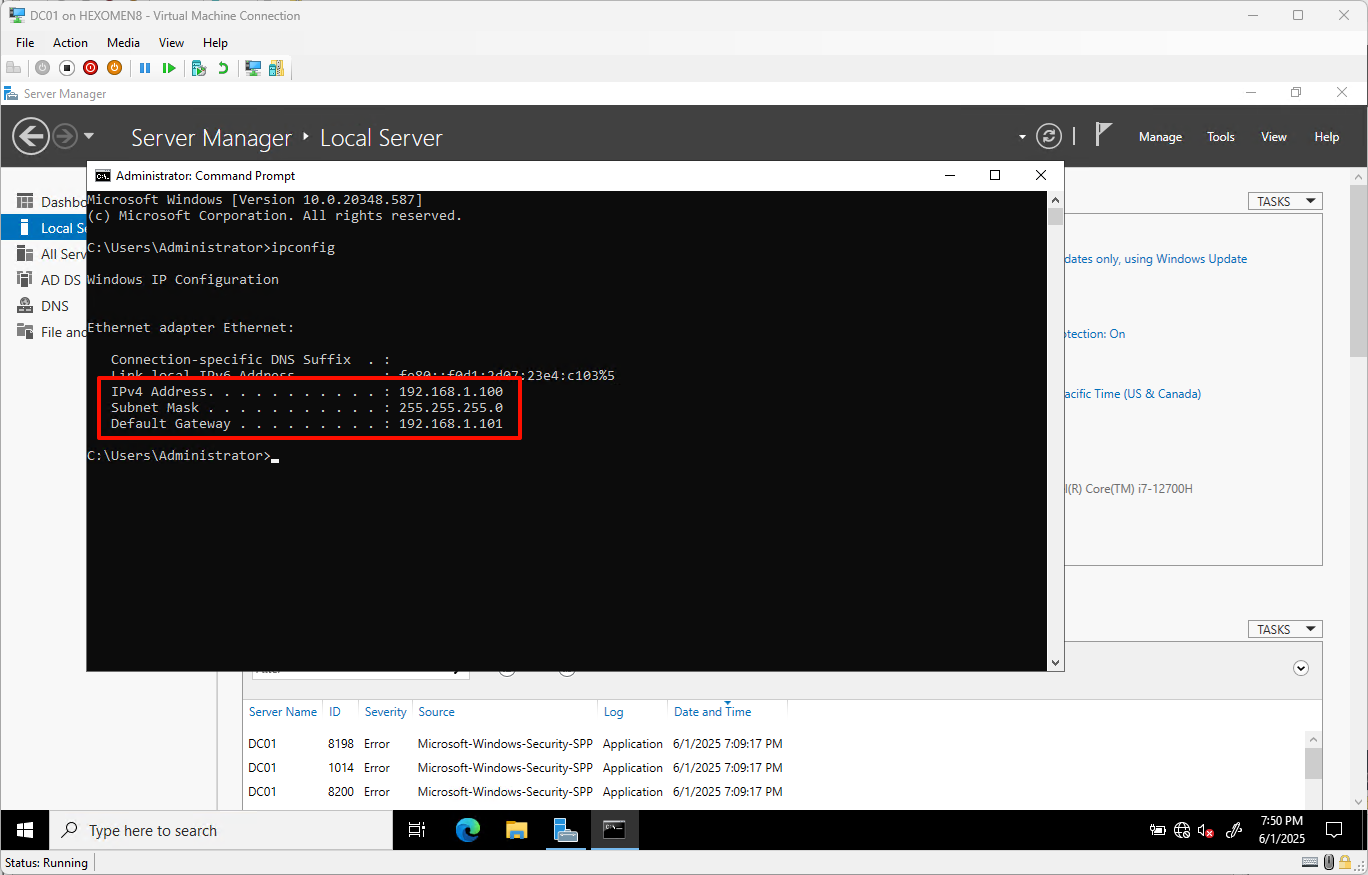
-
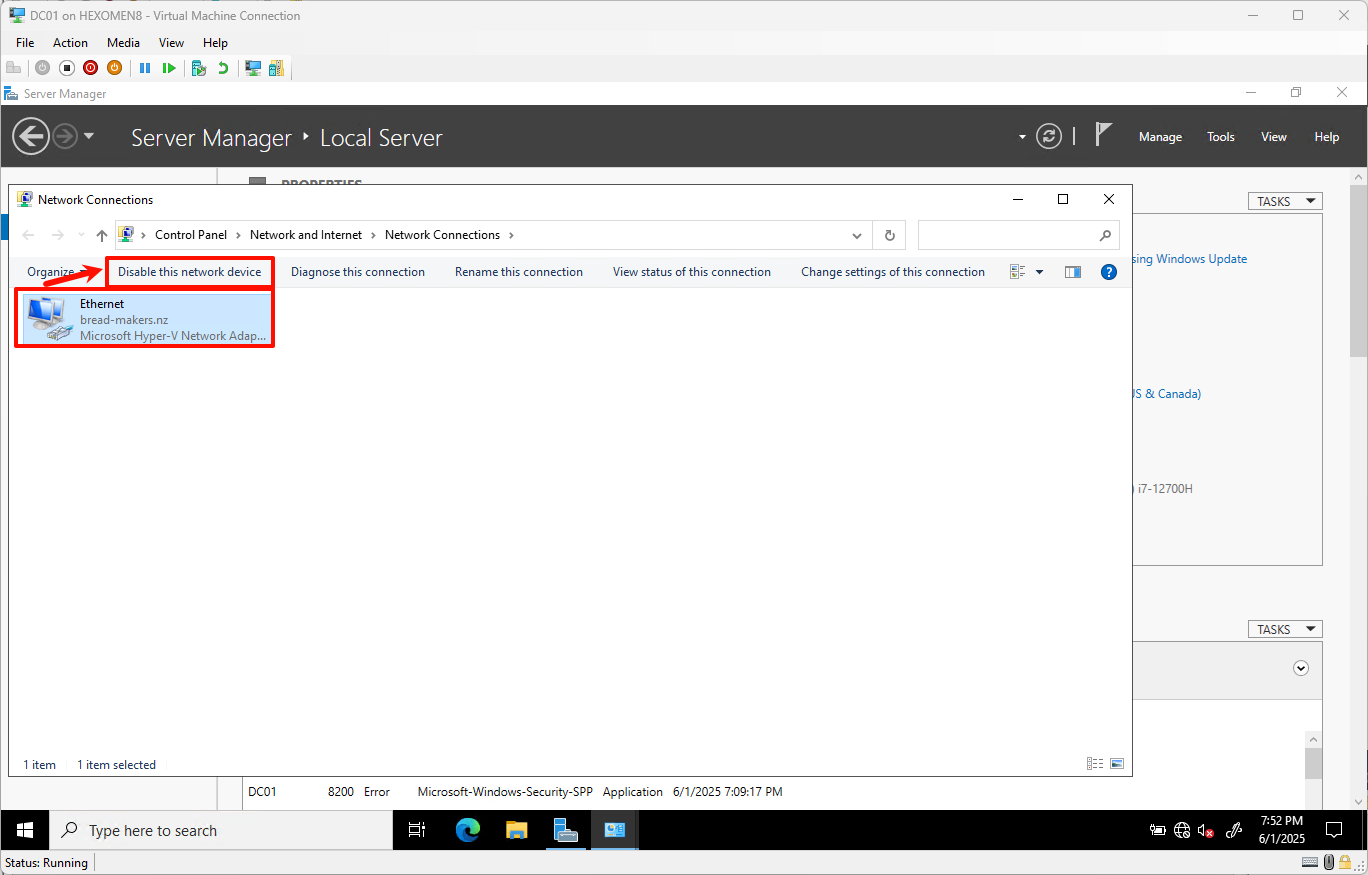
If the settings do not take effect, try disabling and re-enabling the network adapter:
- Return to the “Change adapter settings” interface
- Select the current network adapter
- Click ->
Disable->Enable
Install AD Domain Services (DC01)
-
Open
Server Manageron DC01
ClickManage->Add Roles and Featuresfrom the top menu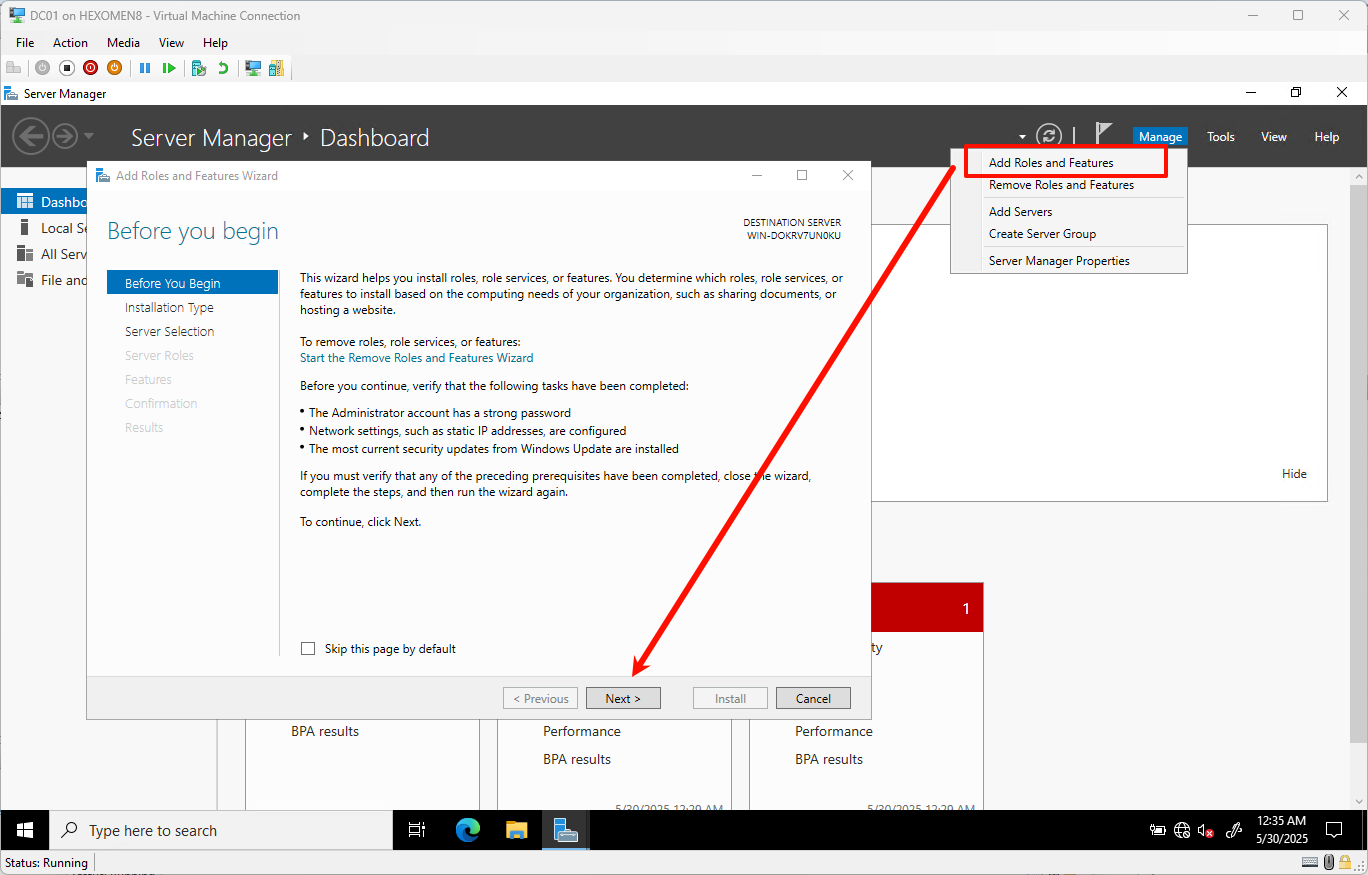
-
In the Add Roles and Features Wizard, keep the installation type as default and click
Next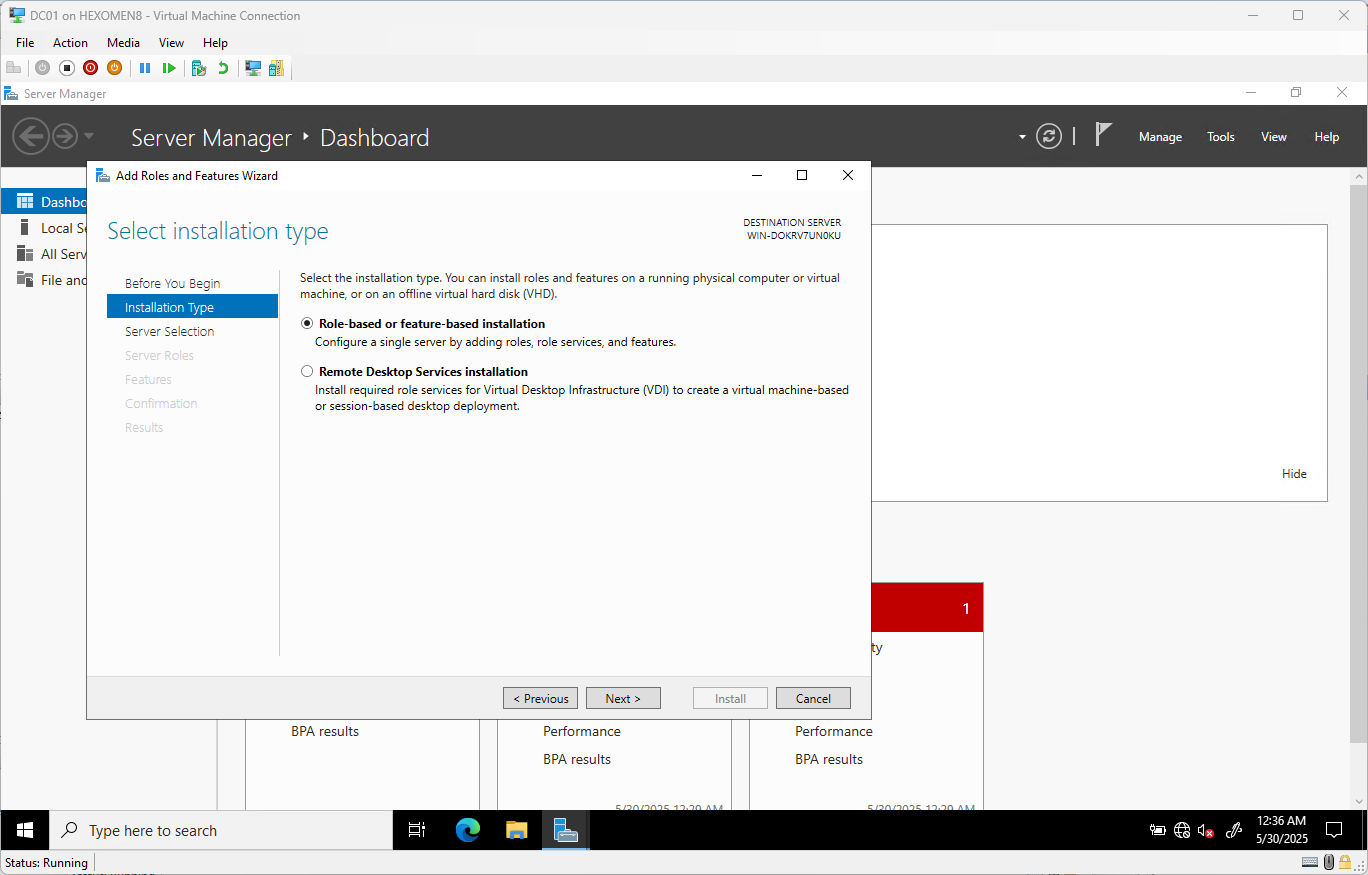
-
Keep the server selection as default and click
Next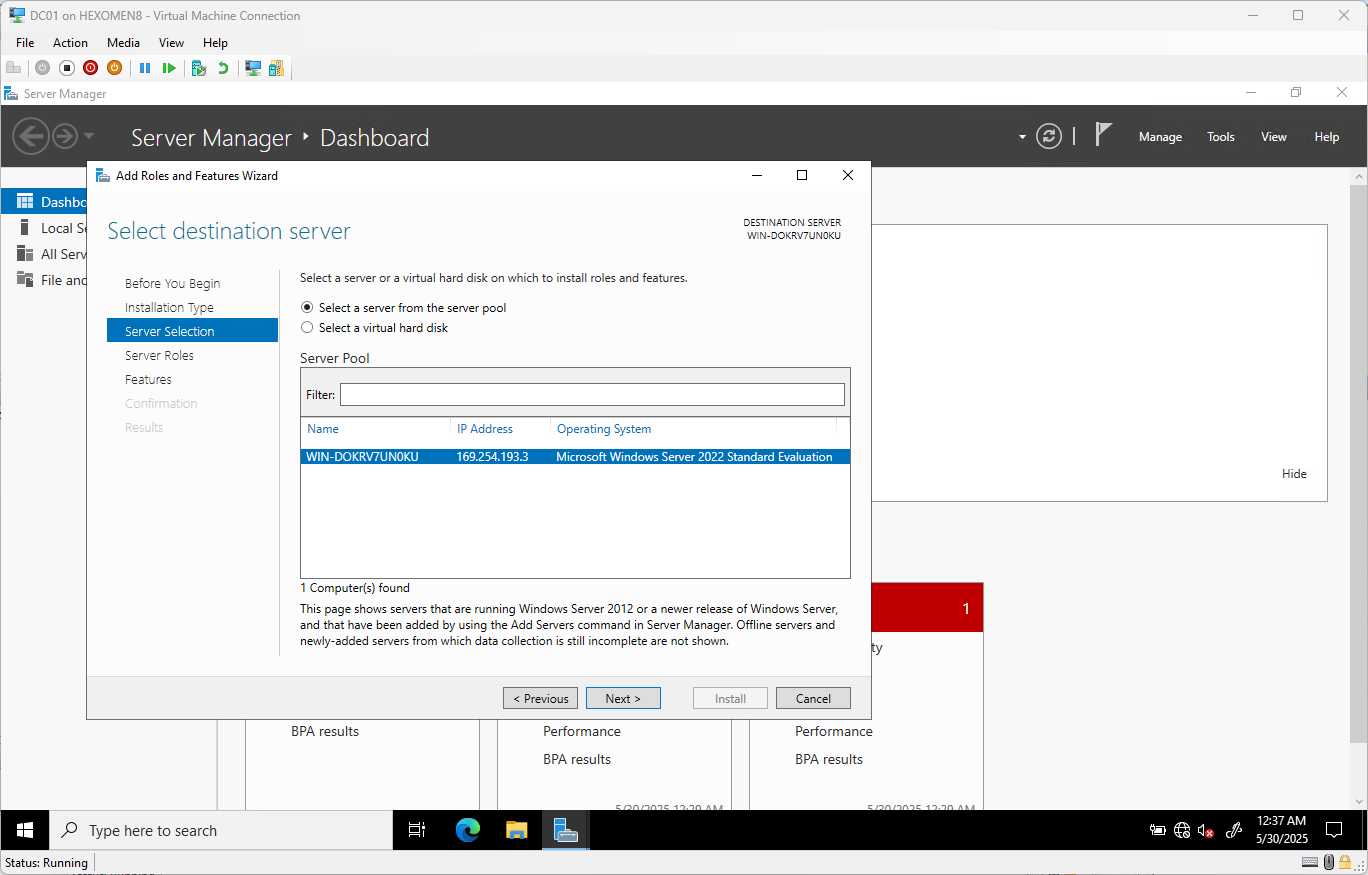
-
On the Server Roles page, check
Active Directory Domain Services
ClickAdd Featureswhen prompted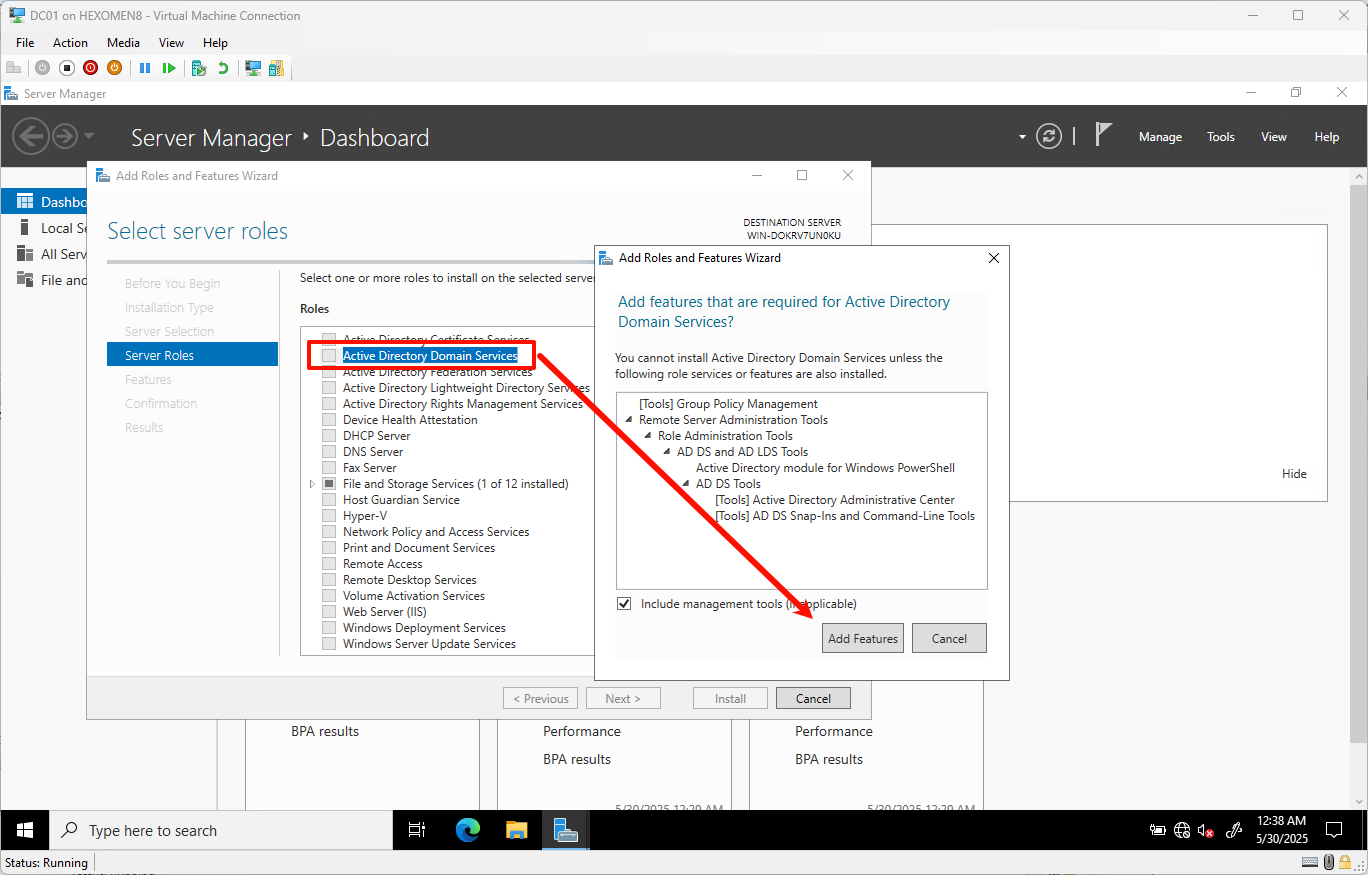
-
Keep the features selection as default and click
Next
-
Leave the AD DS settings as default and continue clicking
Next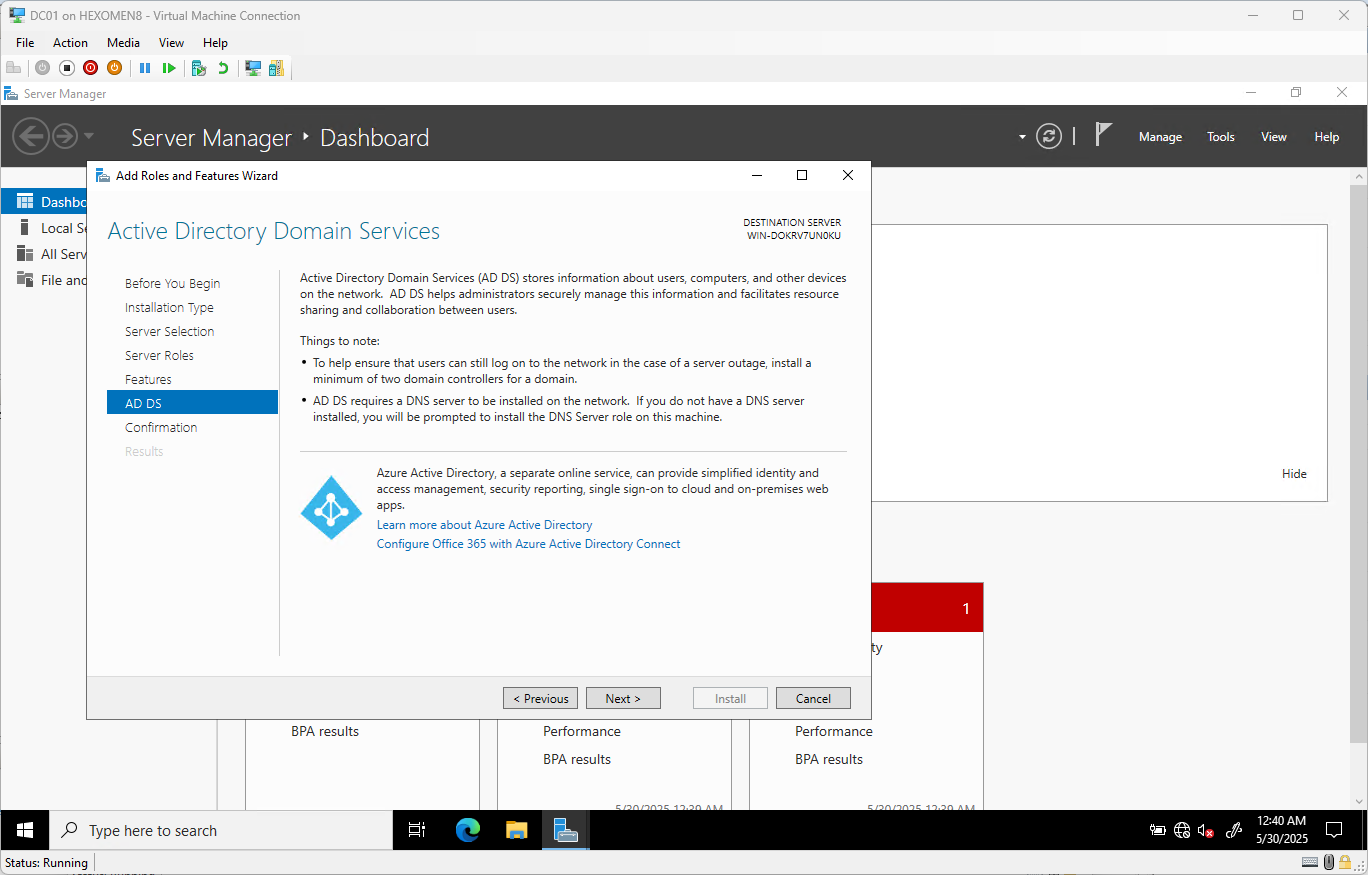
-
Confirm your selections and click
Install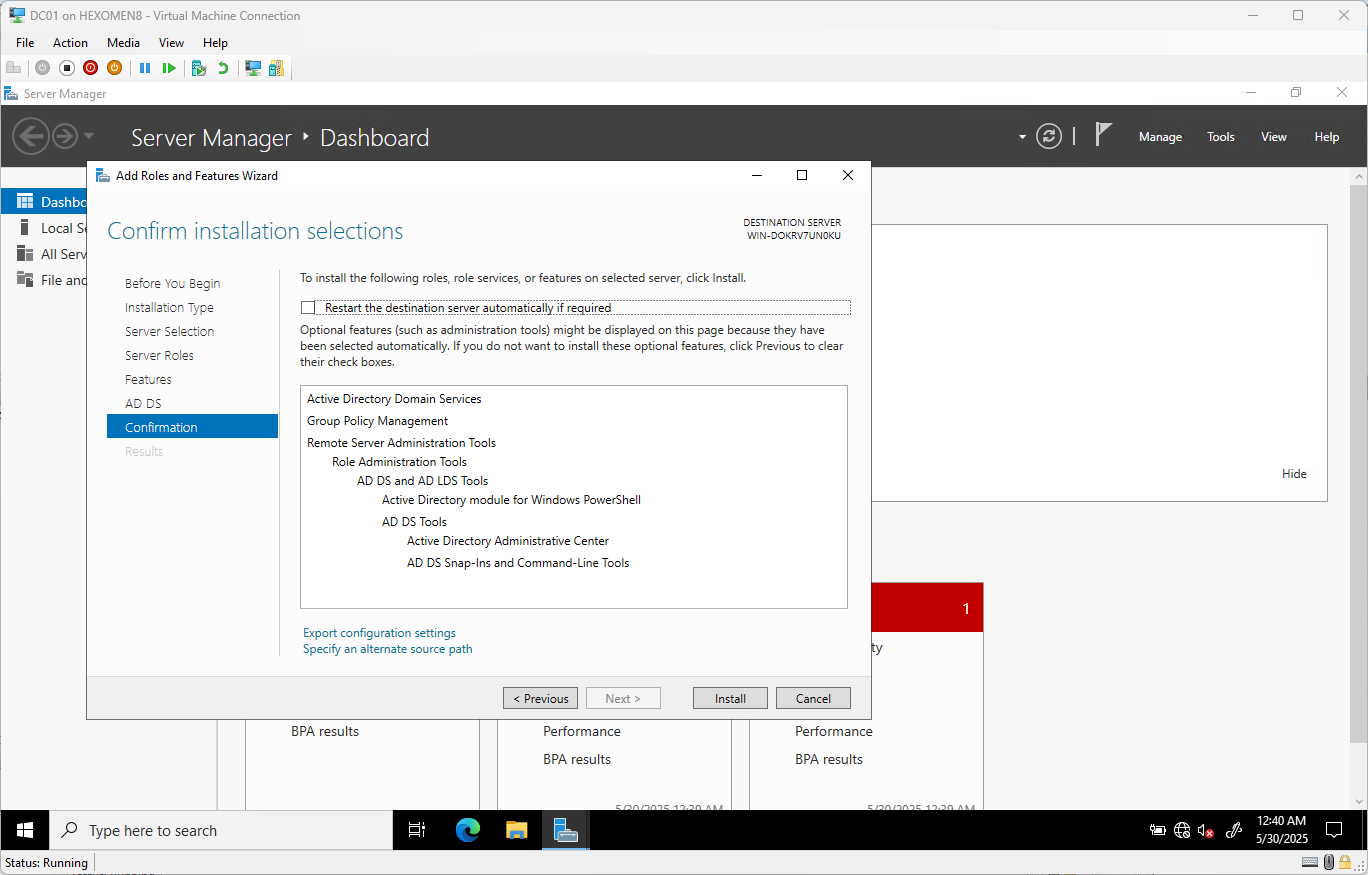
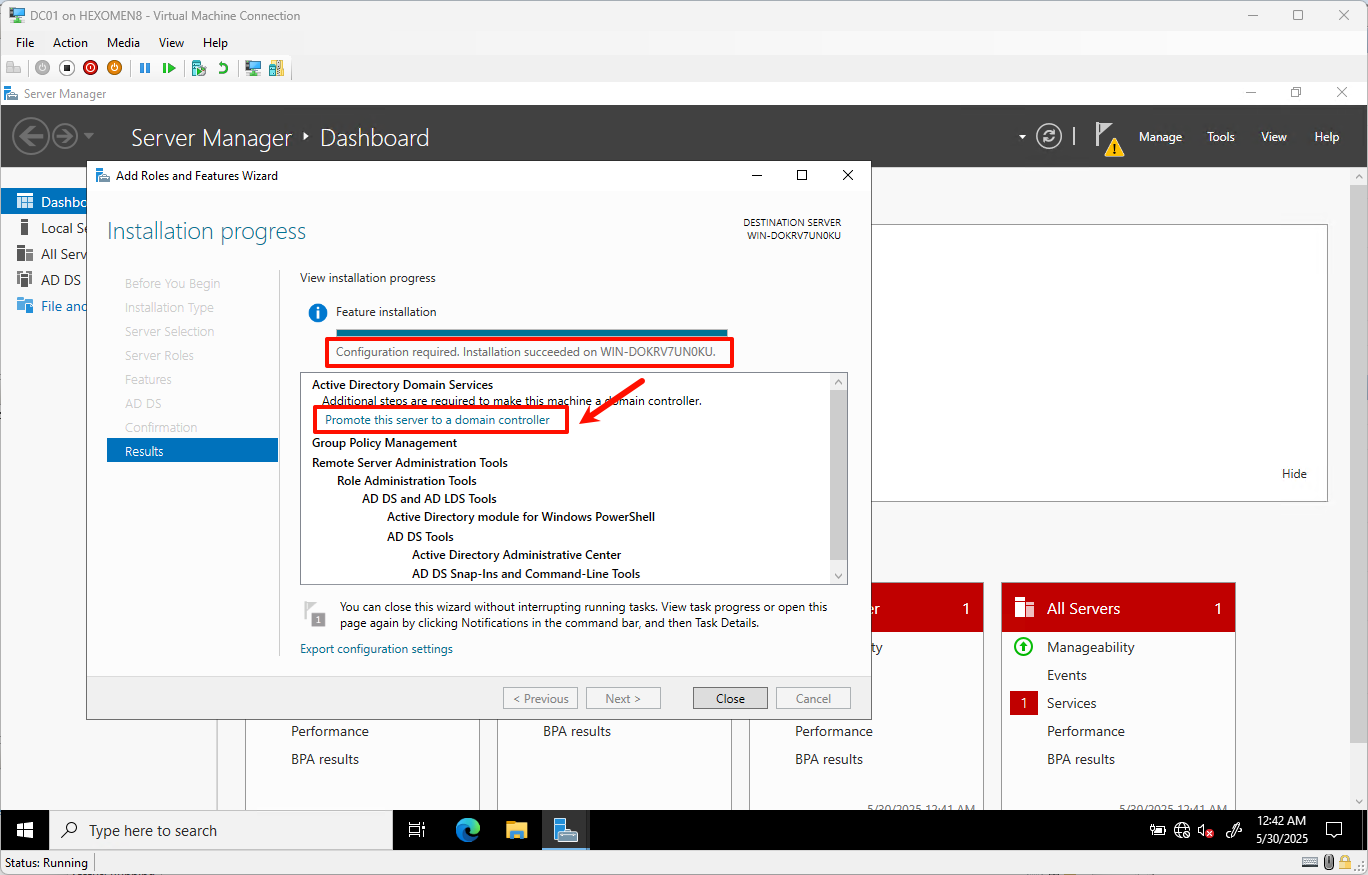
-
After installation completes, a prompt appears saying Promote this server to a domain controller – click the link to continue
Configure the Primary AD Domain Controller (DC01)
-
Enter the new domain name:
bread-makers.nz, then clickNext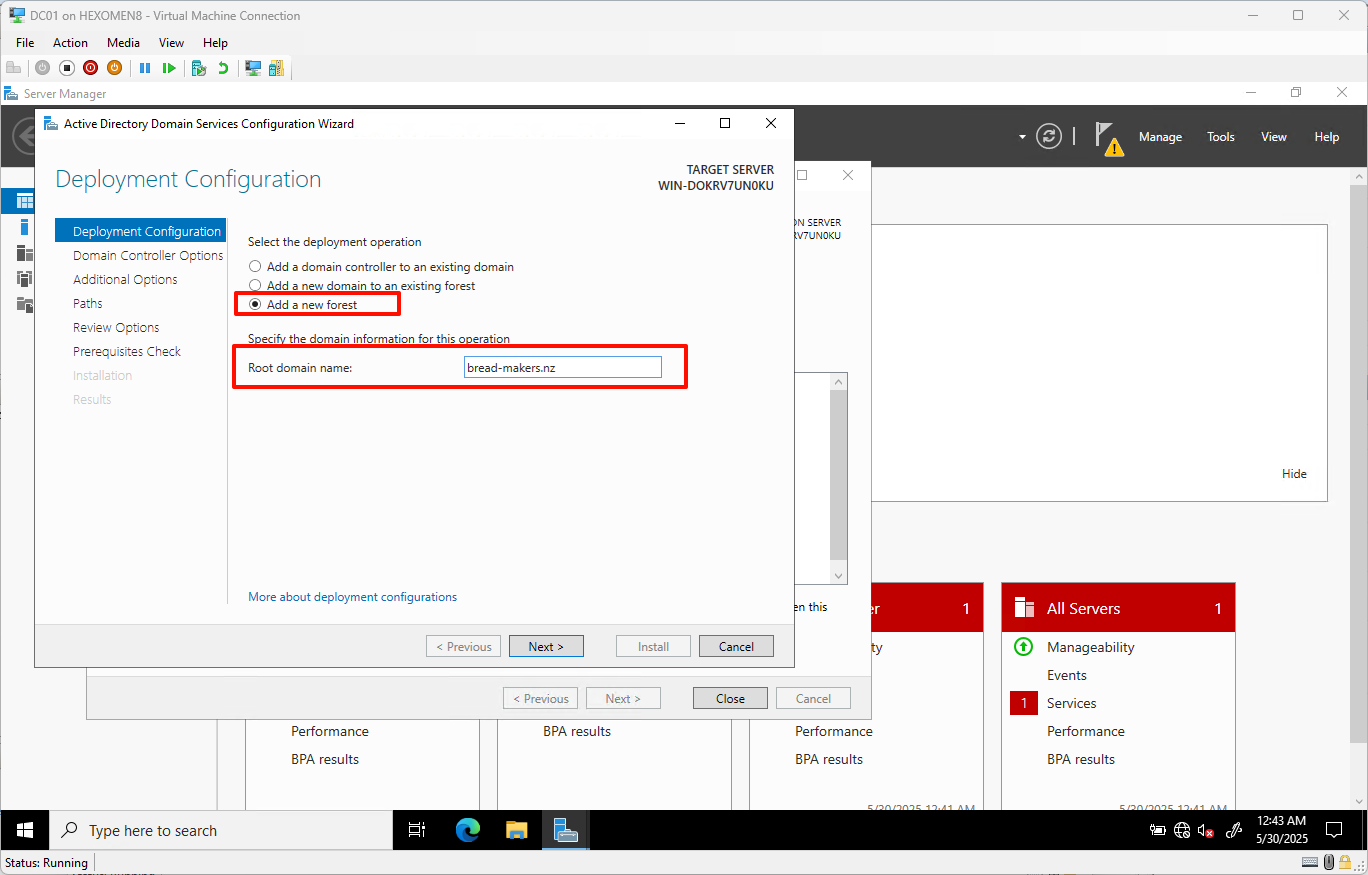
-
Set the DSRM password (used for directory recovery), then click
Next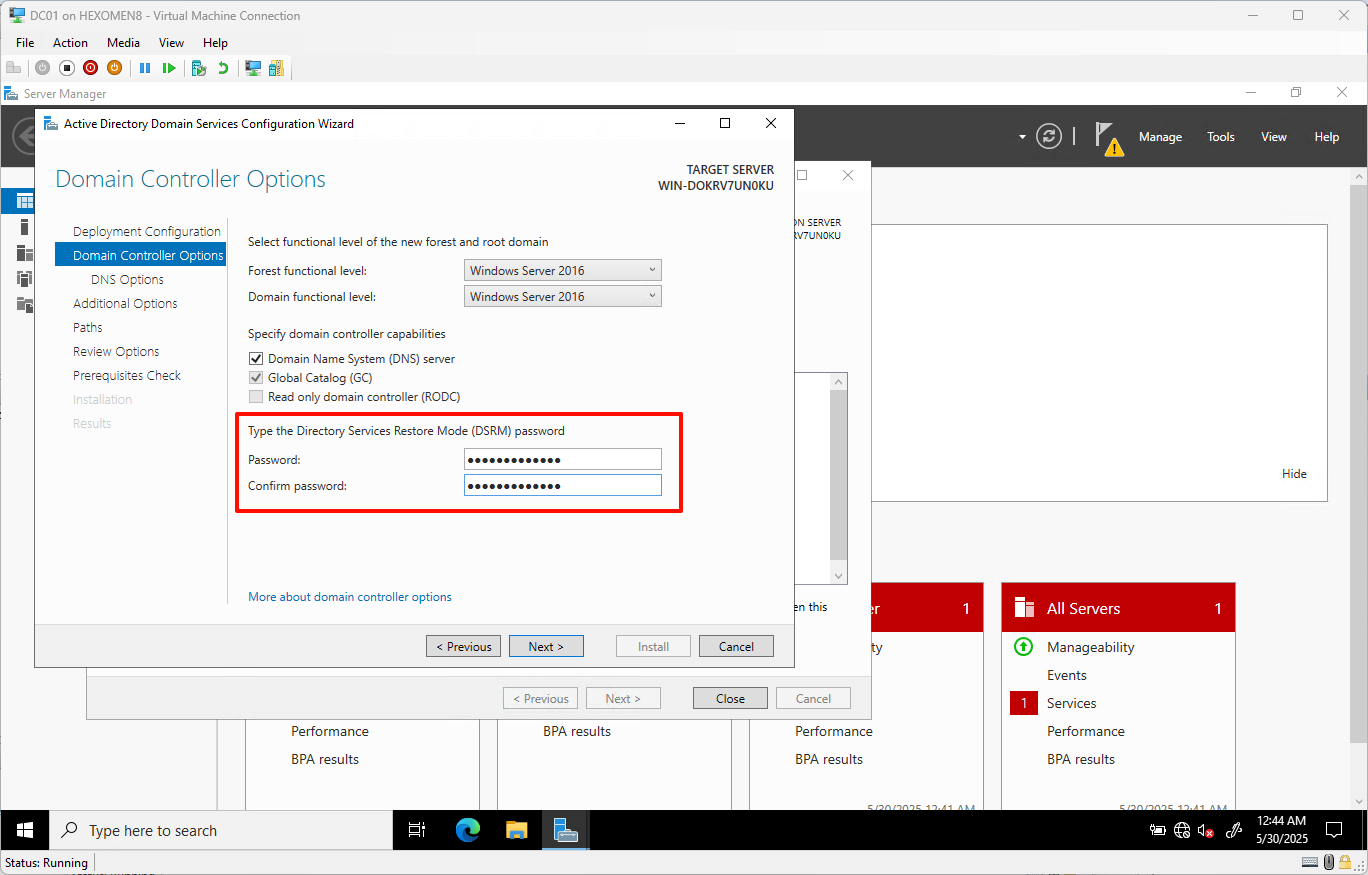
-
Leave DNS settings as default and click
Next
-
The domain name will be auto-filled, leave it as is and click
Next
-
Leave the paths as default and click
Next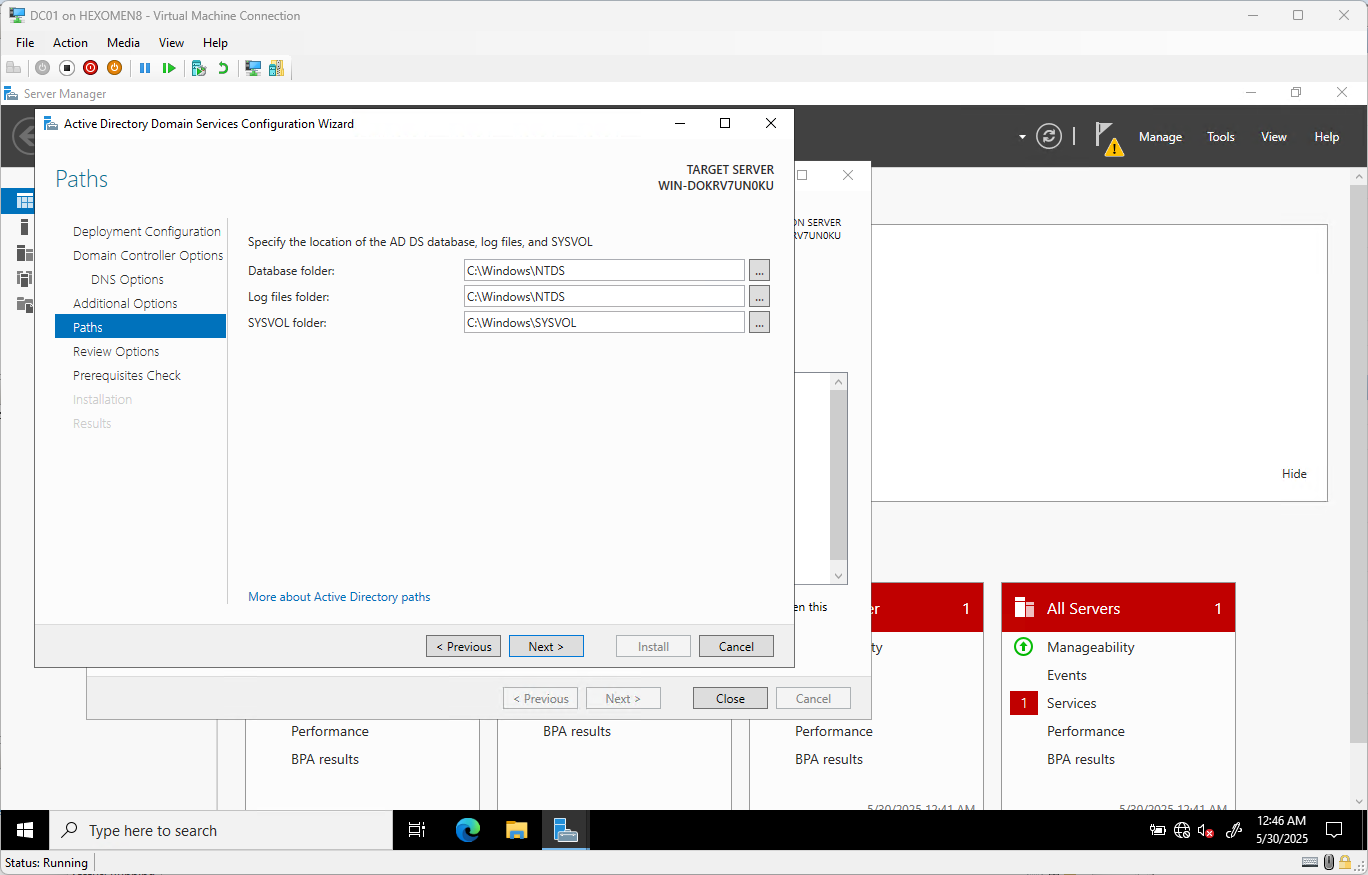
-
Review the installation information and click
Next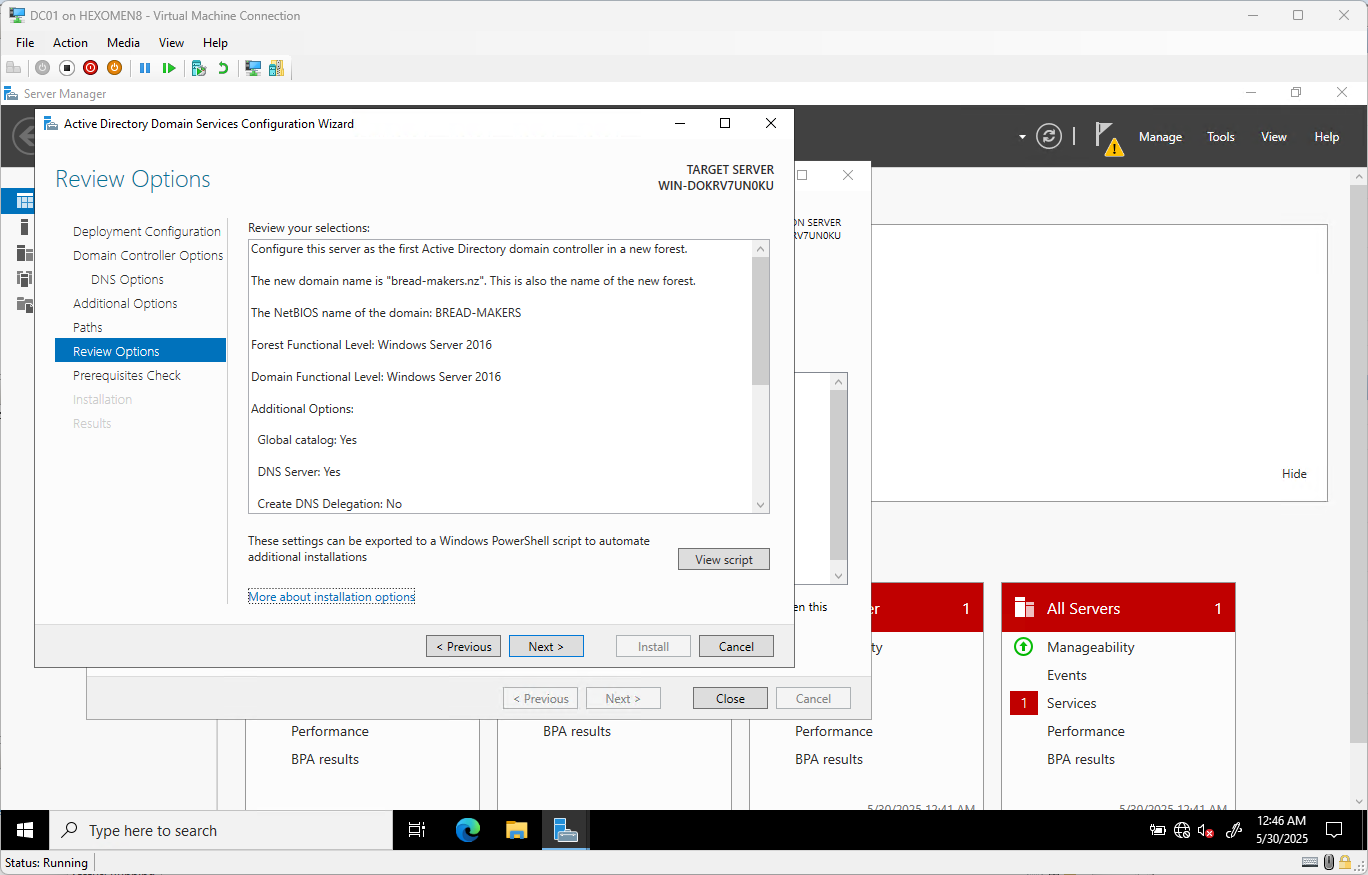
-
Once the prerequisite checks complete, click
Install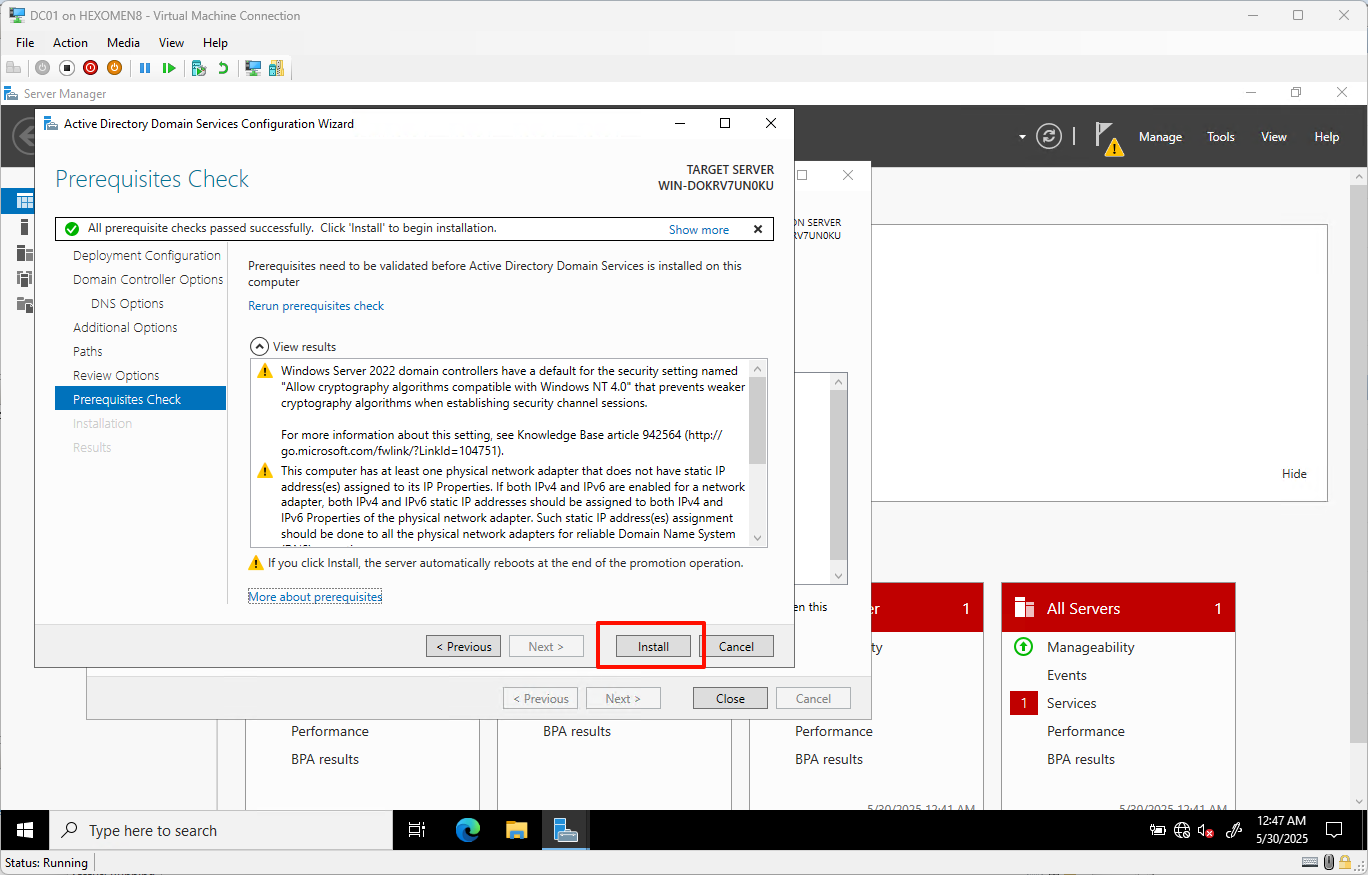
-
After installation finishes, the system will automatically restart – click
Closeto confirm the reboot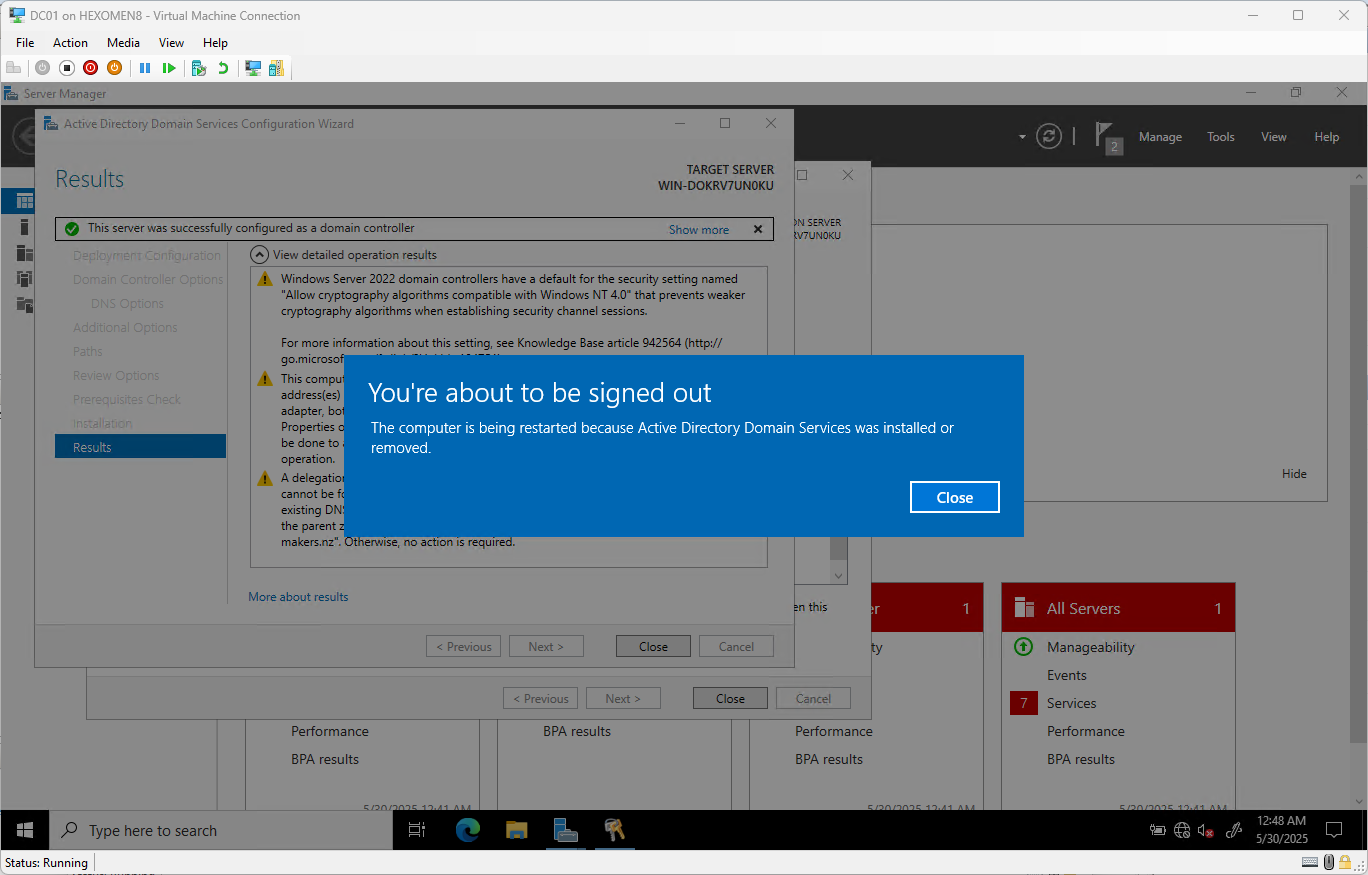
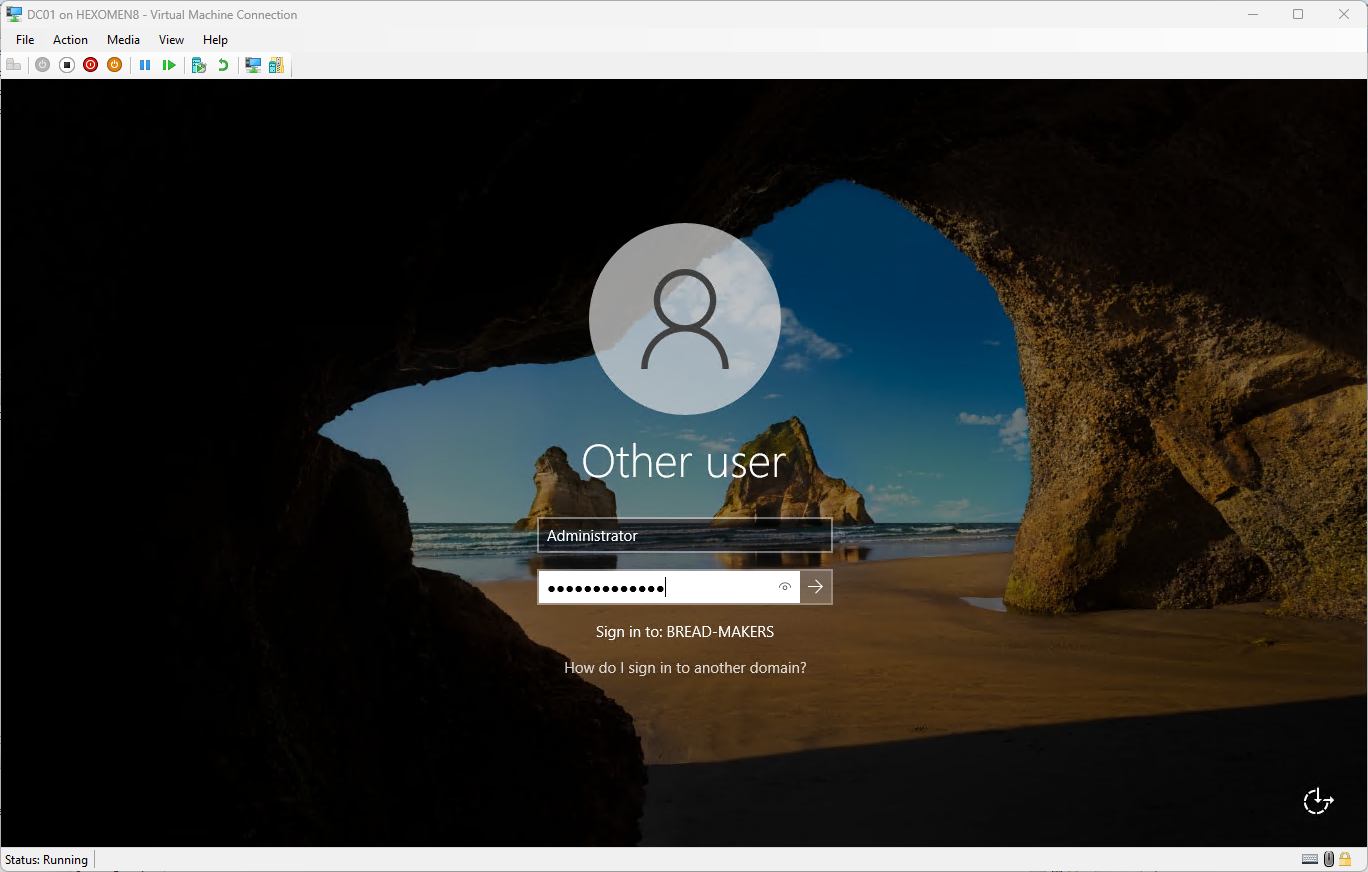
-
After rebooting, log in using the domain administrator account
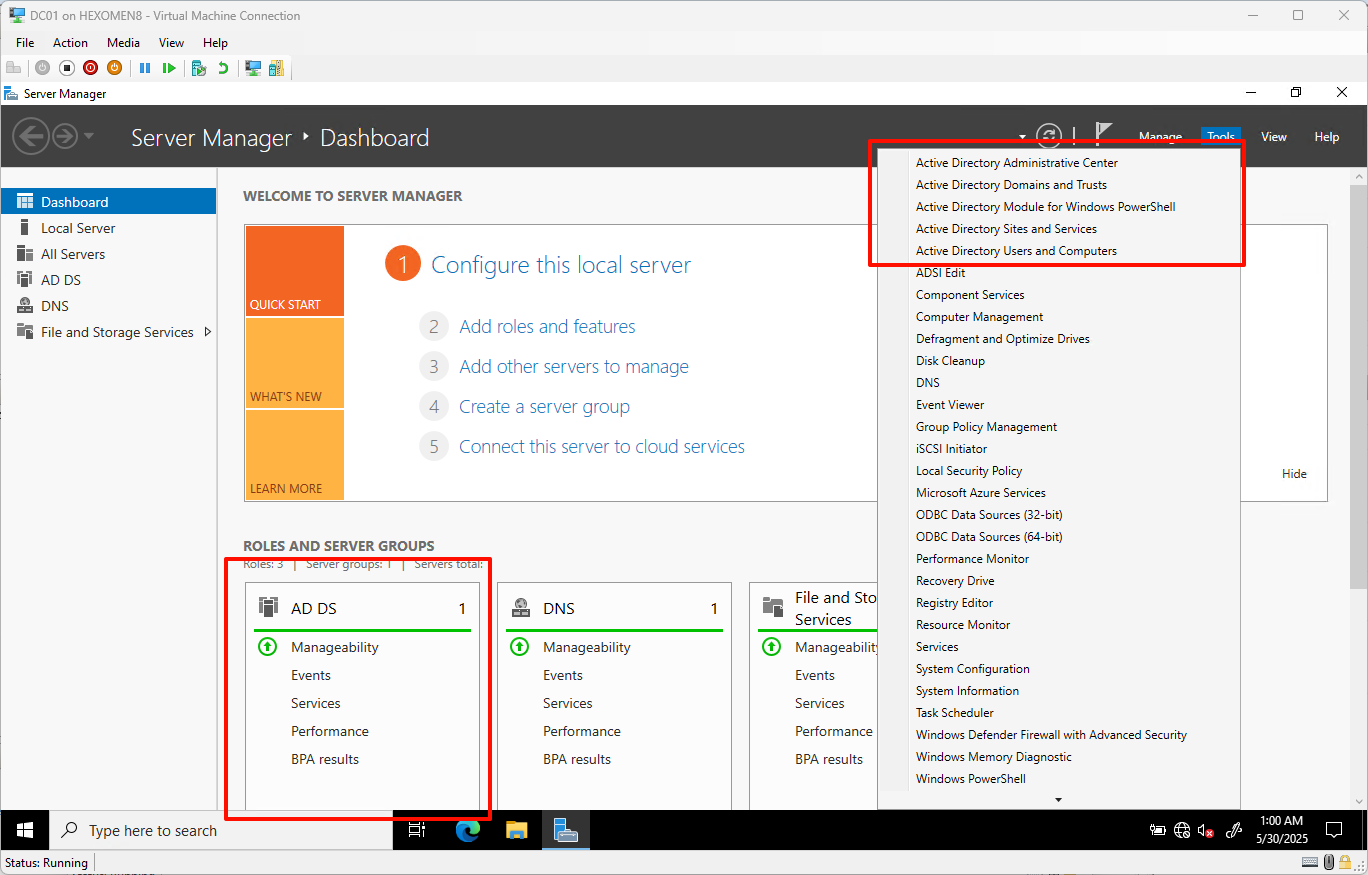
-
After logging in, you can see that the AD Domain Services have been successfully installed via Server Manager
Configure the Secondary AD Domain Controller (DC02)
The installation steps for the AD DS role are the same as for DC01 – refer to the previous section.
-
Click
Add a domain controller to an existing domain, enter the domain namebread-makers.nz, and clickNext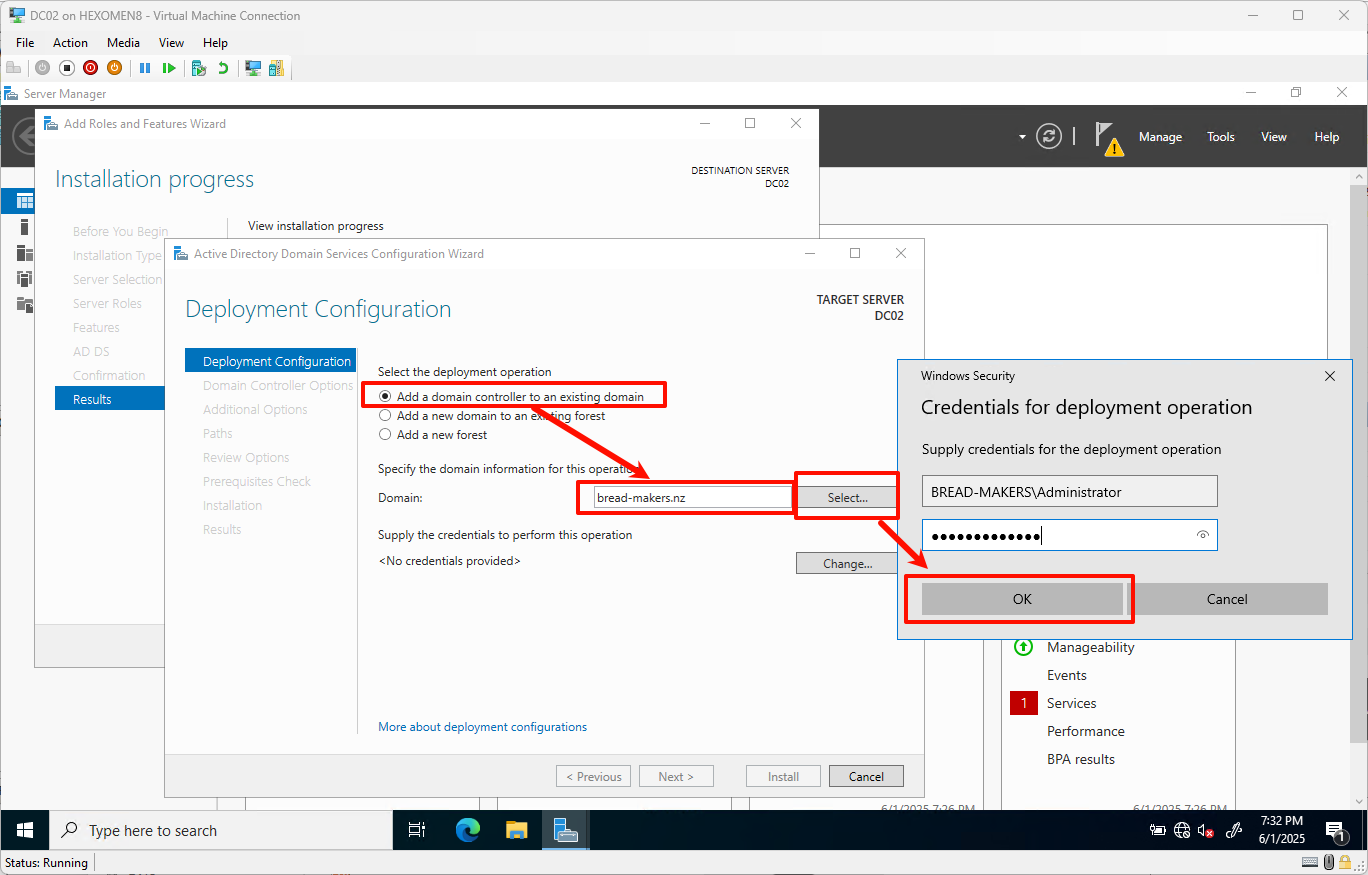
Note: You can view the domain administrator username on DC01:
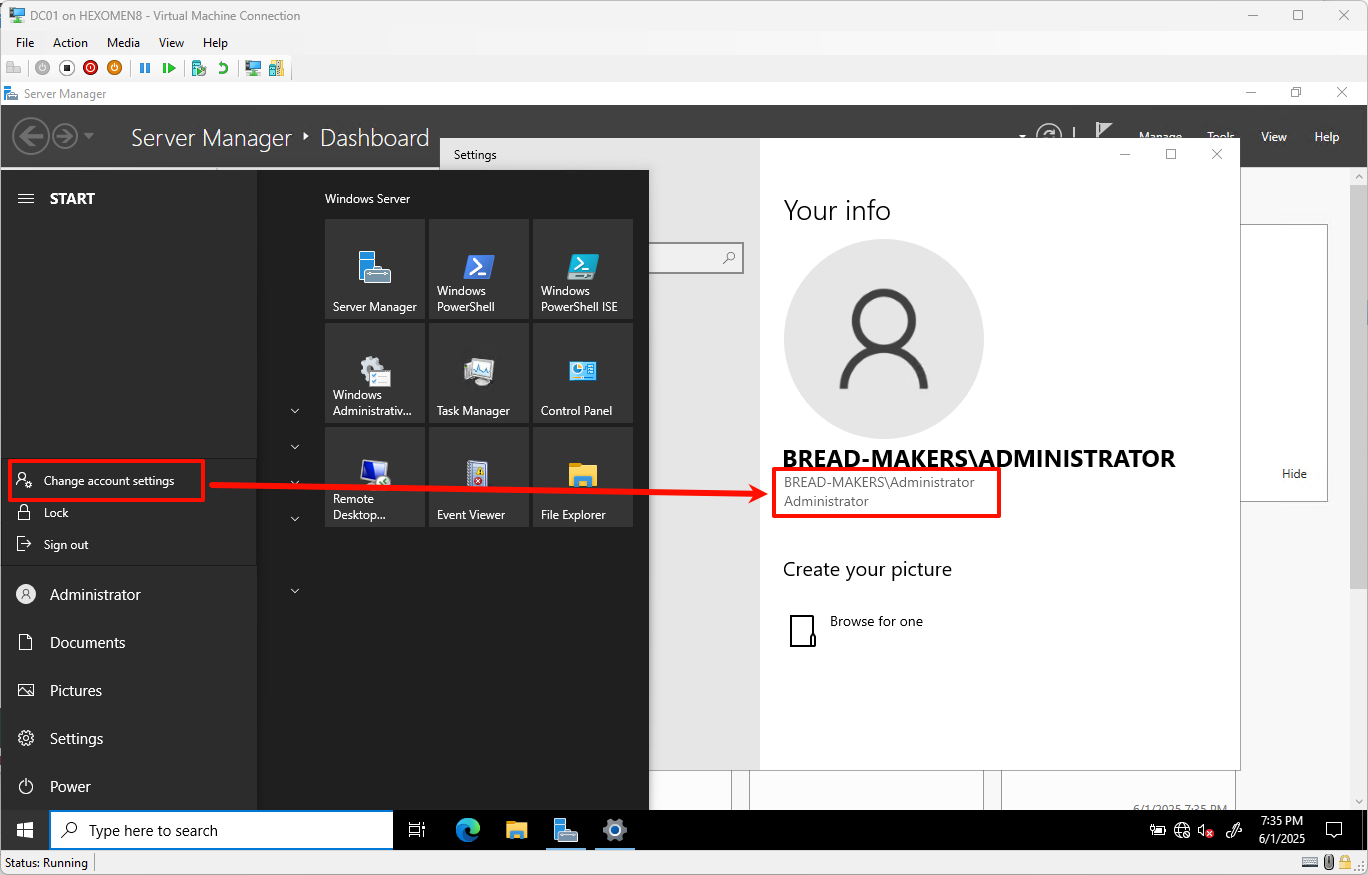
-
Enter the domain administrator password and click
OK. After verification, clickNext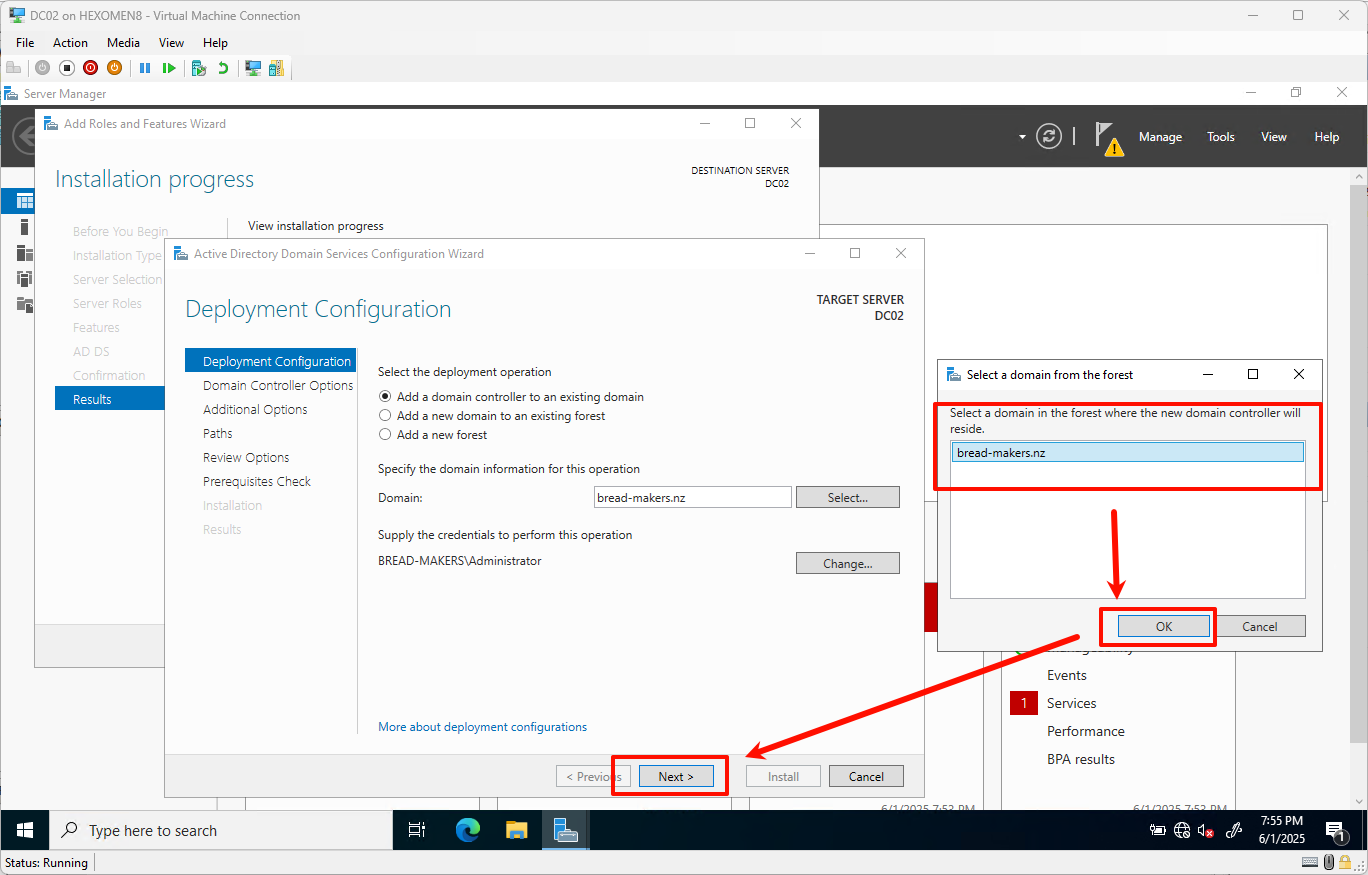
-
Set the DSRM password and click
Next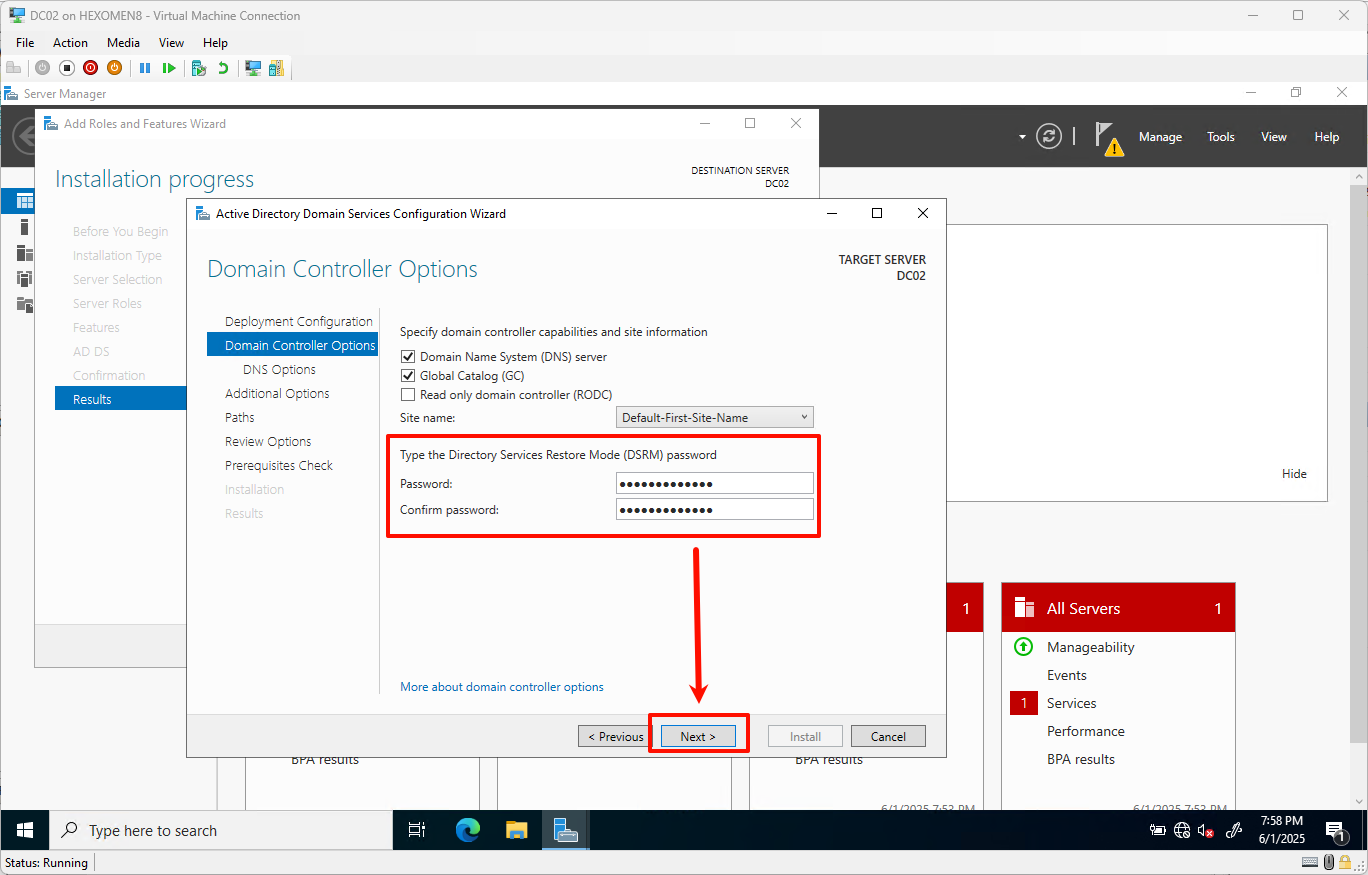
-
Leave DNS settings as default and click
Next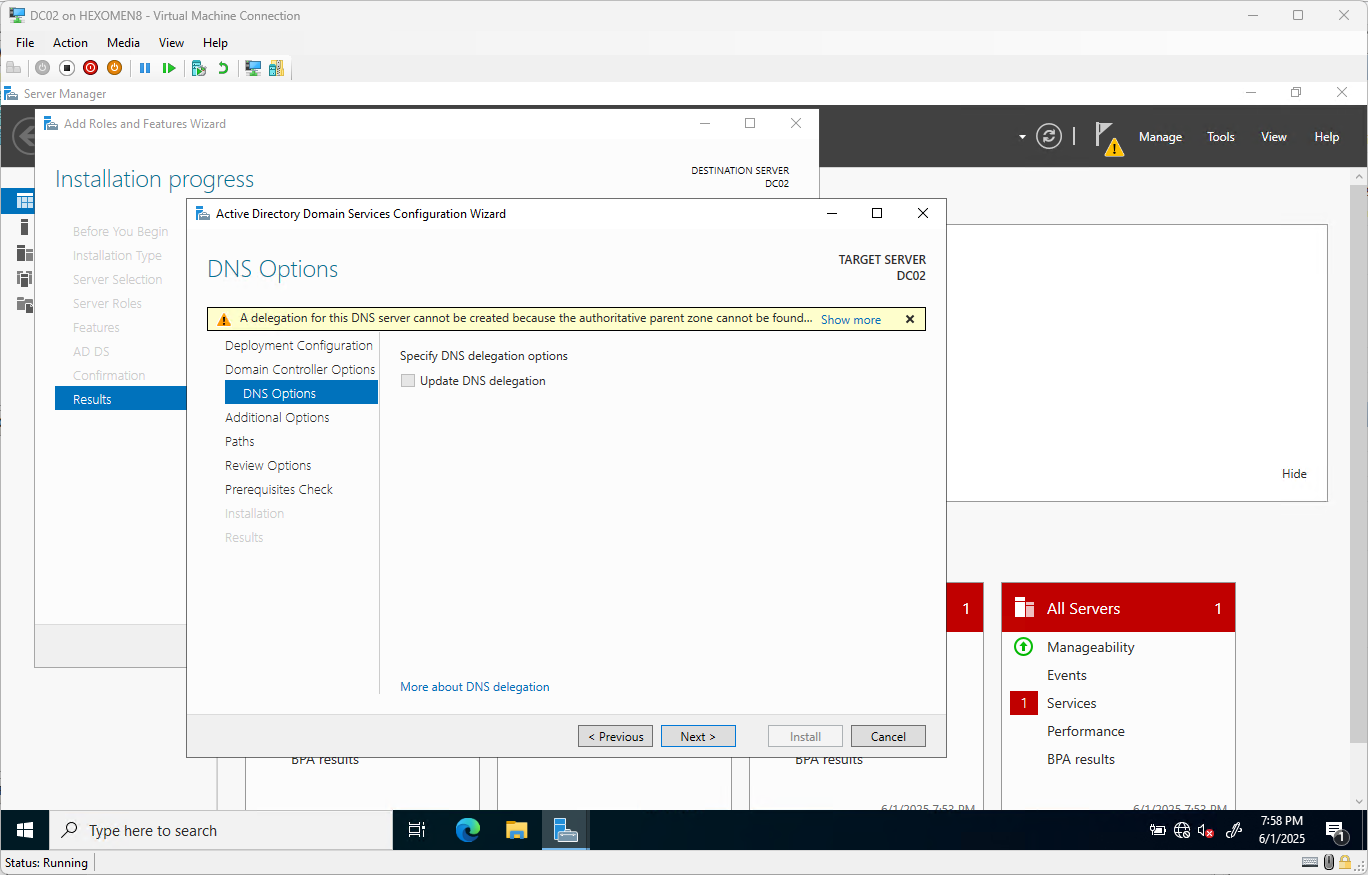
-
Leave additional options as default and click
Next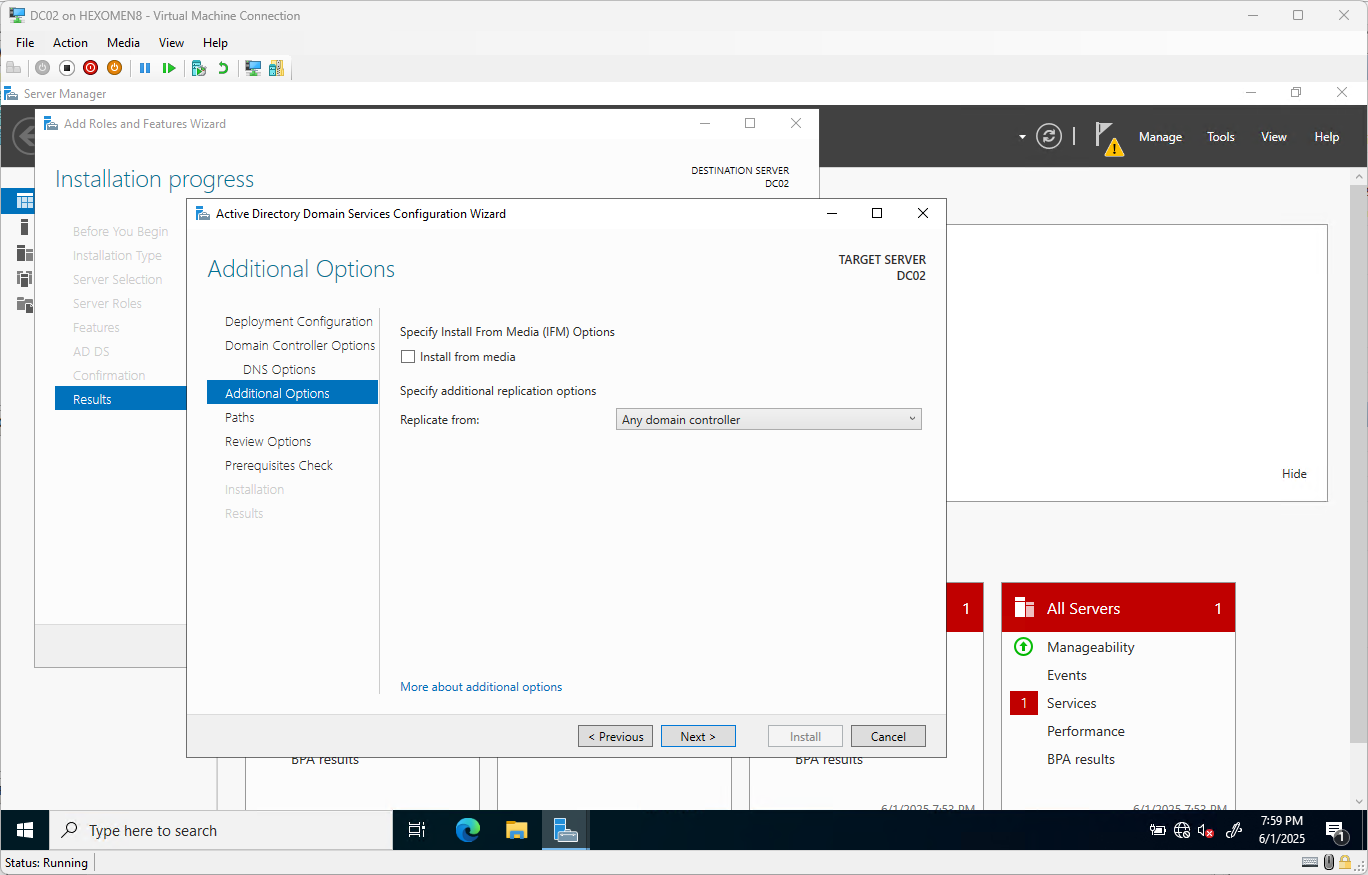
-
Leave the path settings as default and click
Next
-
Confirm the installation settings and click
Next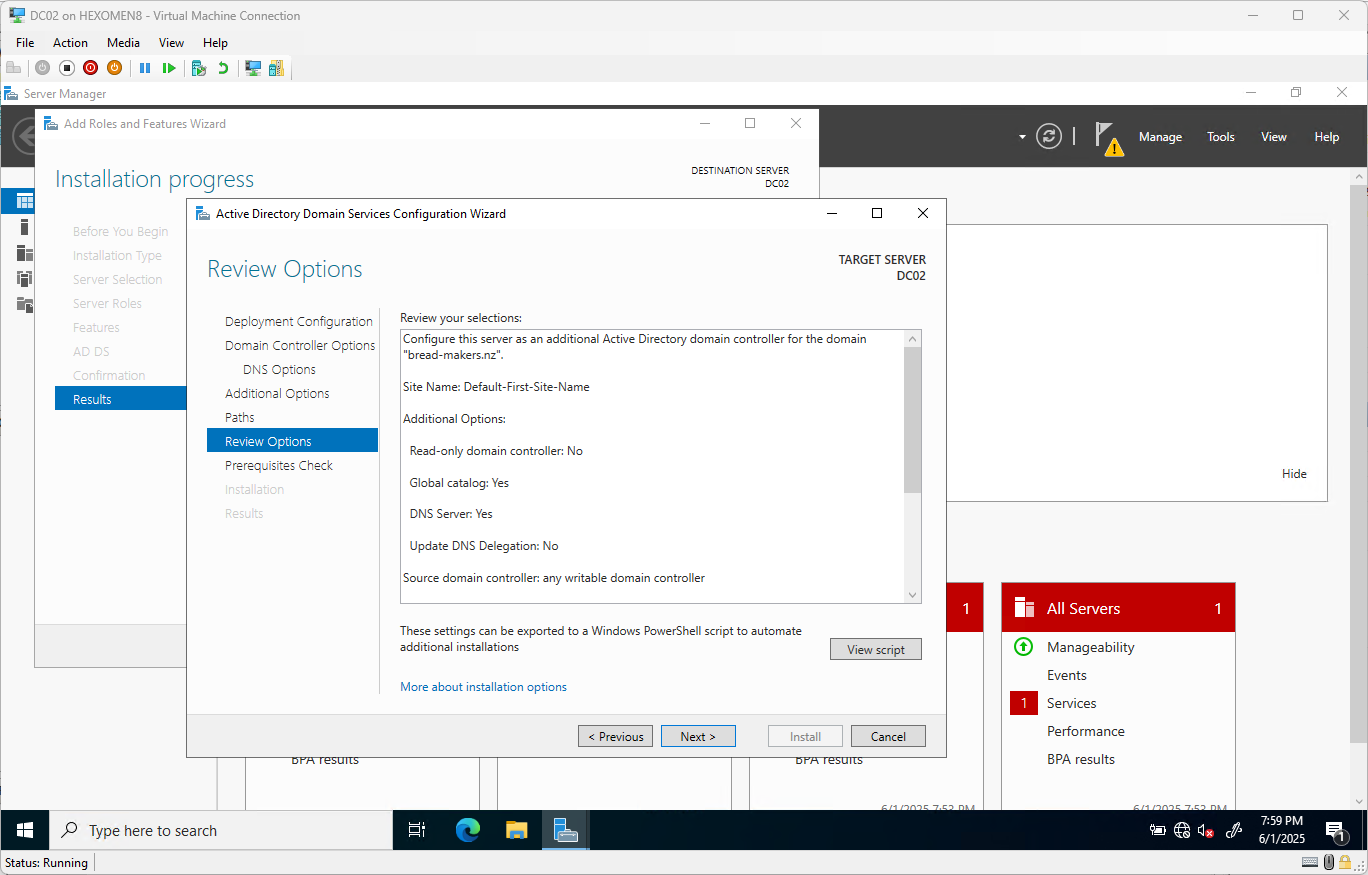
-
Once the prerequisite checks complete, click
Install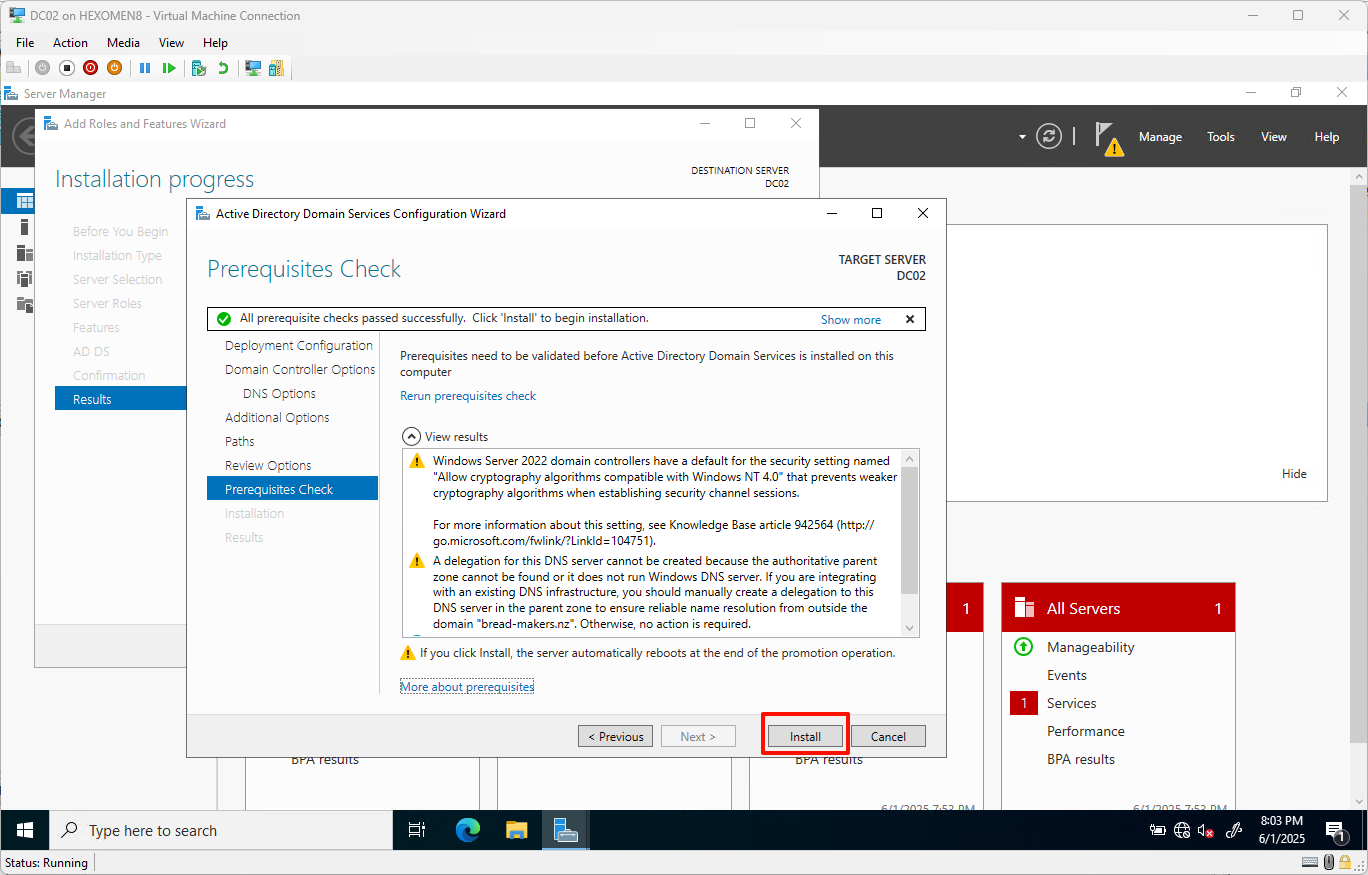
-
After installation finishes, the system will automatically restart – log in using the domain administrator account after reboot
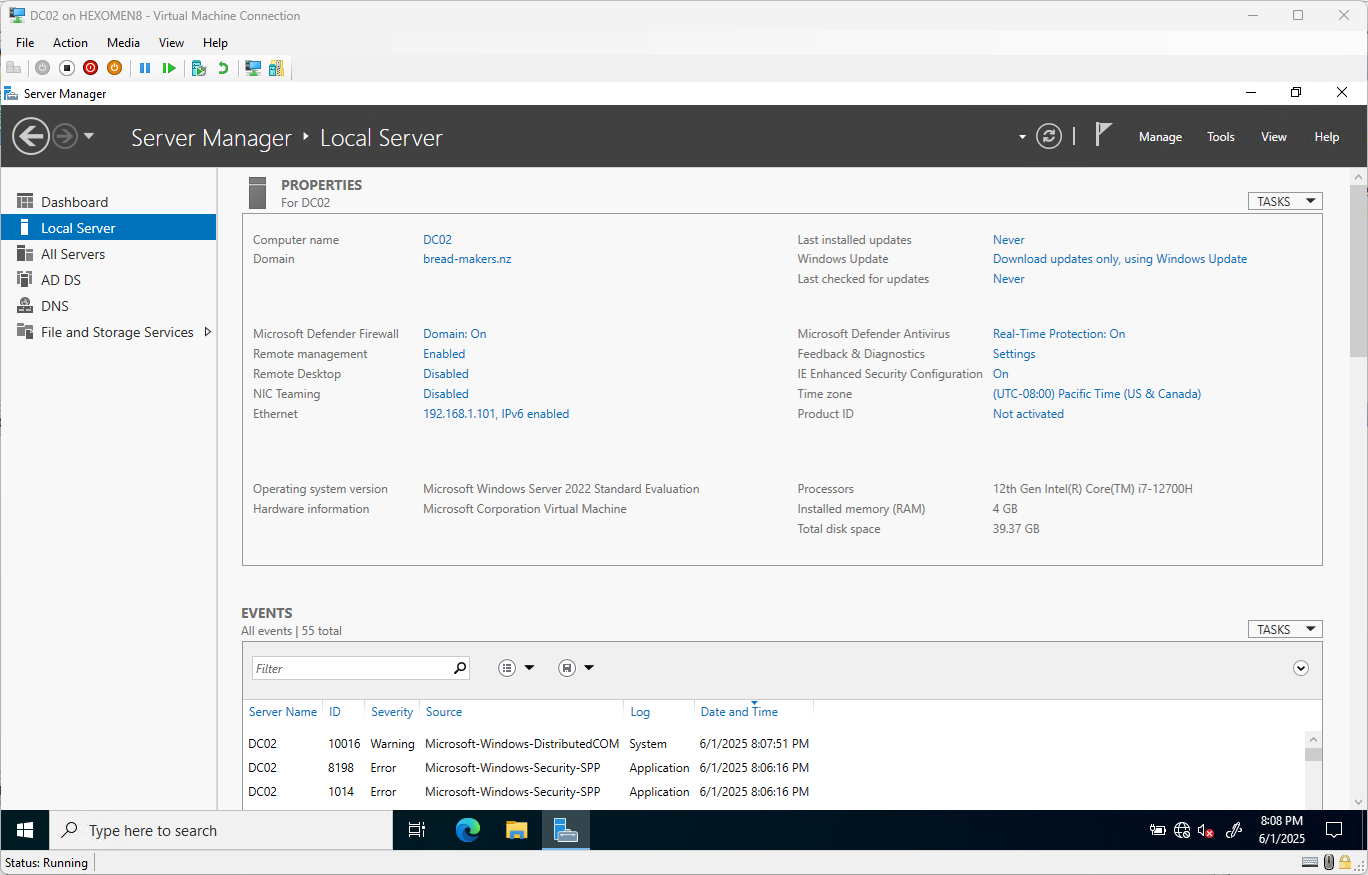
-
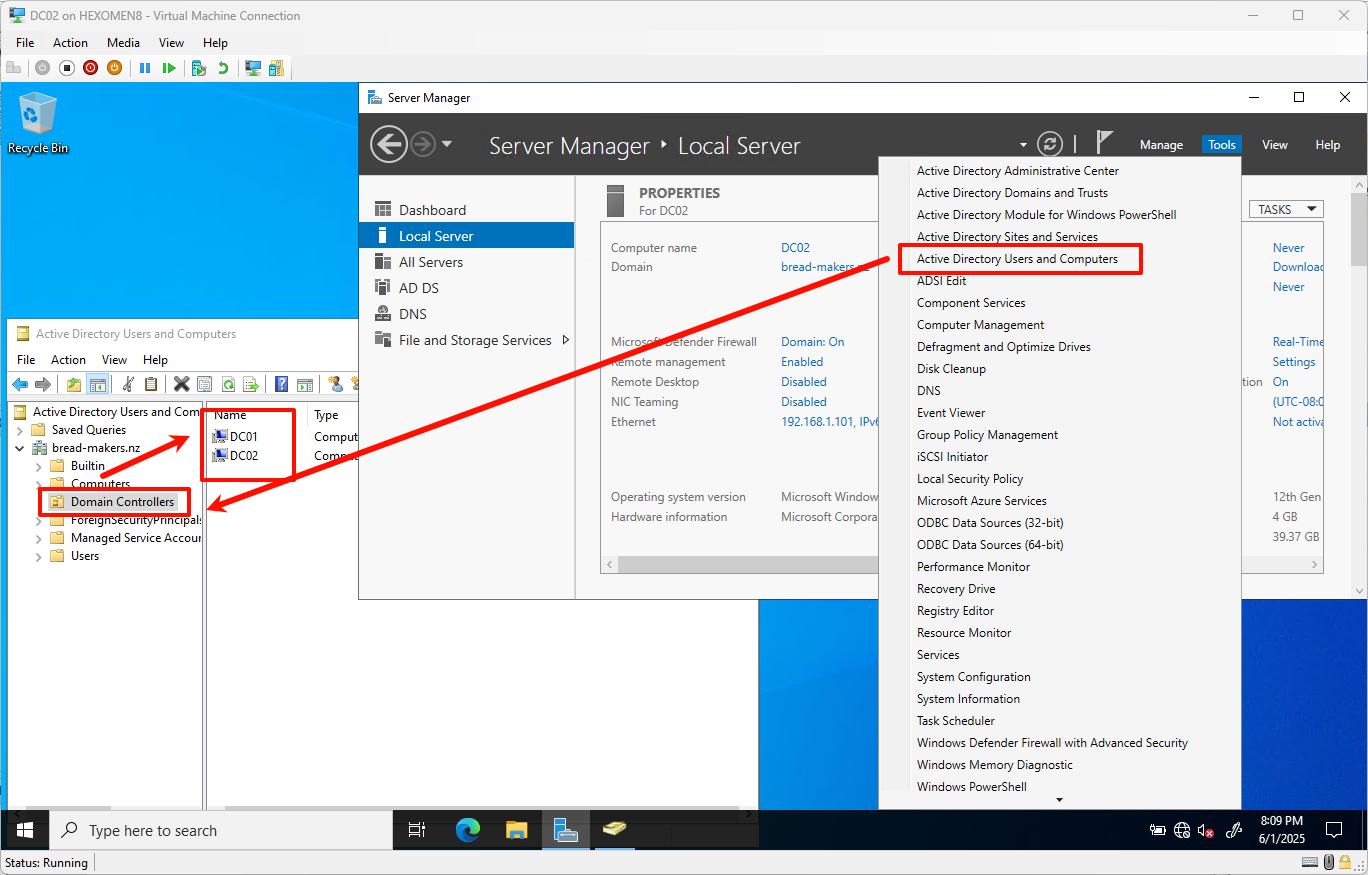
After logging in, open
Server Manager->Tools->Active Directory Users and Computerson any domain controller. You should now see both domain controllers listed under thebread-makers.nzdomain
Summary
In this chapter, we completed the following tasks:
- Assigned static IP addresses to all devices
- Installed and configured the primary domain controller (DC01)
- Installed and joined the secondary domain controller (DC02) to the domain
In the next chapter, we will continue by setting up the DHCP service to allow clients to automatically obtain IP addresses.