Enterprise Network Setup with Windows Server
A step-by-step guide to setting up an enterprise-level network environment using Hyper-V, Windows 10, and Windows Server 2022. Includes AD domain setup, DHCP, DFS, PowerShell automation, and more.
View the Project on GitHub hexwarrior6/Enterprise-Network-Setup-with-Windows-Server
Chapter 4: Configuring DFS File Sharing
In enterprise environments, file sharing and storage management are critical tasks. In this chapter, we will use the Distributed File System (DFS) feature to configure namespaces and replication on DC01 and DC02, enabling a highly available file sharing service.
Install DFS Role (on both DC01 and DC02)
- Open
Server Manager->Add Roles and Features
On the Server Roles page, check the following two options:- DFS Namespaces
- DFS Replication
Click
Add Features, then clickNext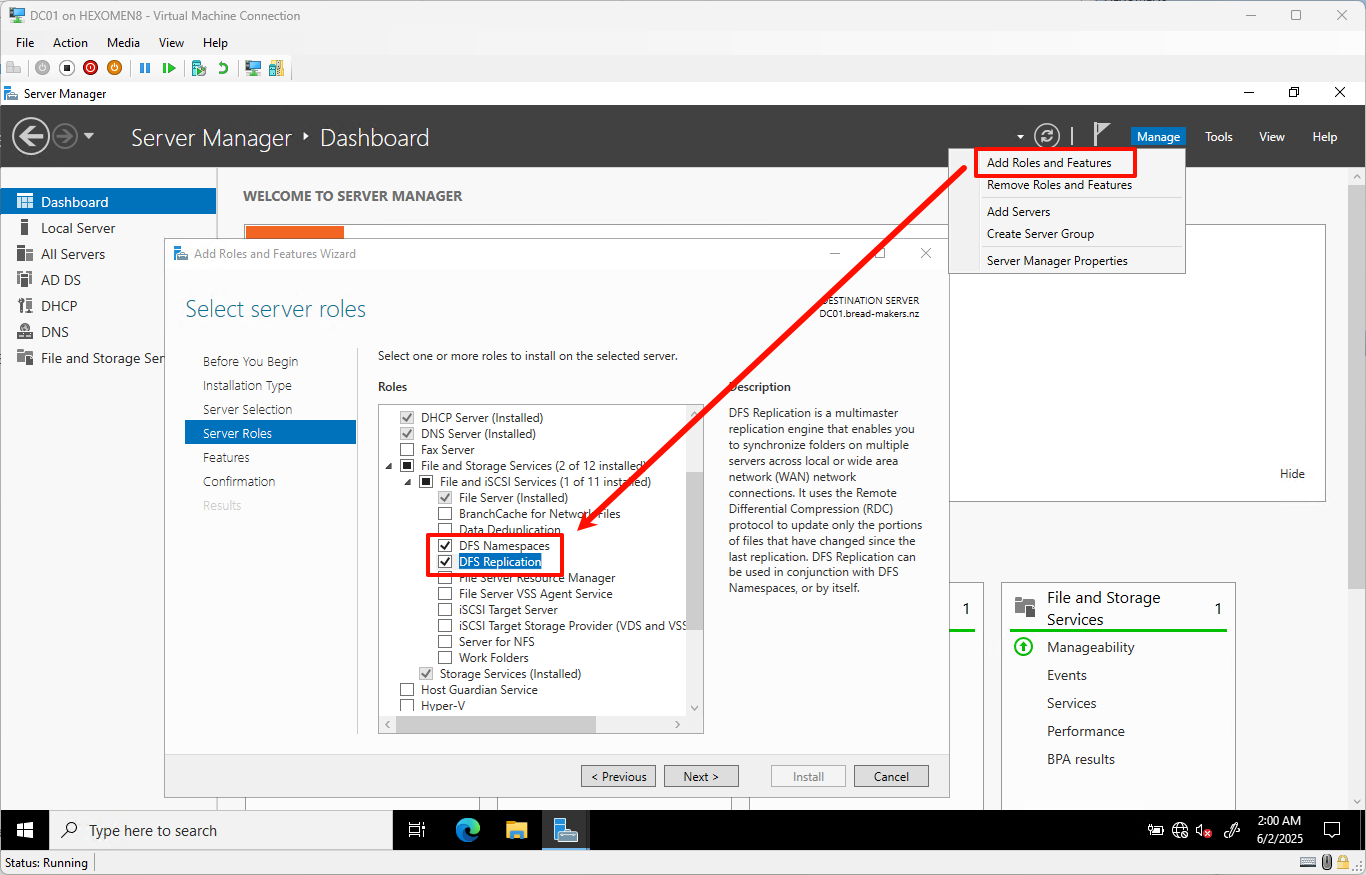
-
Proceed to the Confirmation panel and click
Installto begin installation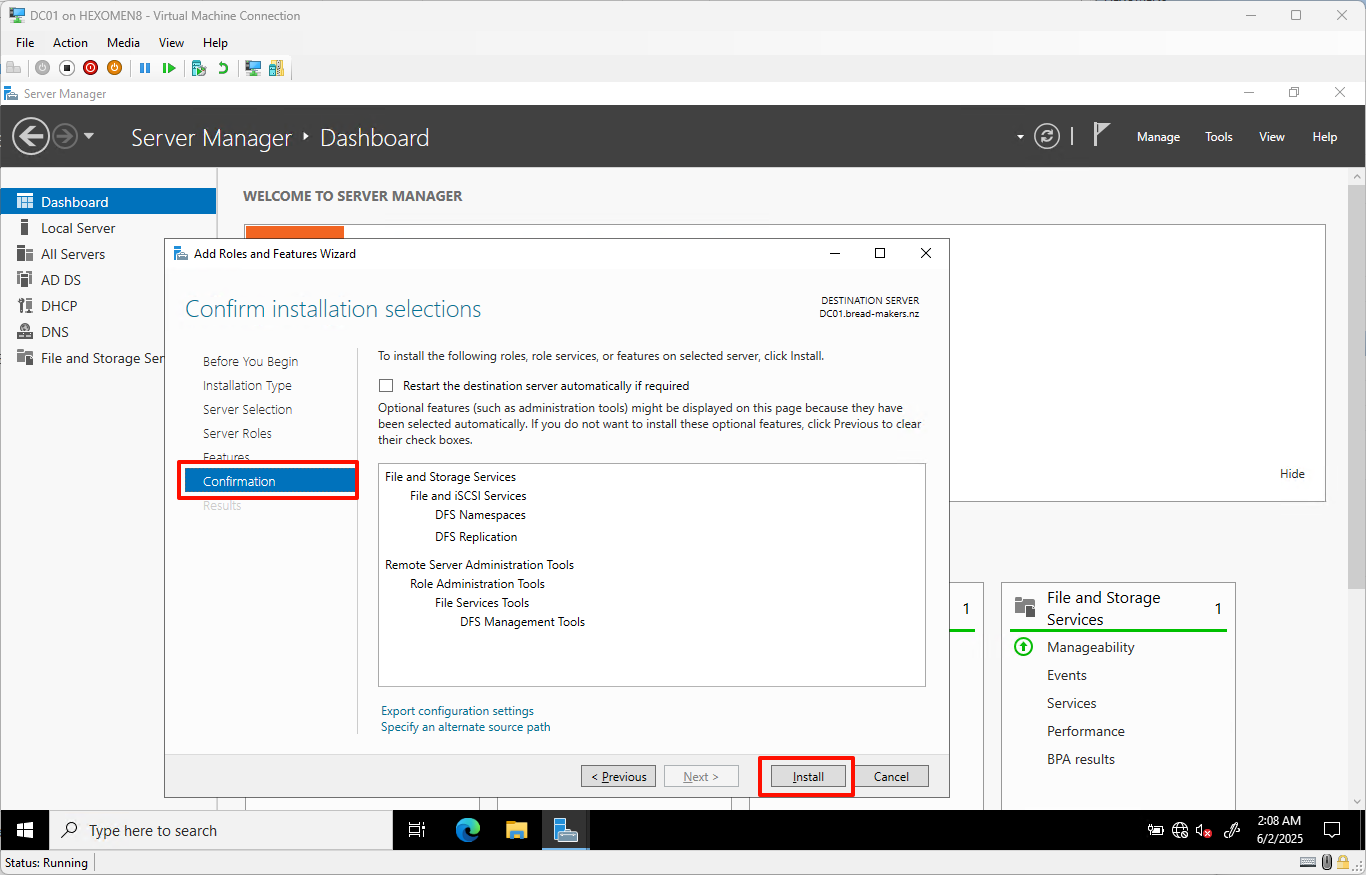
-
After installation completes, click
Closeto finish the process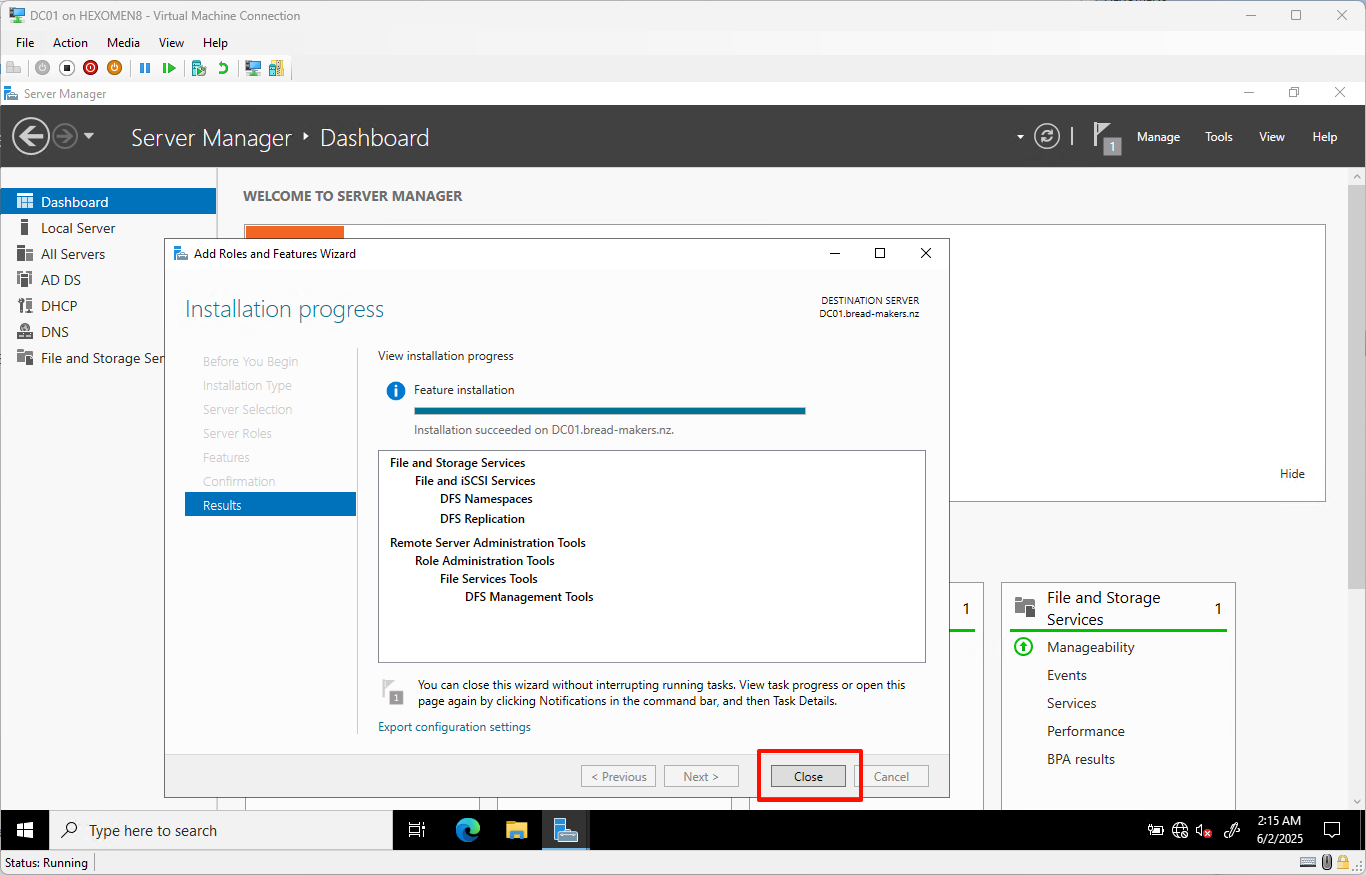
Configure DFS Namespace
-
On DC01, open
Server Manager->Tools->DFS Management
Right-click onNamespaceson the left and selectNew Namespace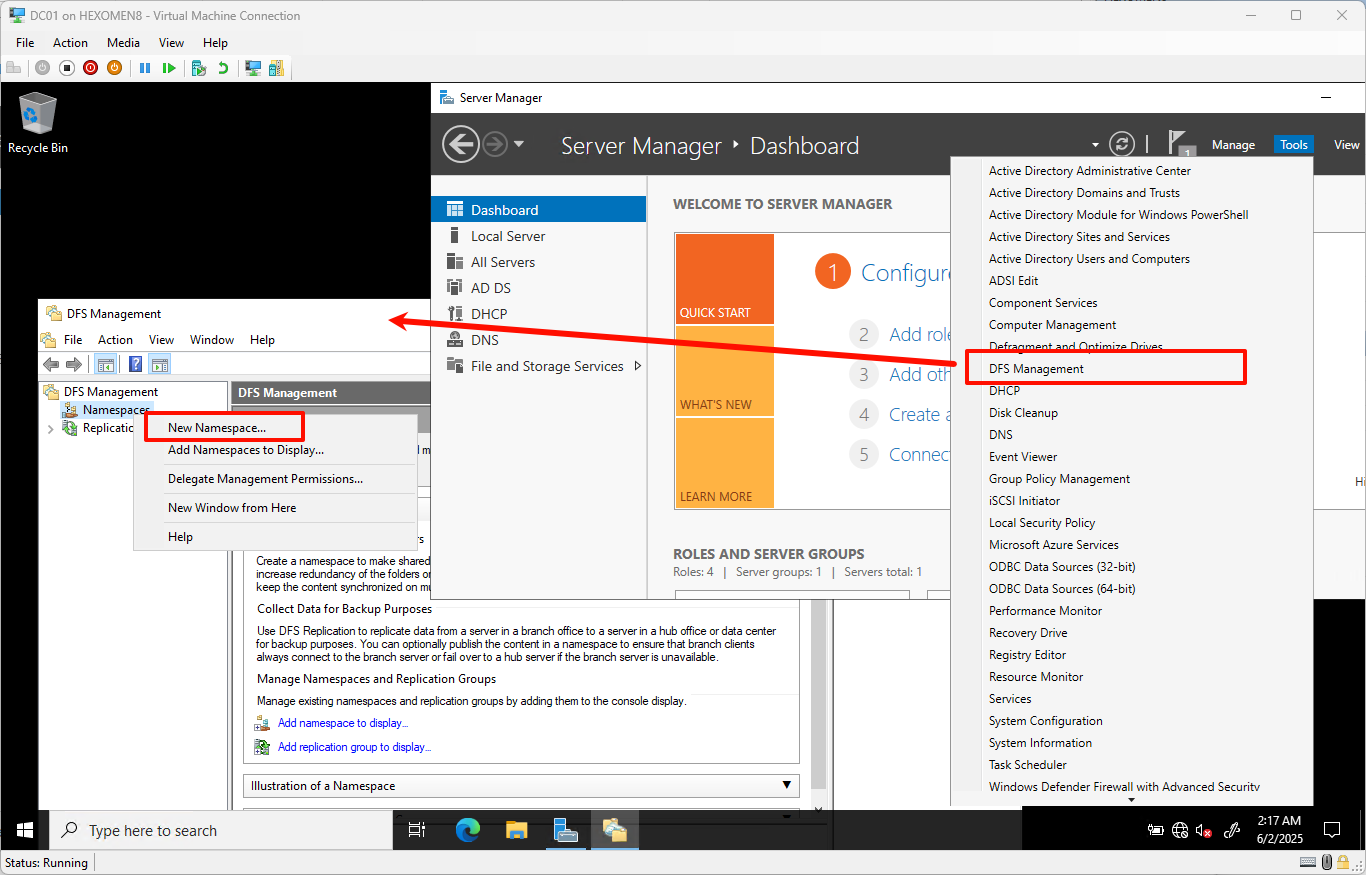
-
In the New Namespace Wizard, select DC01 as the host server and click
Next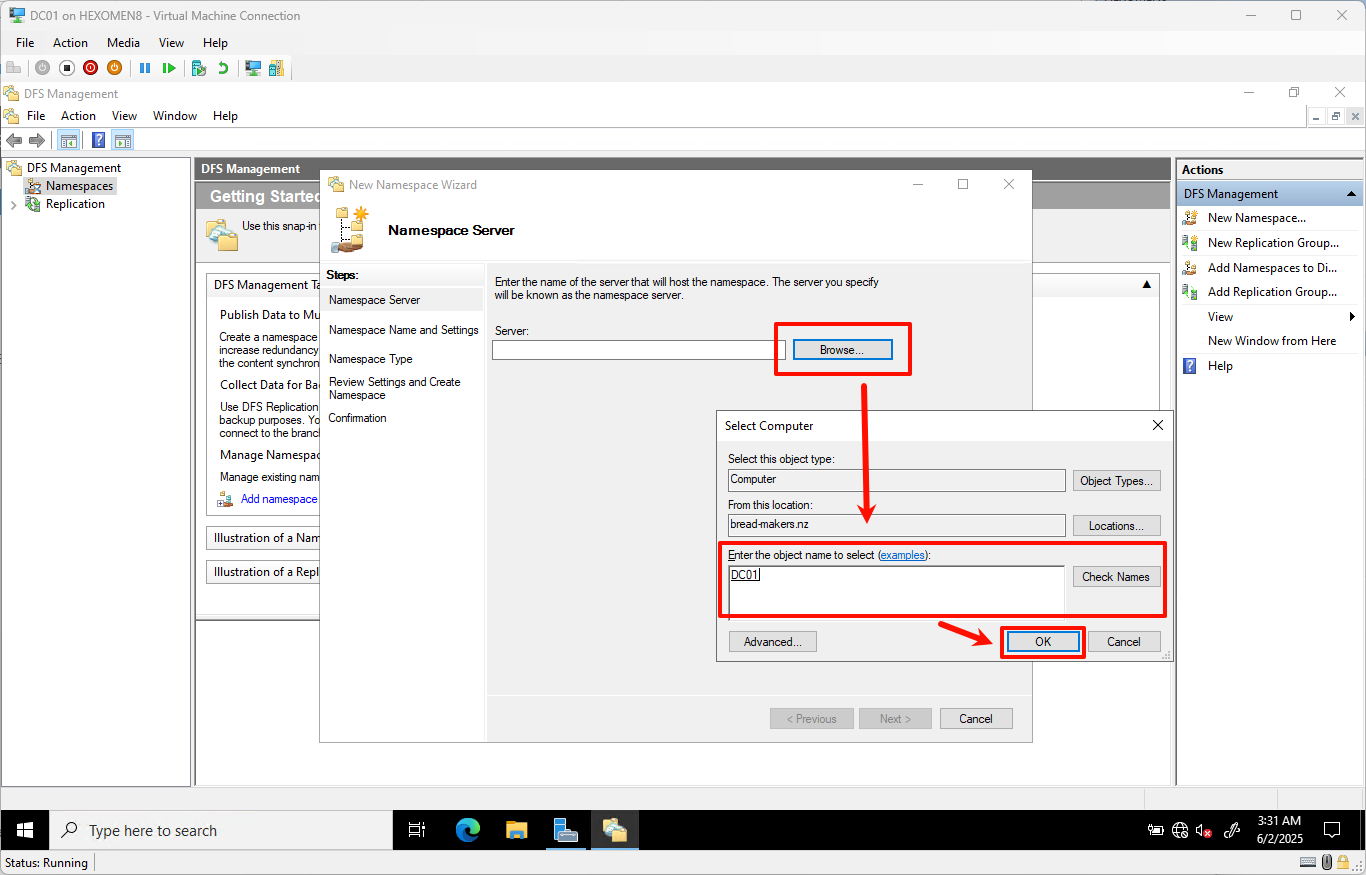
- Enter a namespace name such as
bread-makers DFS
ClickEdit Settingsto specify the physical path on the server (default isC:\DFSRoots\Namespace Name)
Choose share permissions based on your needs:- If users need read/write access, select All users have read and write permissions
- For read-only access, choose All users have read-only permissions
Click
Nextafter configuration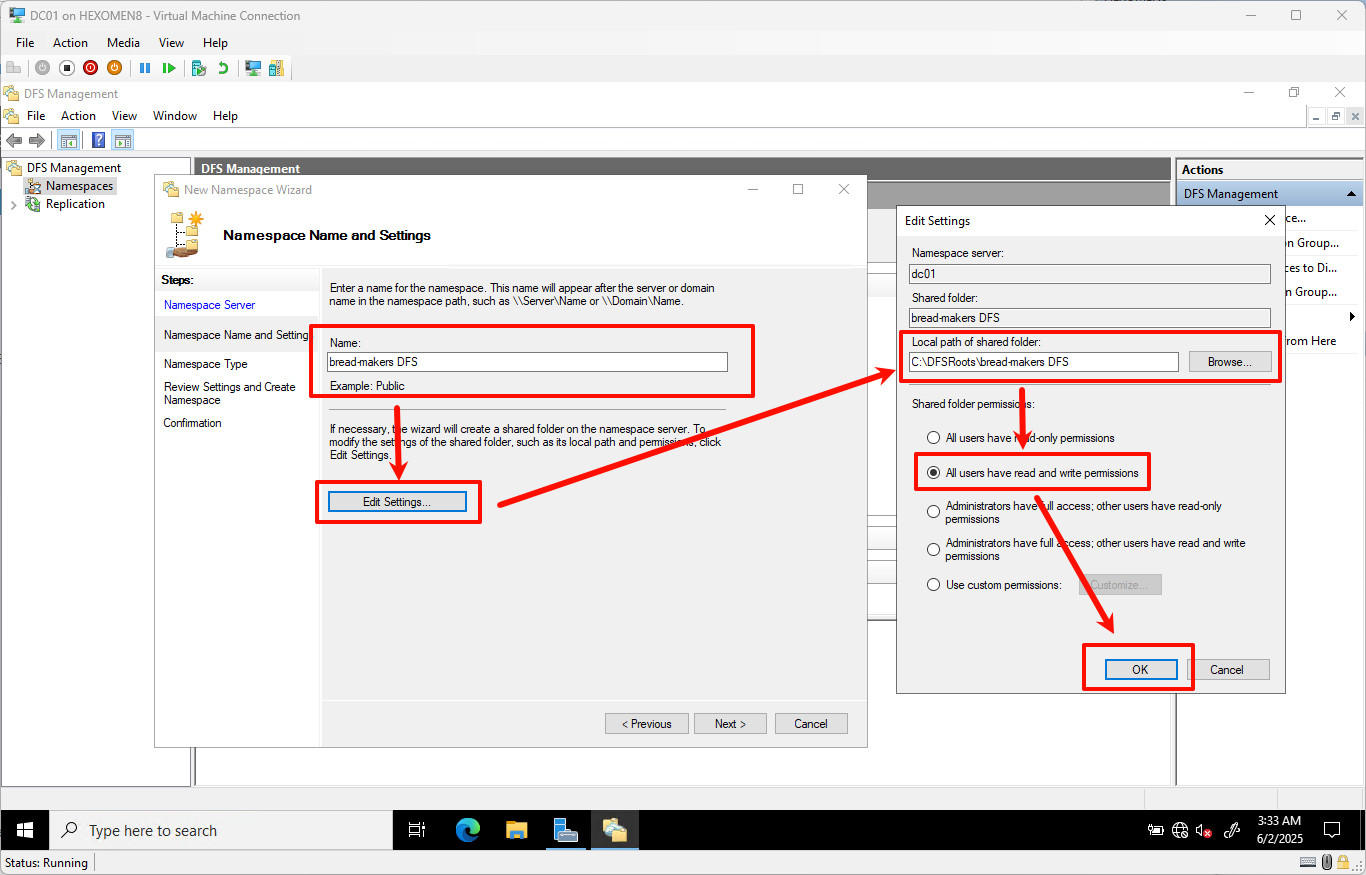
-
Leave the type as default (Stand-Alone Namespace) and click
Next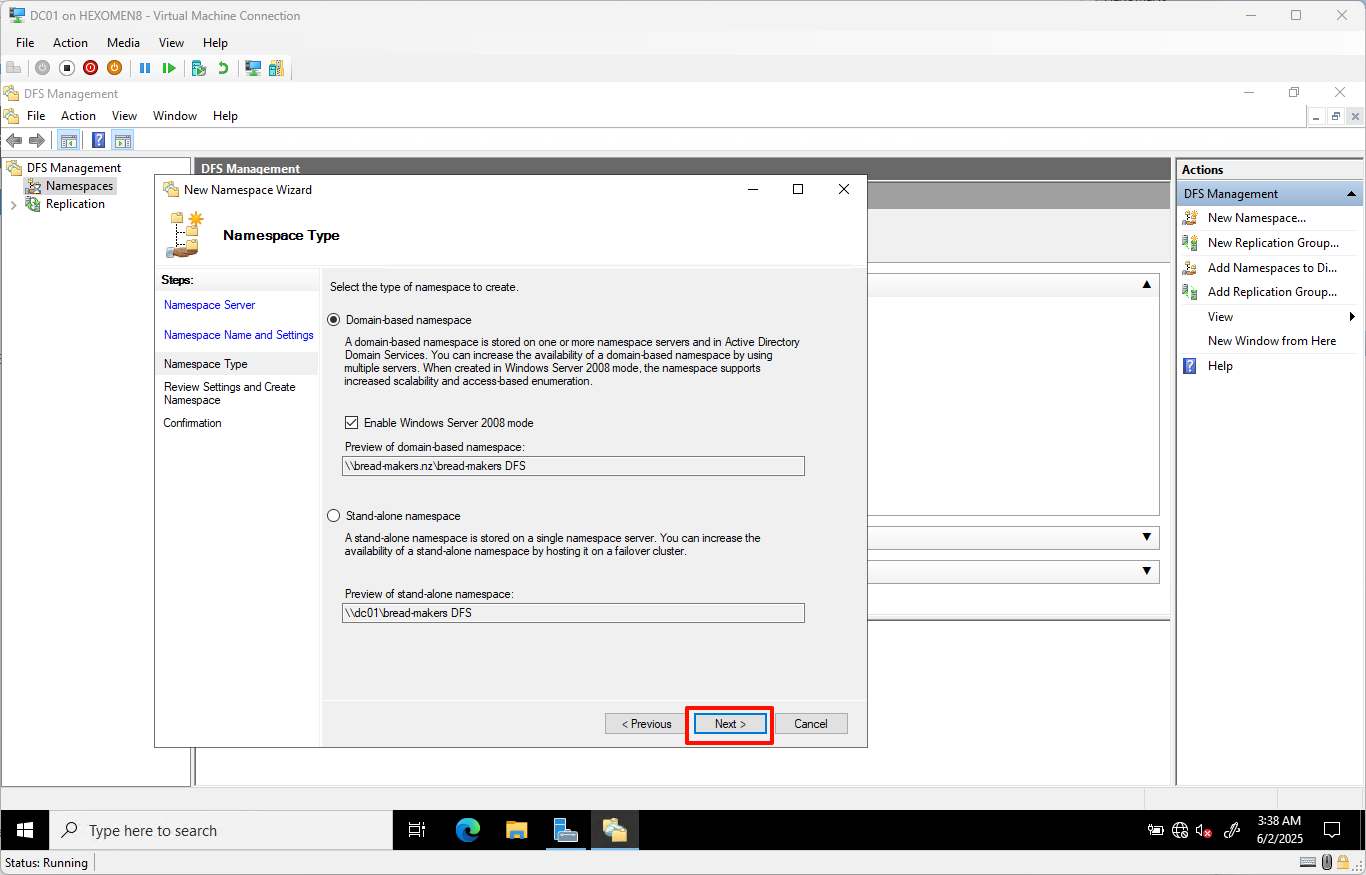
-
Review the settings and click
Create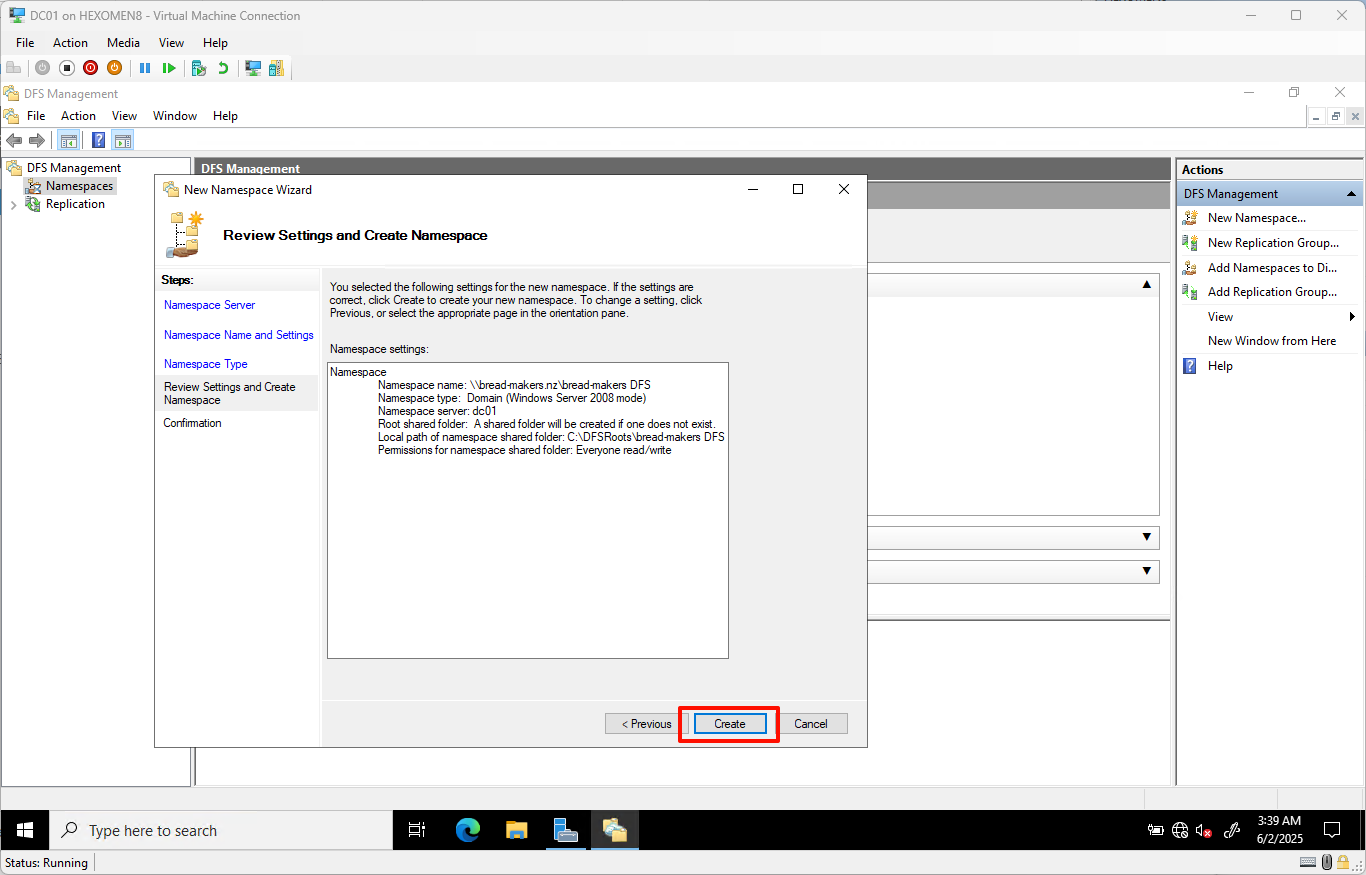
- Once created, click
Close
✅ Verification Steps:
-
Local File Path Verification:
Open File Explorer and navigate toC:\DFSRoots\bread-makers DFSto see the physical folder associated with the namespace.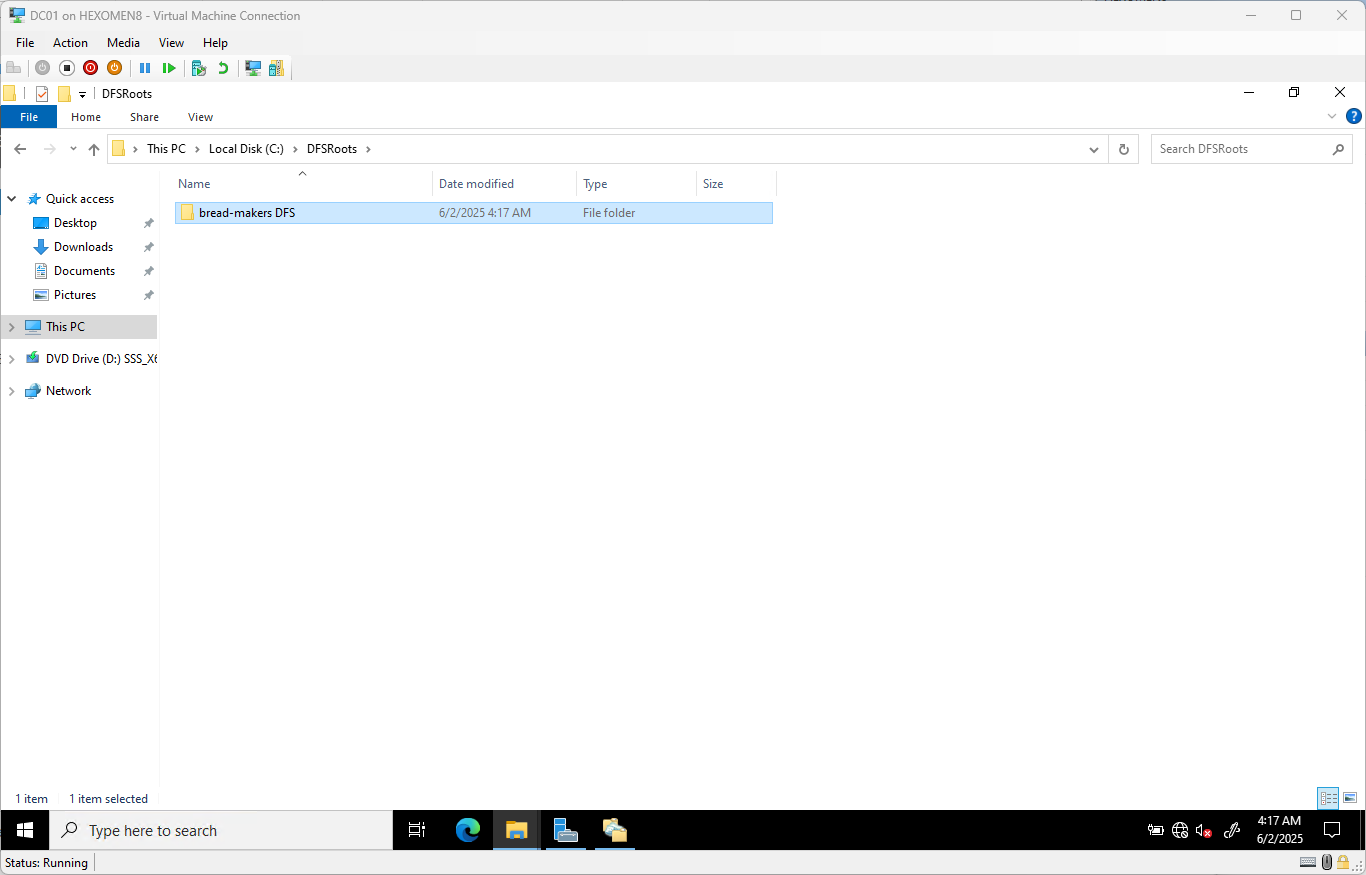
-
Network Access Verification:
In the address bar of File Explorer, type\\bread-makers.nzand press Enter. You should see the newly created DFS shared directory.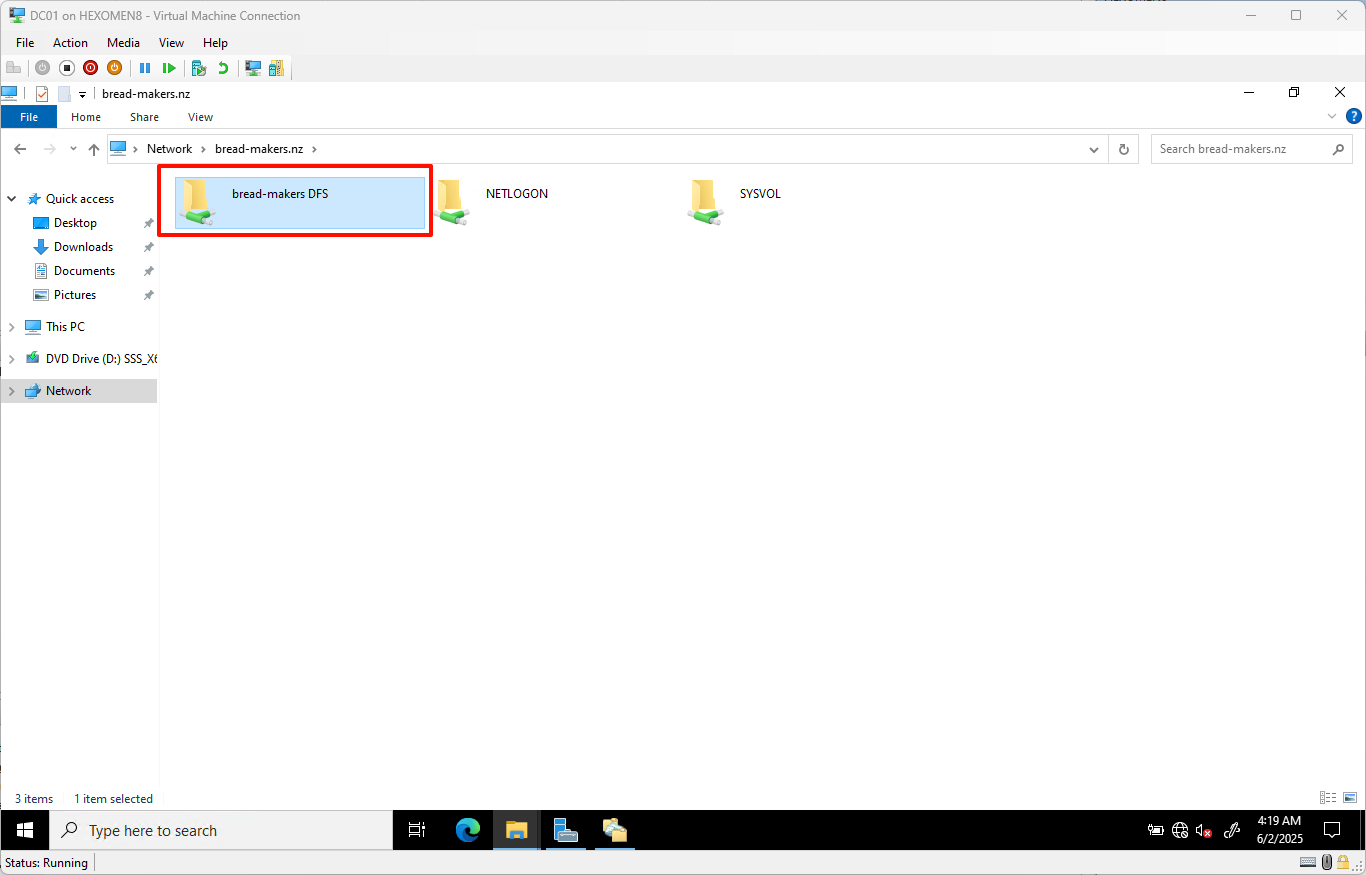
Add Second DFS Namespace Server (DC02)
-
In
DFS Managementon DC01, right-click the previously created namespace and selectAdd Namespace Server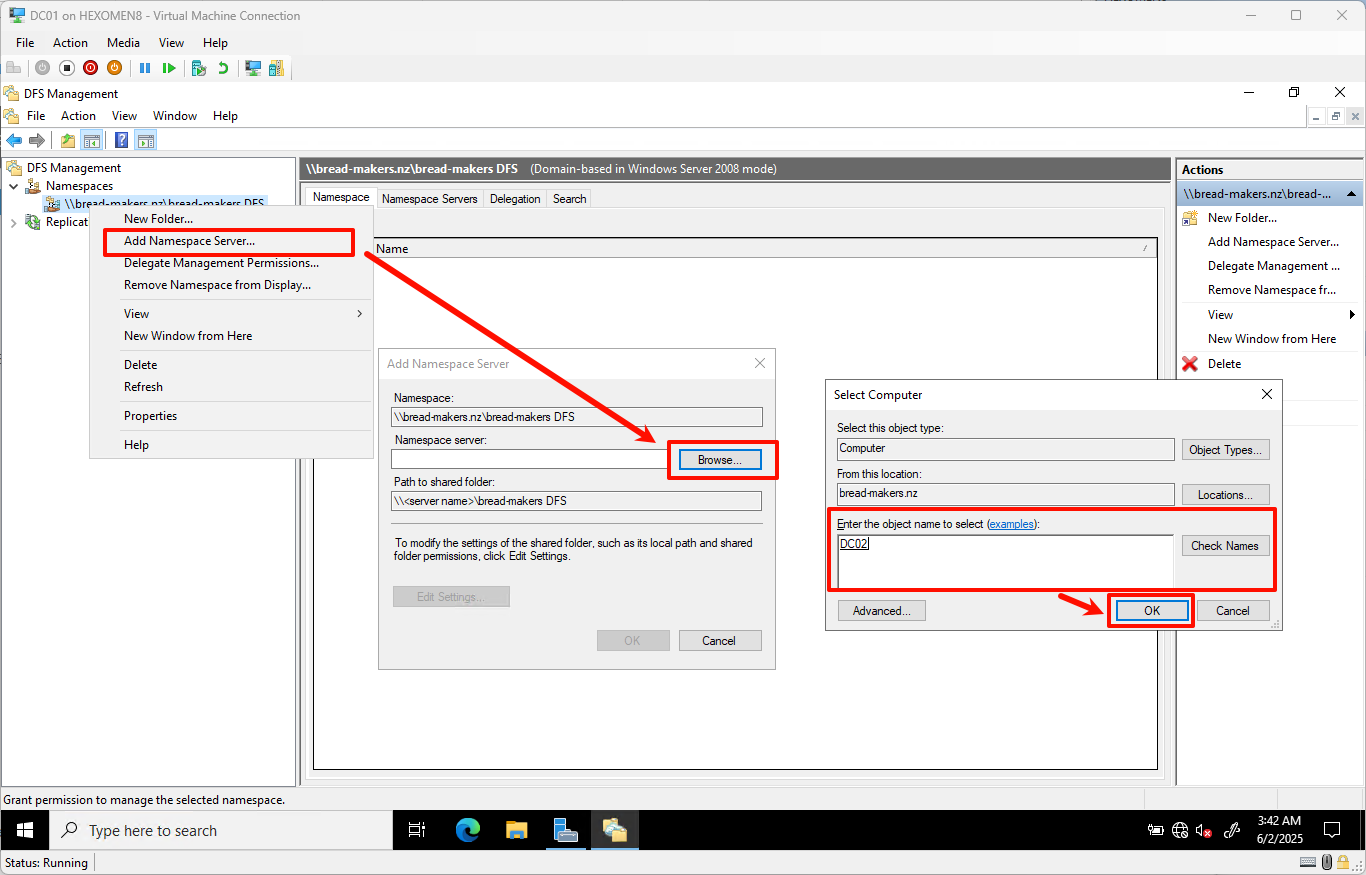
-
Click
Browse, enterDC02, and clickCheckto verify server status
ClickEdit Settingsagain, and set the same physical path (default is fine) and share permissions
After configuration, click allOKbuttons to complete the addition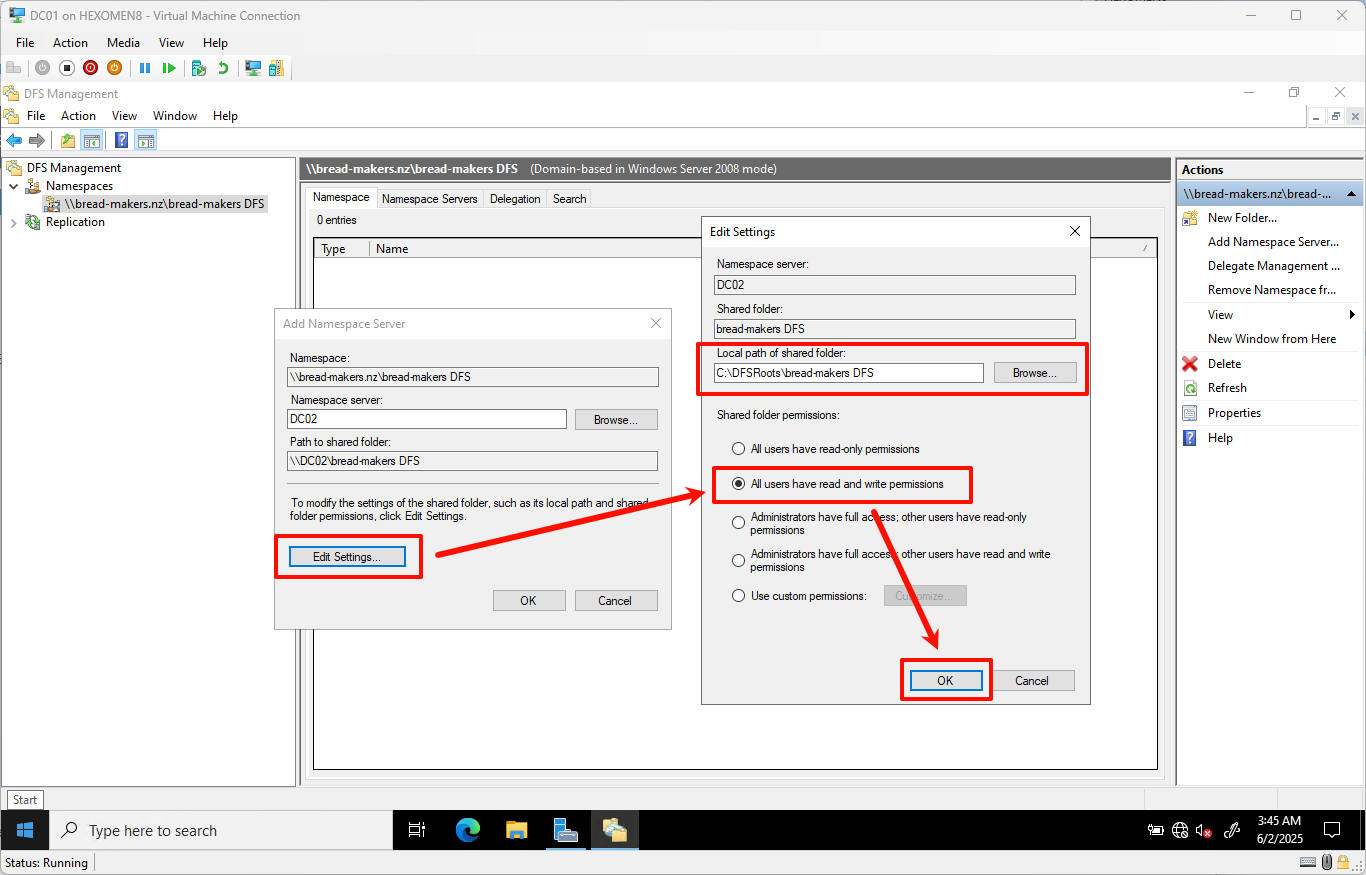
✅ Verification Steps:
-
In the
DFS Managementwindow, go into the namespace and switch to the Namespace tab
You should now see both DC01 and DC02 listed under the namespace servers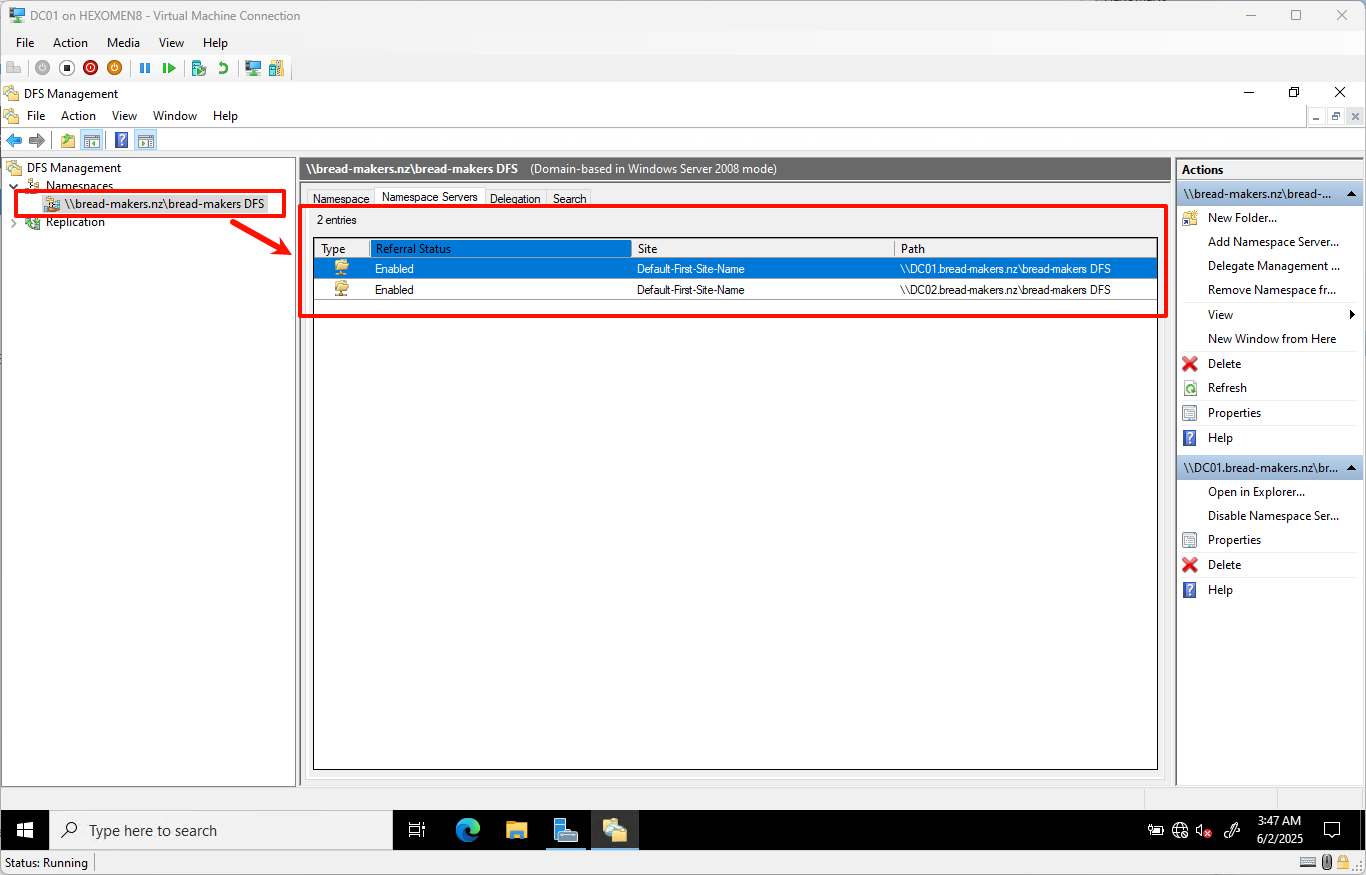
-
In File Explorer, type
\\bread-makers.nzin the address bar and press Enter
Right-click the namespace folder ->Properties->DFStab
Check if information for both servers is displayed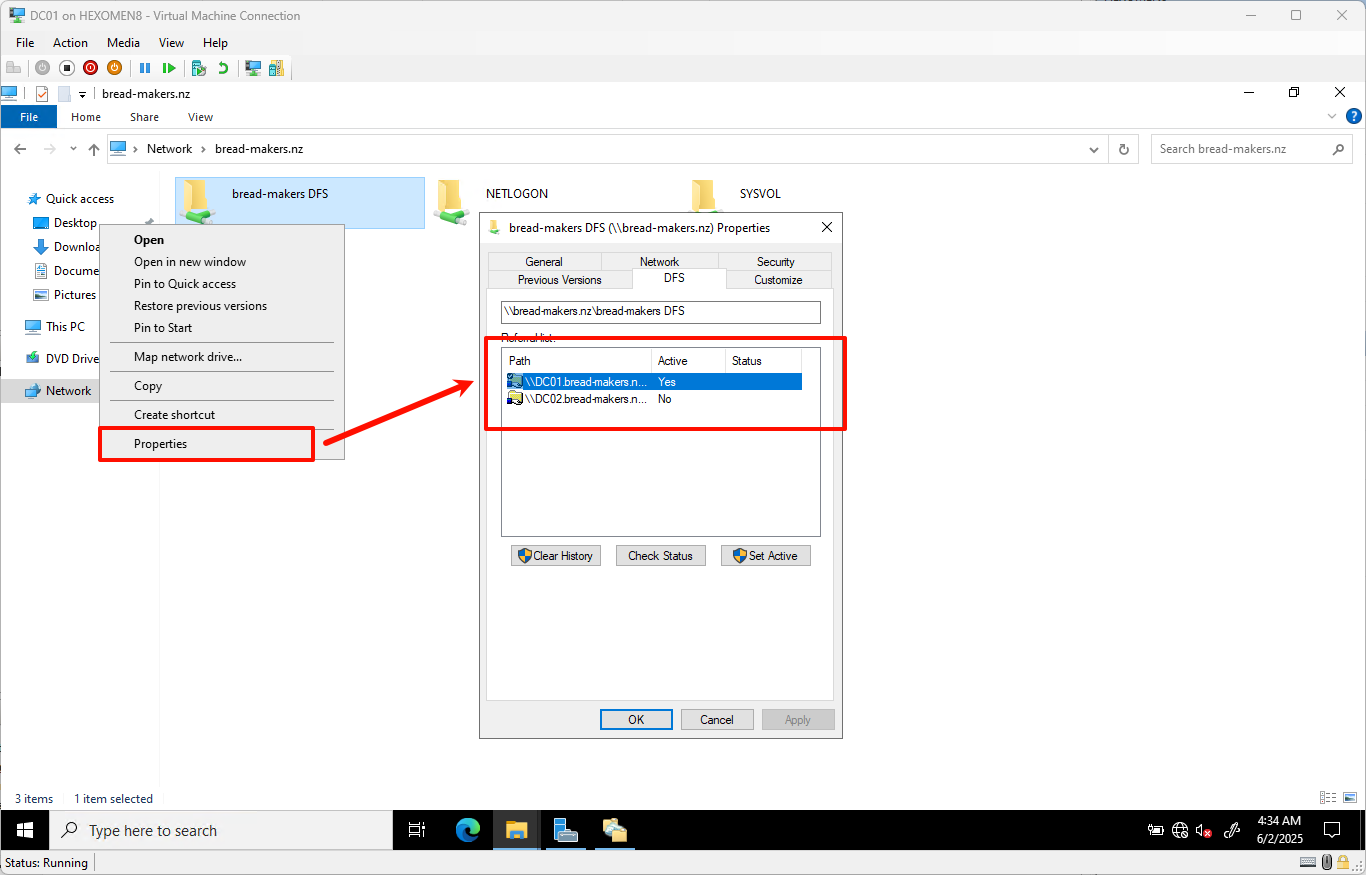
🔧 Tip: How to Fix Incorrect Permission Settings:
If a server has incorrect share permissions, you can:
- Go to
DFS Management->Namespacetab - Right-click the problematic server
- Select
Configure - Click
Share Permissionsto adjust the settings

Configure DFS Replication
Currently, we’ve added multiple namespace servers, but their content is not yet synchronized. Next, we will configure DFS Replication to ensure that the namespace contents on DC01 and DC02 remain consistent.
-
Open
DFS Management-> Right-clickReplication->New Replication Group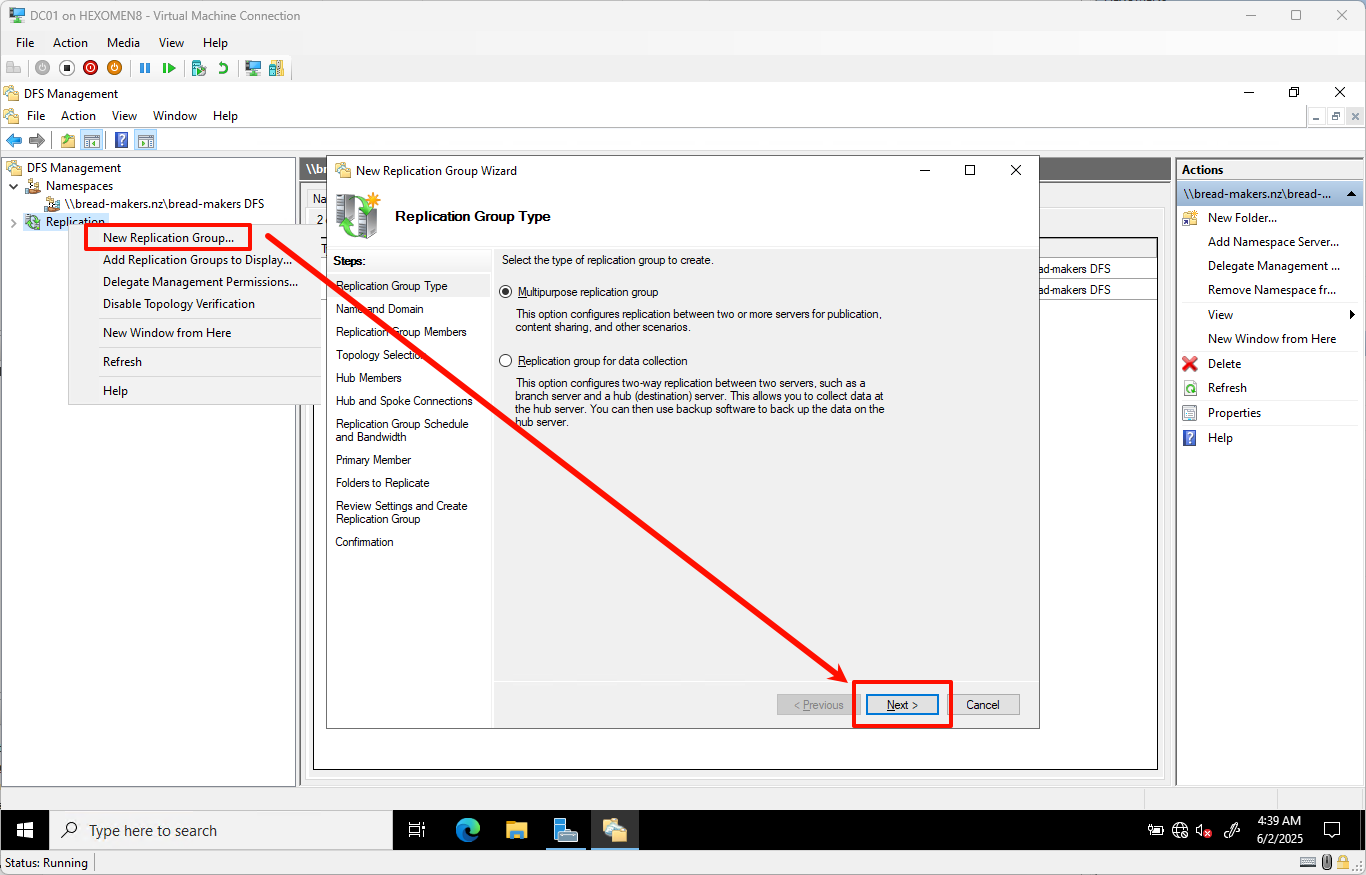
-
Enter a replication group name, such as
bread-makers DFS replication, and clickNext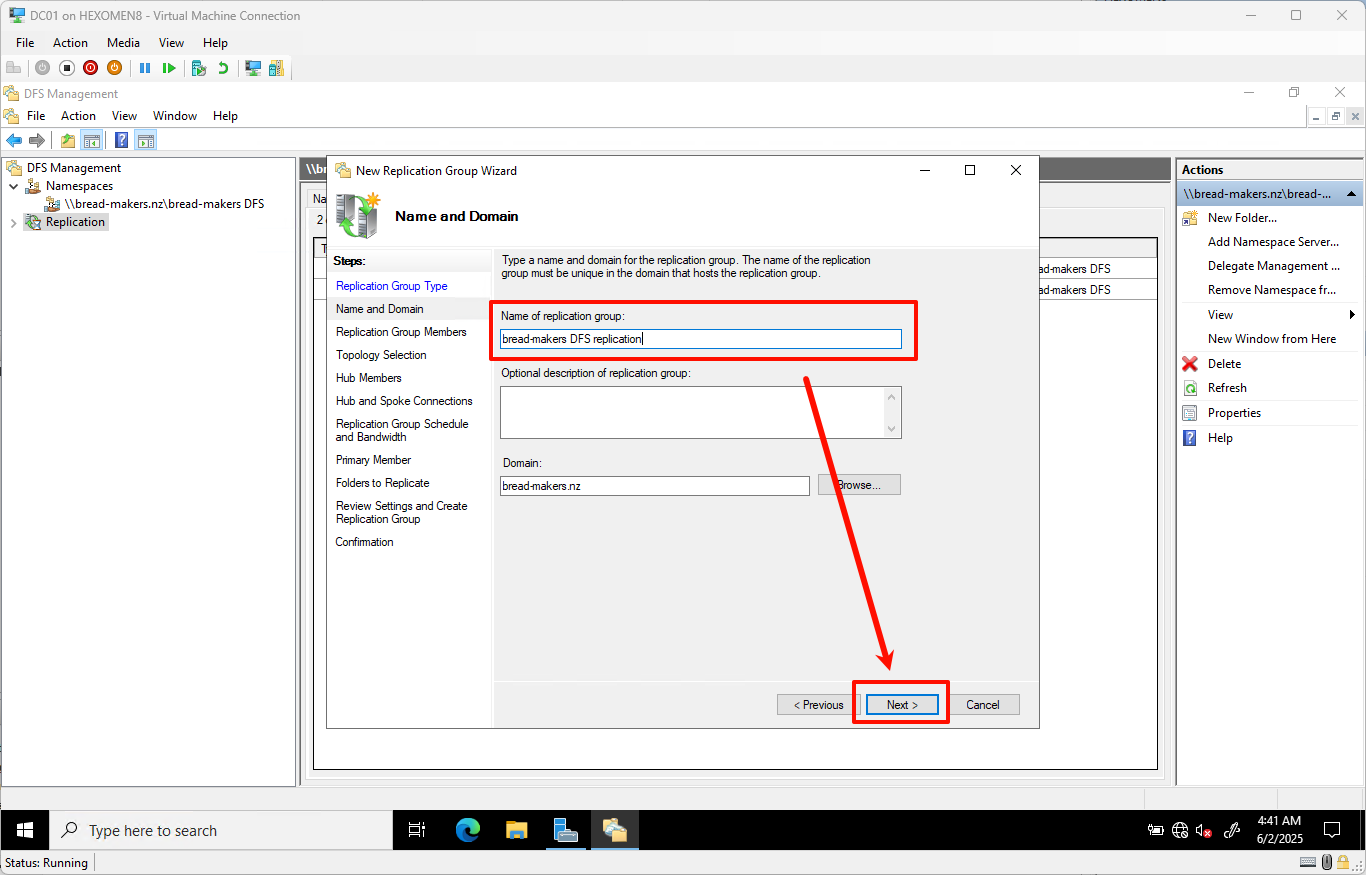
-
On the Select Replication Group Members page, click
Add
In the pop-up window, enterDC01;DC02, then clickCheckto confirm server status
After verification, clickNext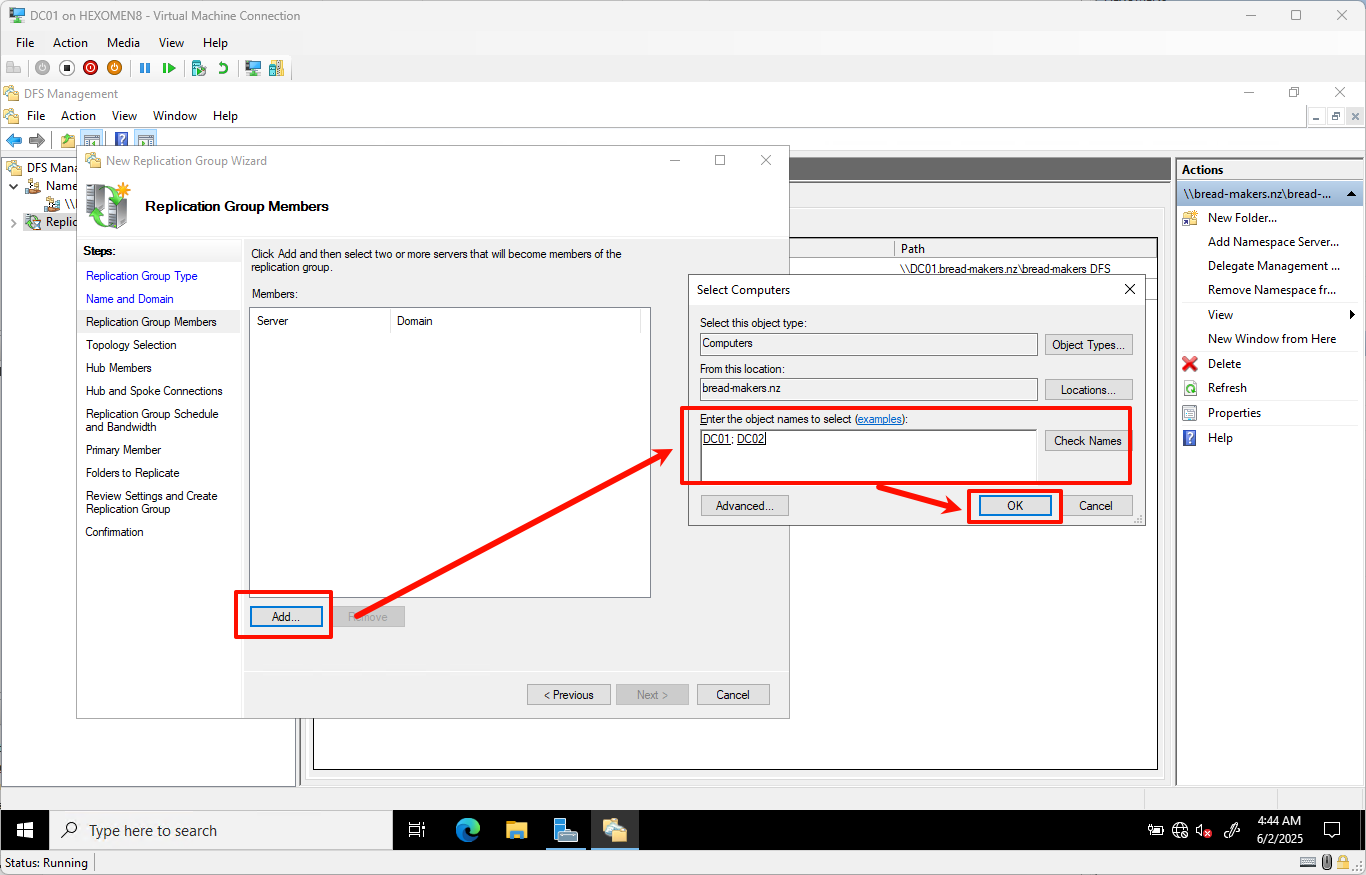
-
Select the default replication topology (Full Mesh) and click
Next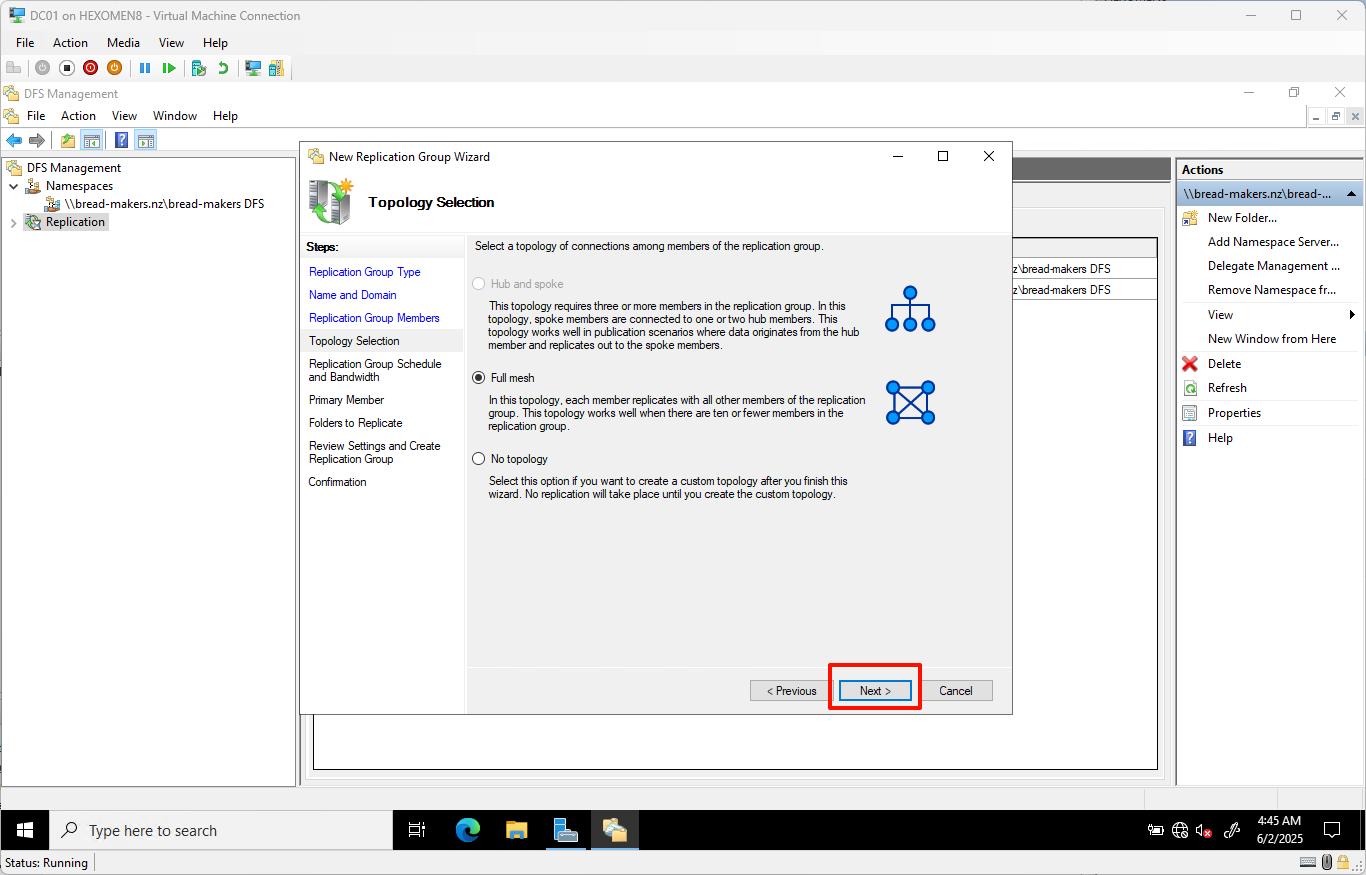
-
Keep replication group policies and bandwidth settings as default, click
Next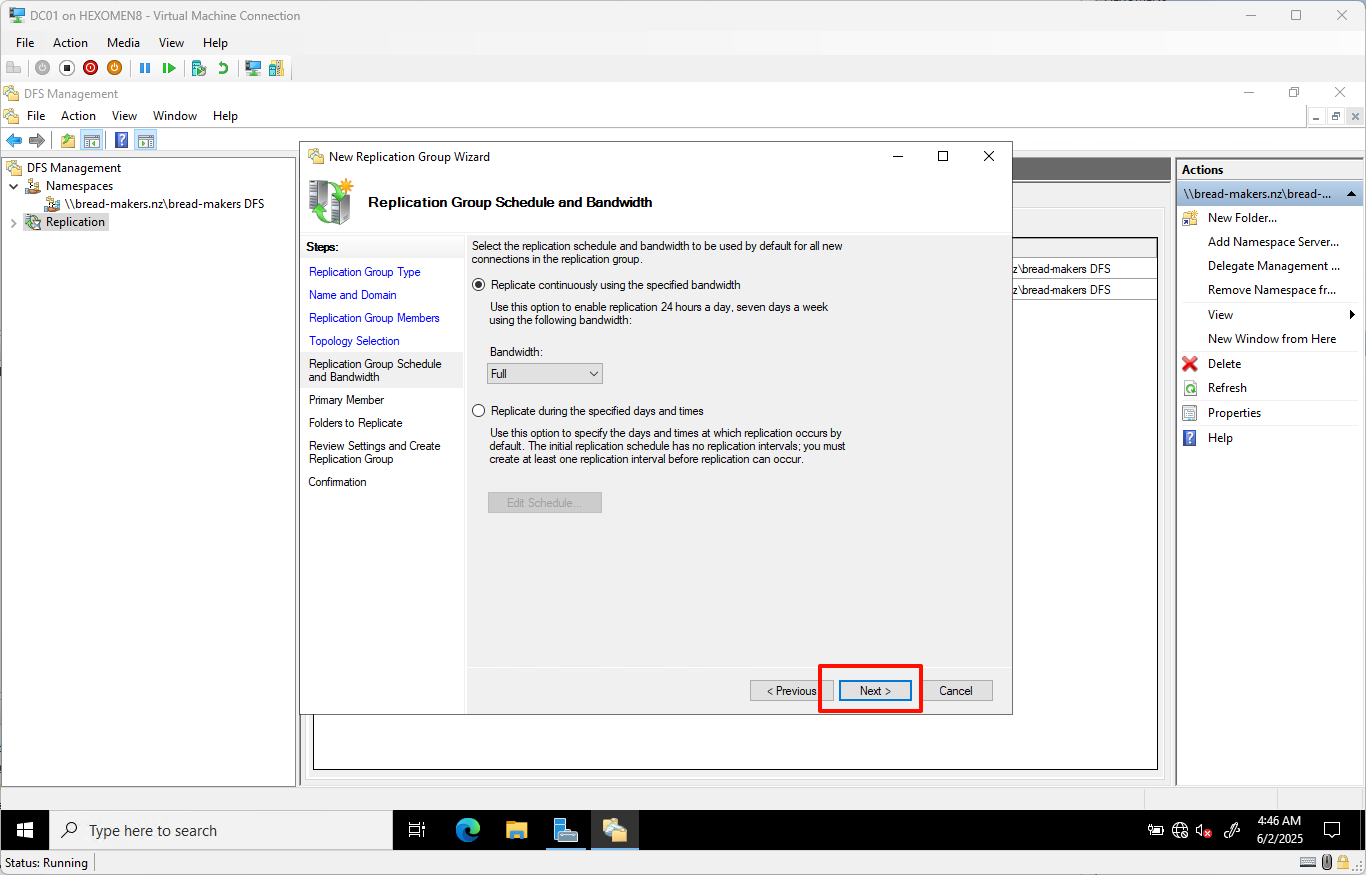
-
Set
DC01as the primary member and clickNext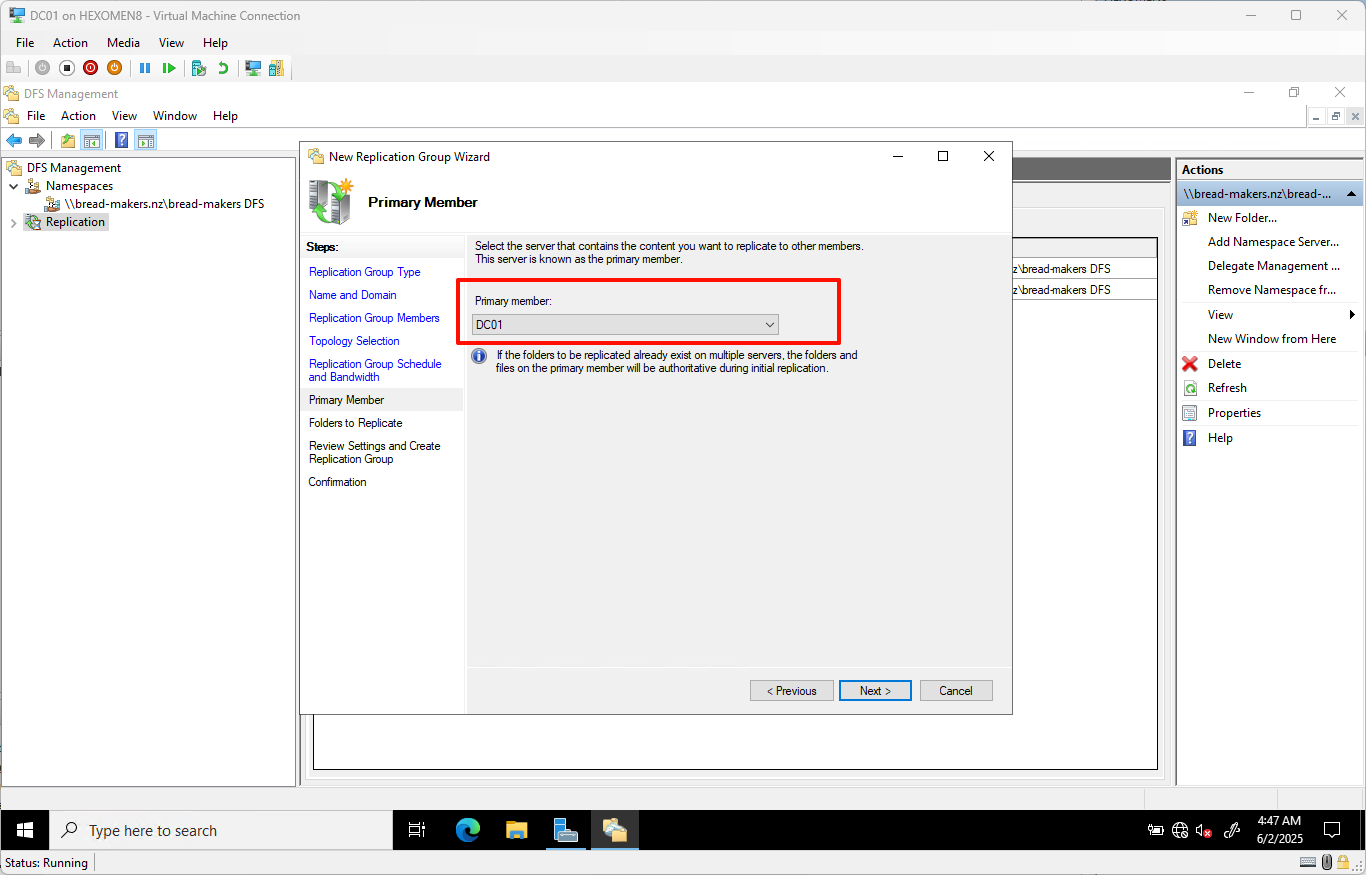
-
Add the folder path to be synchronized, e.g.:
C:\DFSRoots\bread-makers DFS
ClickNext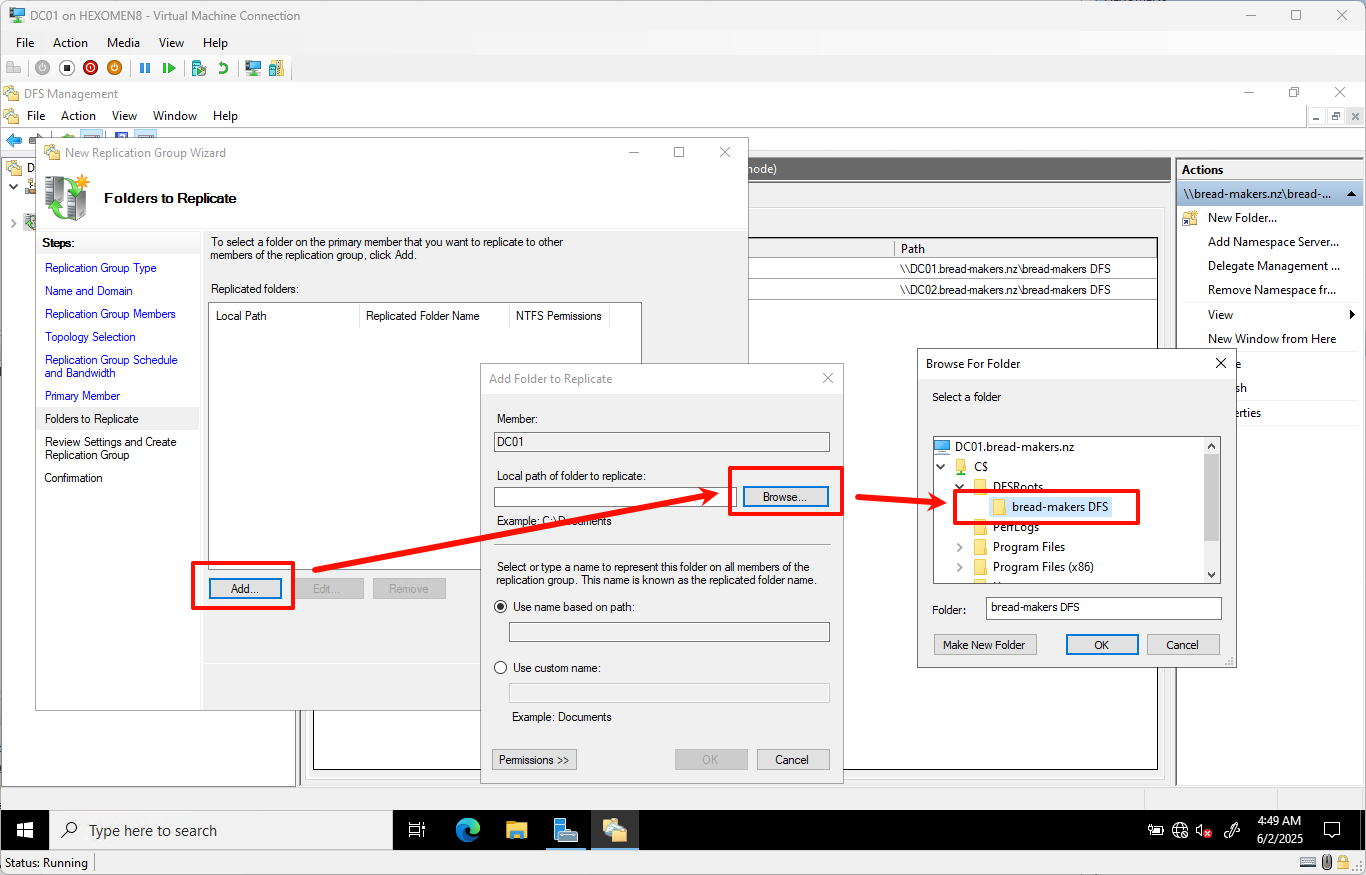
- Set local storage paths for other members:
- Select
DC02 - Click
Edit - Enable replication and set the path to
C:\DFSRoots\bread-makers DFS - Confirm all settings and click
Next
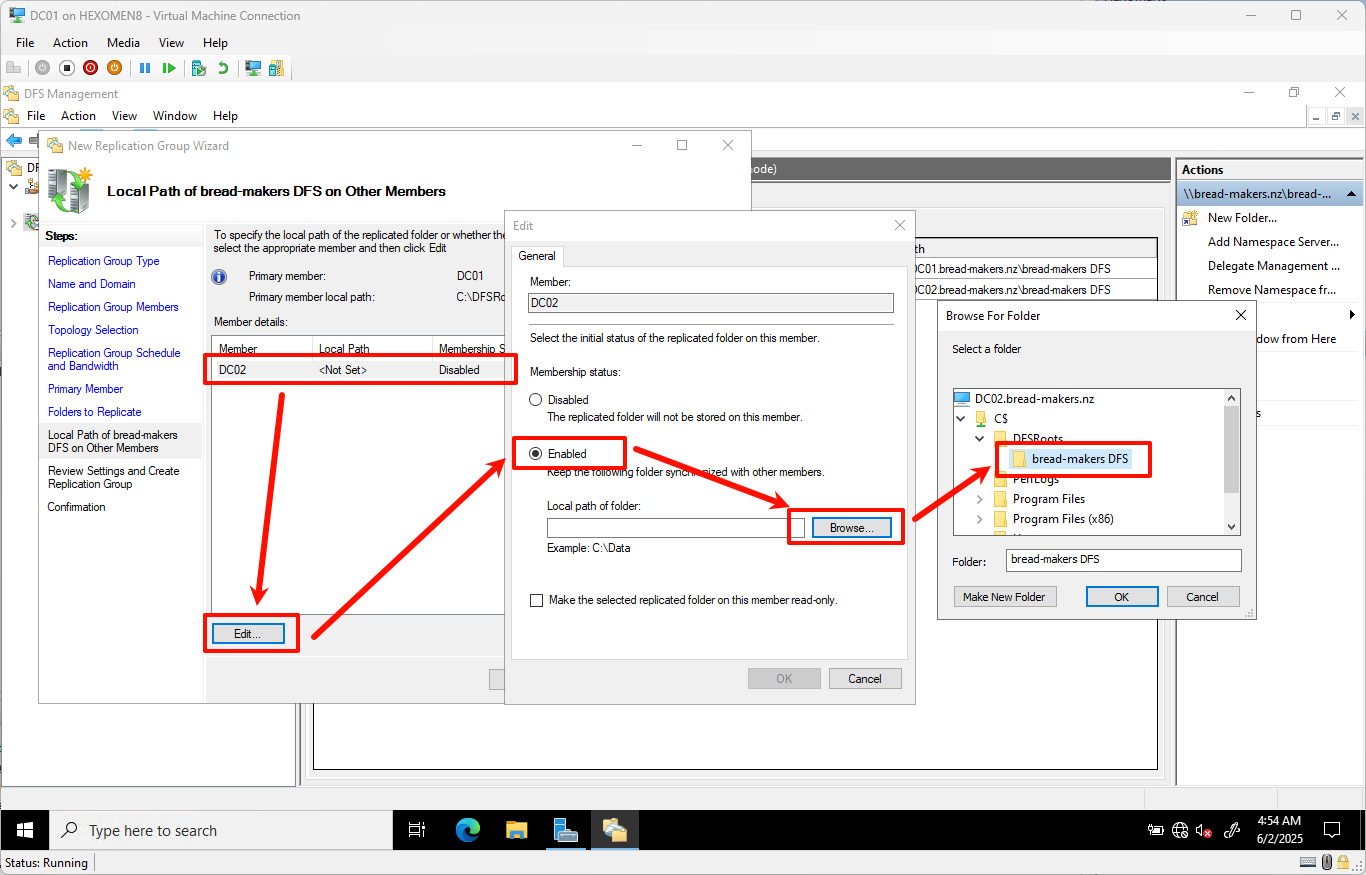
- Select
-
Review the configuration and click
Create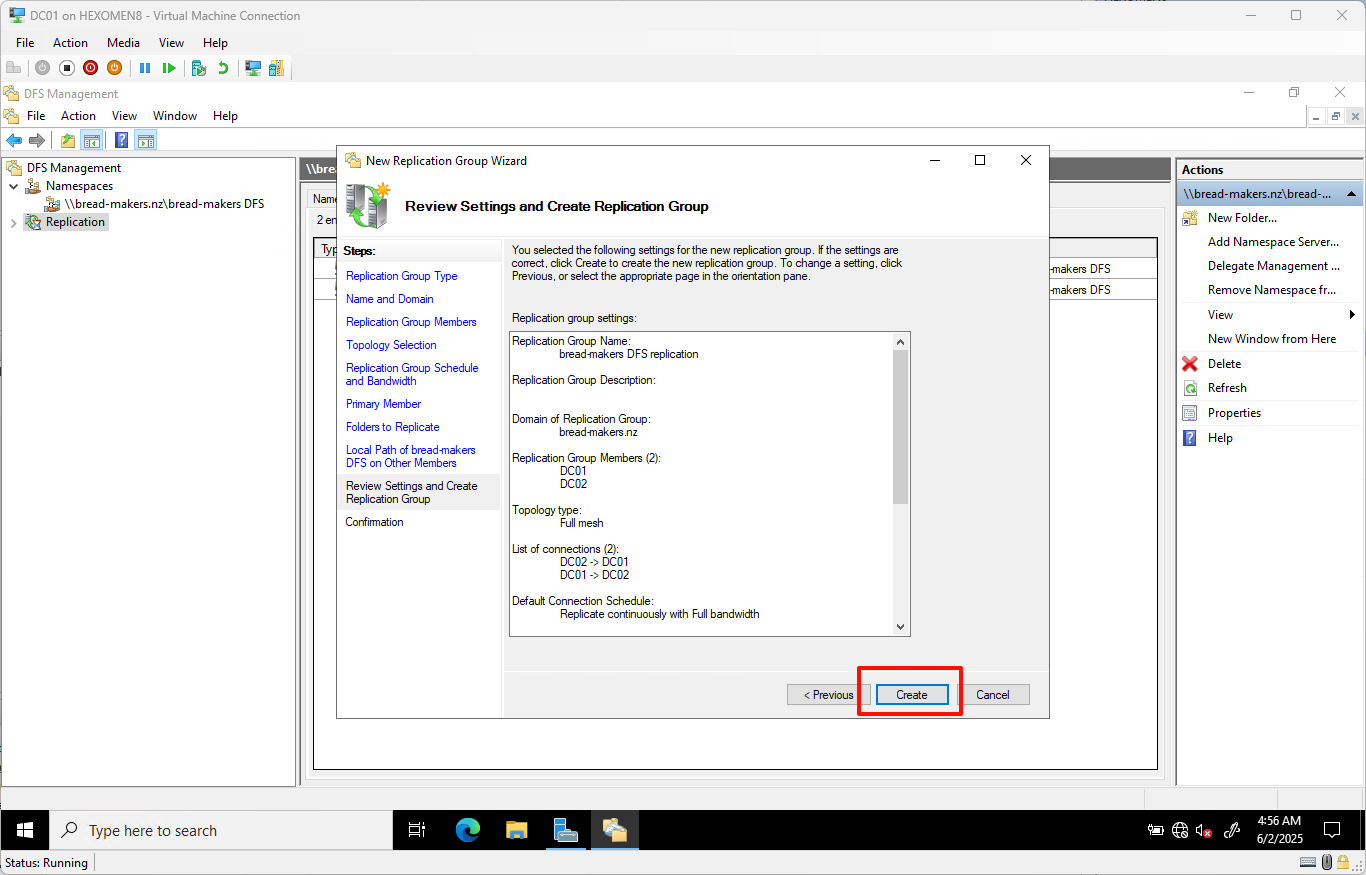
-
After creation, click
Close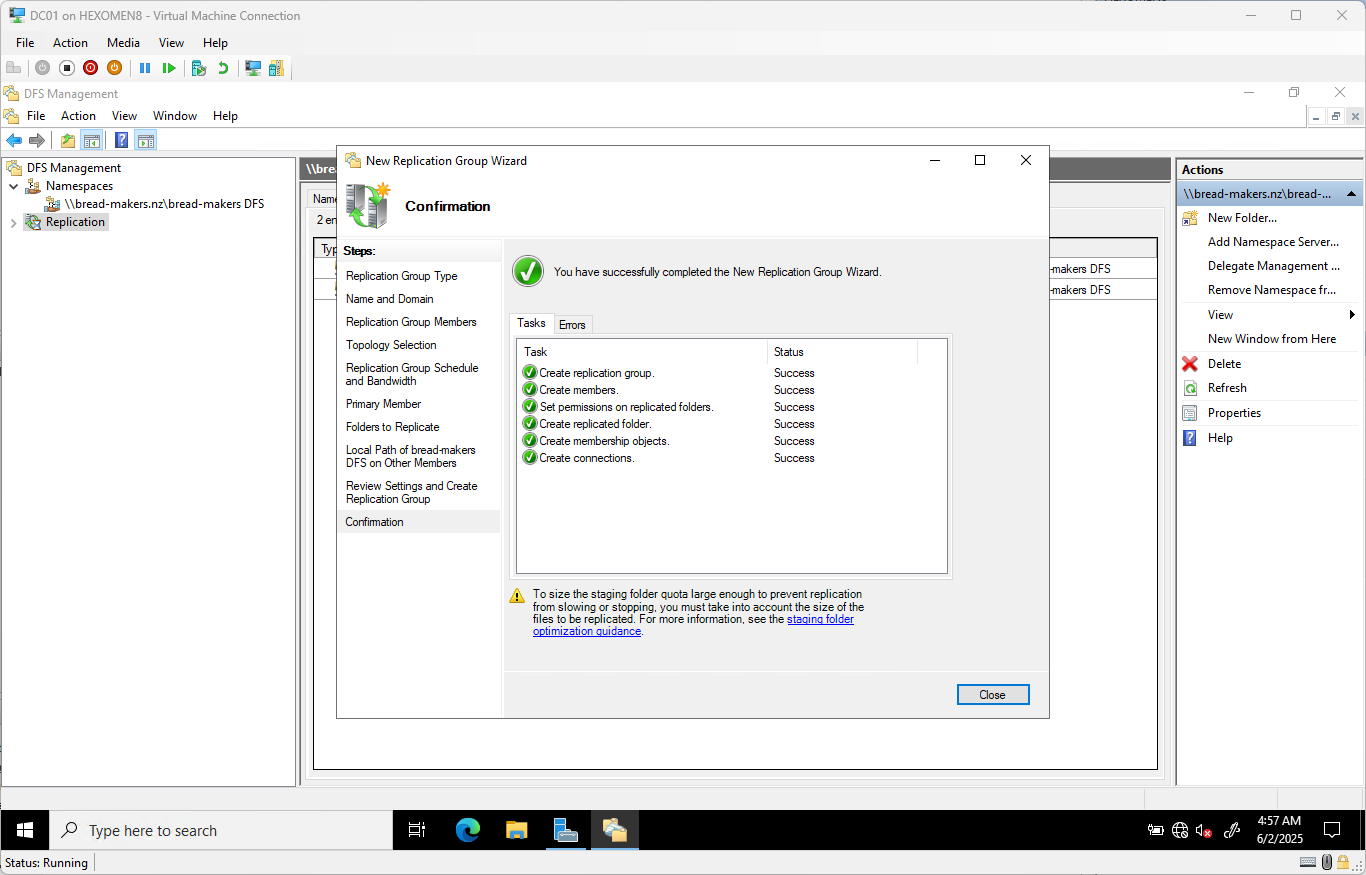
- The wizard displays a message:
“Replication will not start until members of the replication group receive the configuration. This may take time depending on Active Directory Domain Services replication latency and polling intervals.”
ClickOKto continue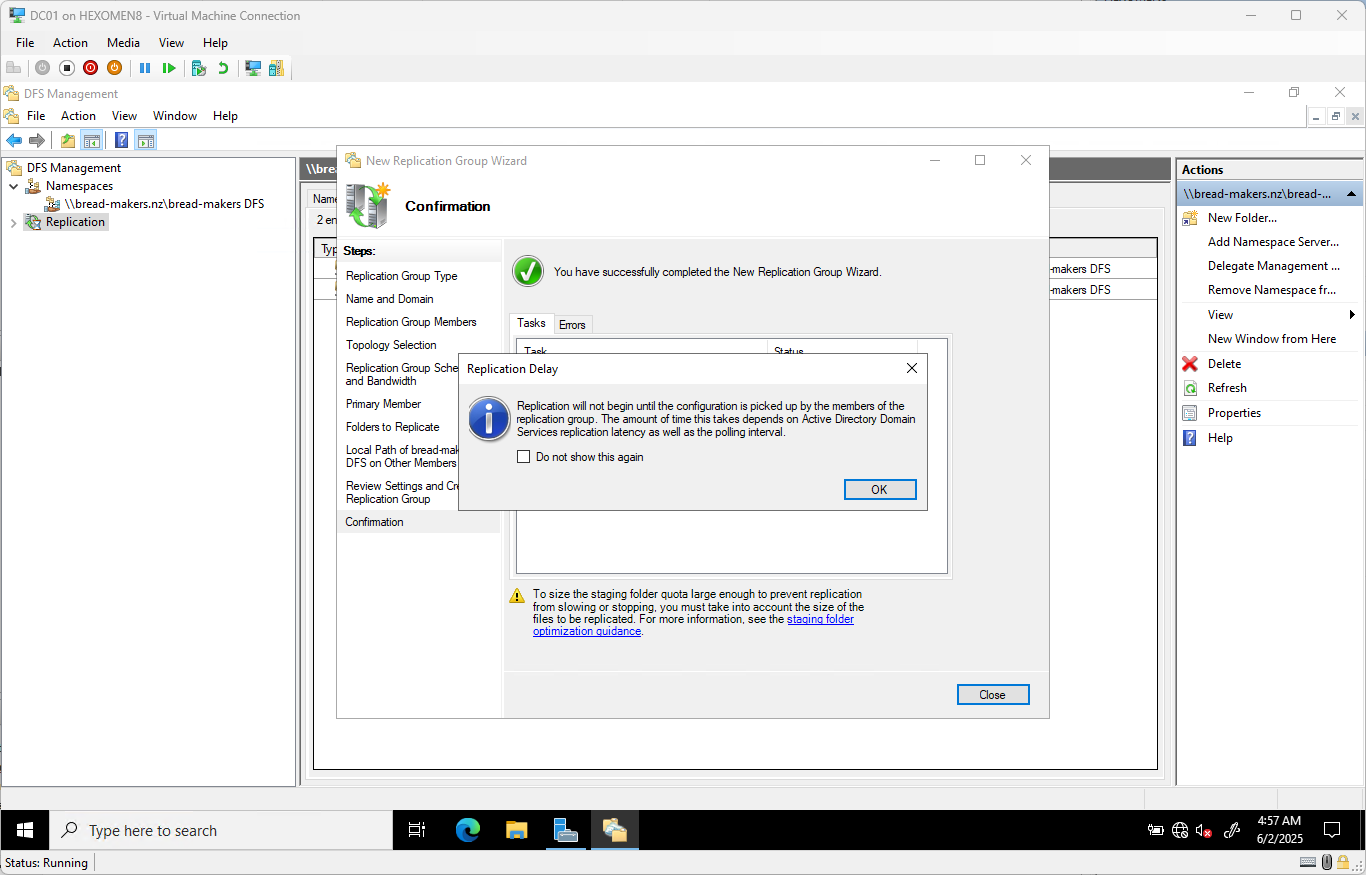
✅ Verification Steps:
-
In
DFS Management->Replicationtab, check the status and health of the replication group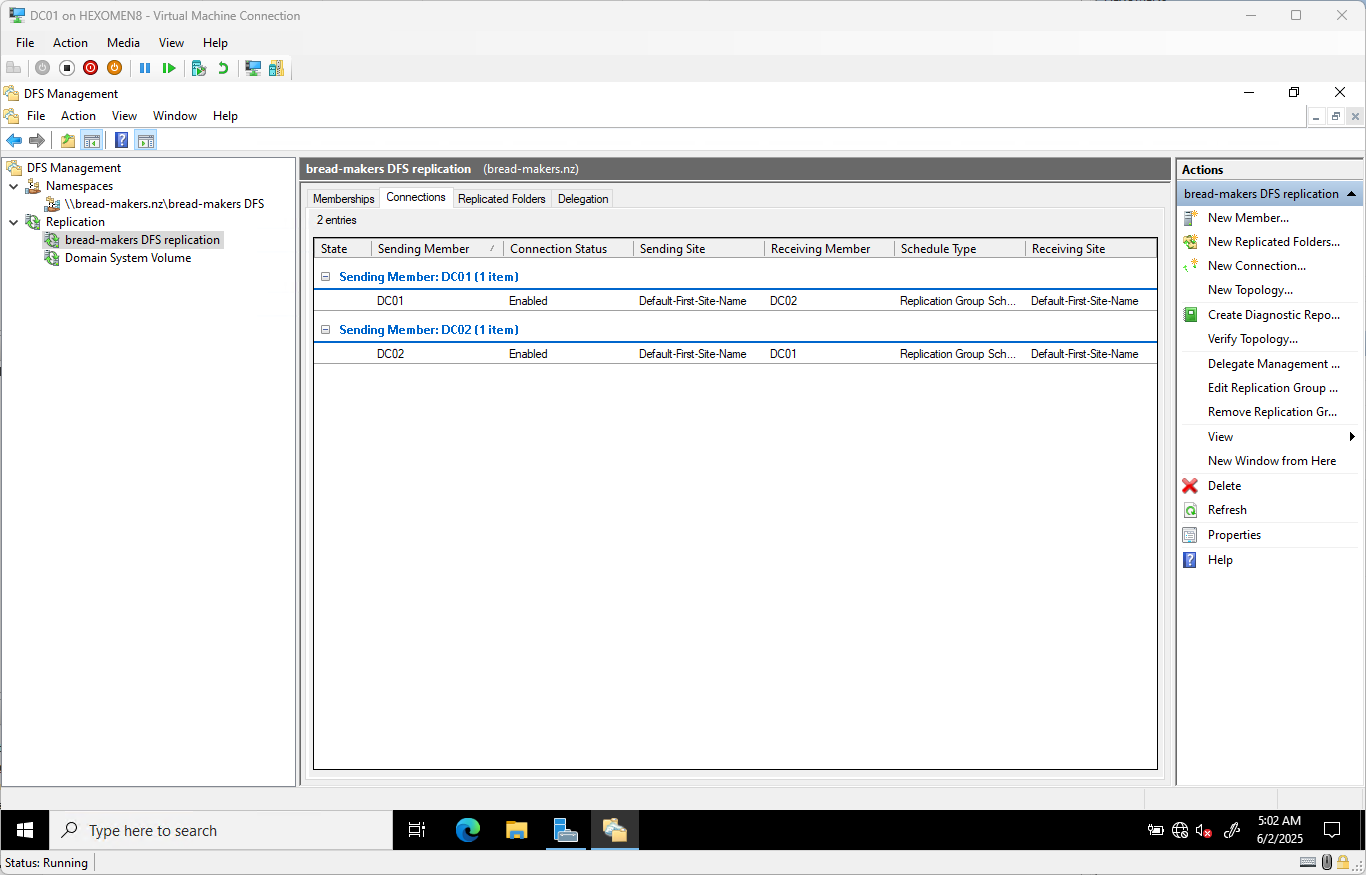
-
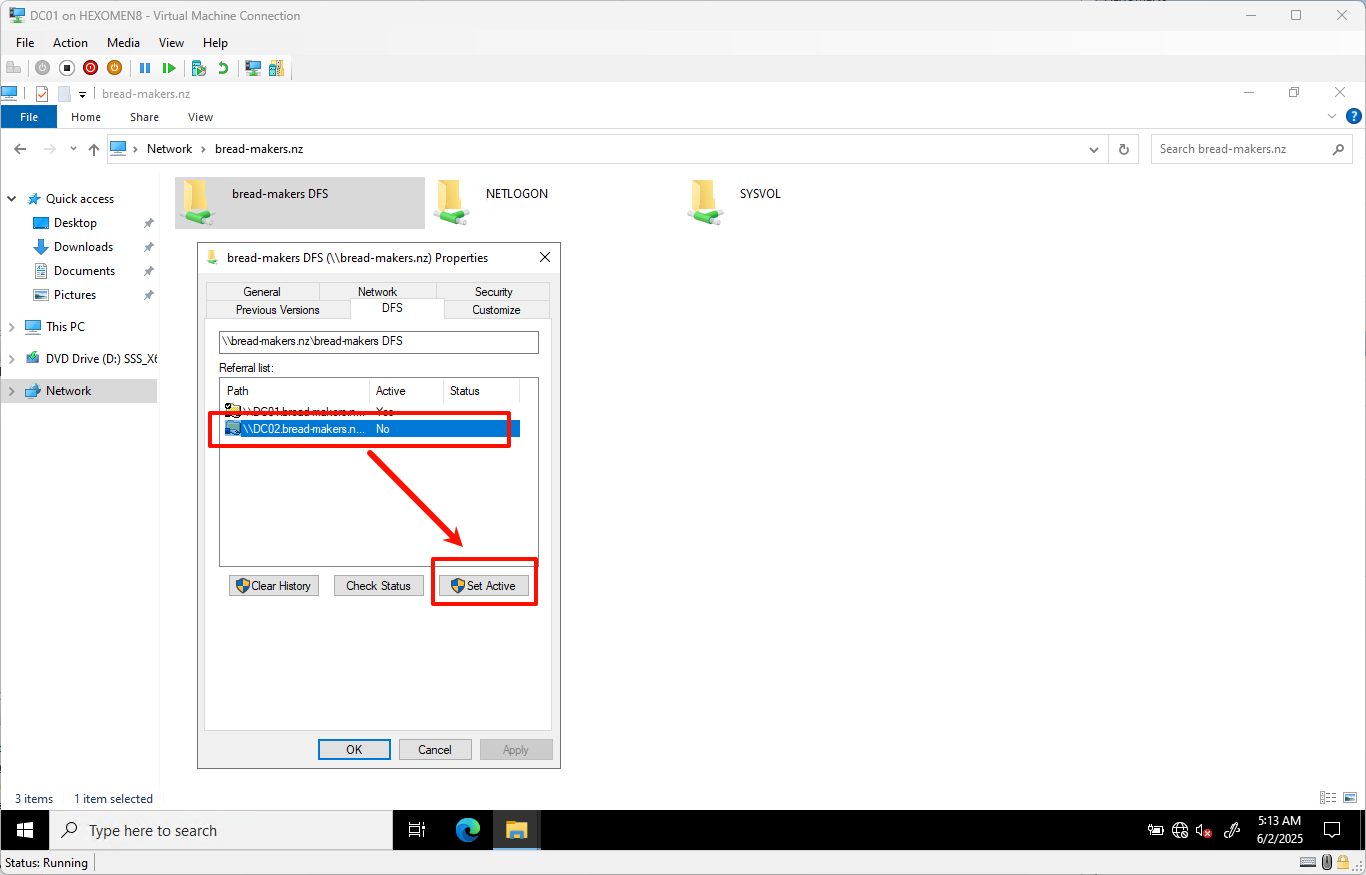
Create or modify files in the shared folder, then switch the active DFS server (via the Referrals tab in DFS properties) and verify that the files have been synchronized
Add Sample Files
Open File Explorer and extract or add the following sample files into the folder C:\DFSRoots\bread-makers DFS: bread-makers DFS.zip
These files will be used in the next chapter for further permission settings and usage examples.
Summary
In this chapter, we completed the following tasks:
- Installed the DFS role on both DC01 and DC02
- Configured a DFS namespace to provide a unified network sharing entry
- Added a second namespace server (DC02)
- Set up DFS replication for cross-server file synchronization
In the next chapter, we will explore how to configure Active Directory users and groups, and use PowerShell for automated user creation, further improving domain environment management efficiency.