Enterprise Network Setup with Windows Server
A step-by-step guide to setting up an enterprise-level network environment using Hyper-V, Windows 10, and Windows Server 2022. Includes AD domain setup, DHCP, DFS, PowerShell automation, and more.
View the Project on GitHub hexwarrior6/Enterprise-Network-Setup-with-Windows-Server
Chapter 5: AD User and Group Management + PowerShell Automation
In enterprise environments, user account and permission management are among the core tasks of Active Directory. In this chapter, we will explore how to create Organizational Units (OUs), users, and groups in AD, and use PowerShell to automate user creation and folder configuration.
AD User and Group Management
-
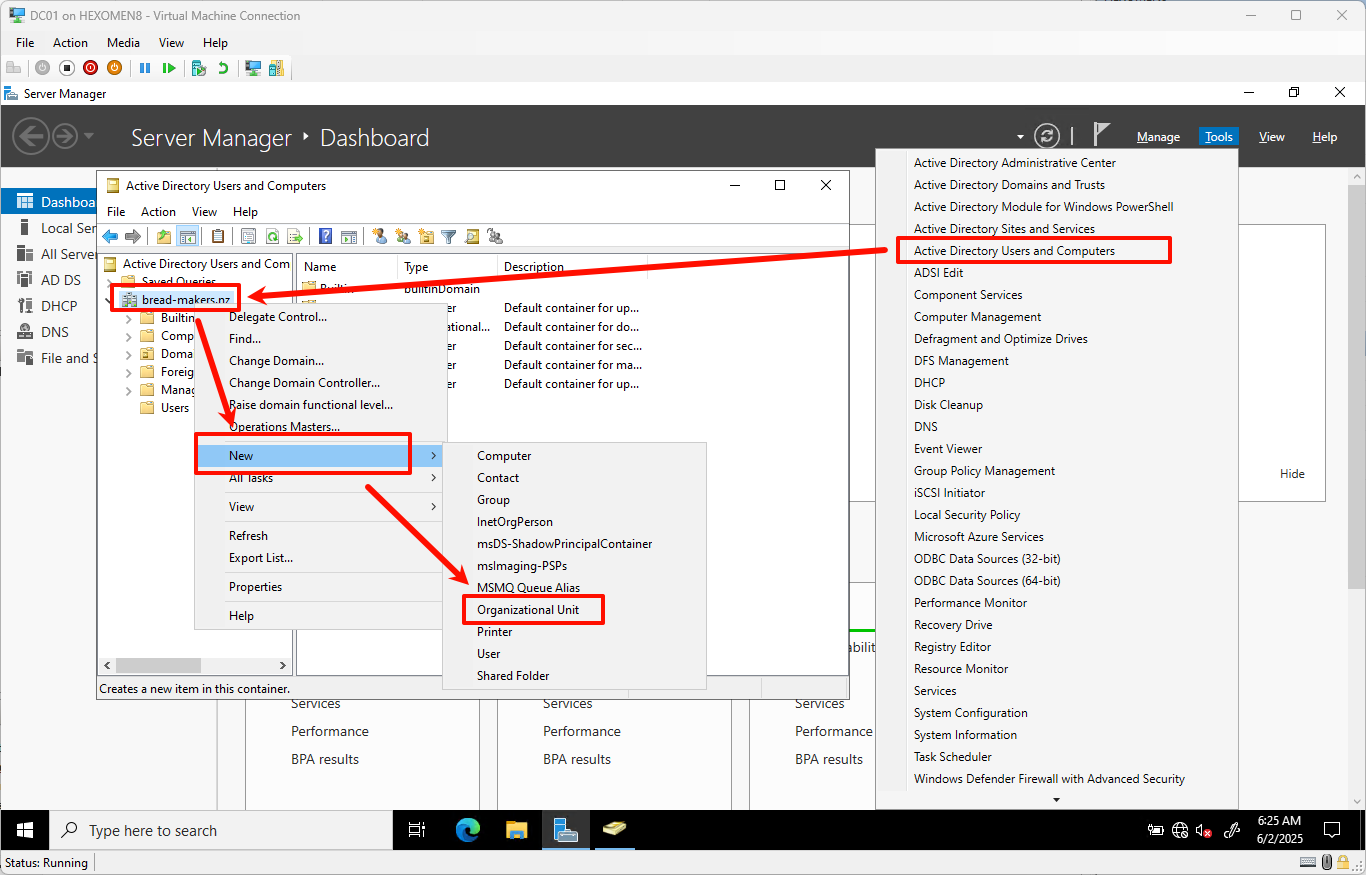
Open
Server Manager-> ClickToolsfrom the top menu -> SelectActive Directory Users and Computers -
Right-click your domain name (e.g.,
bread-makers.nz) -> SelectNew->Organizational Unit
-
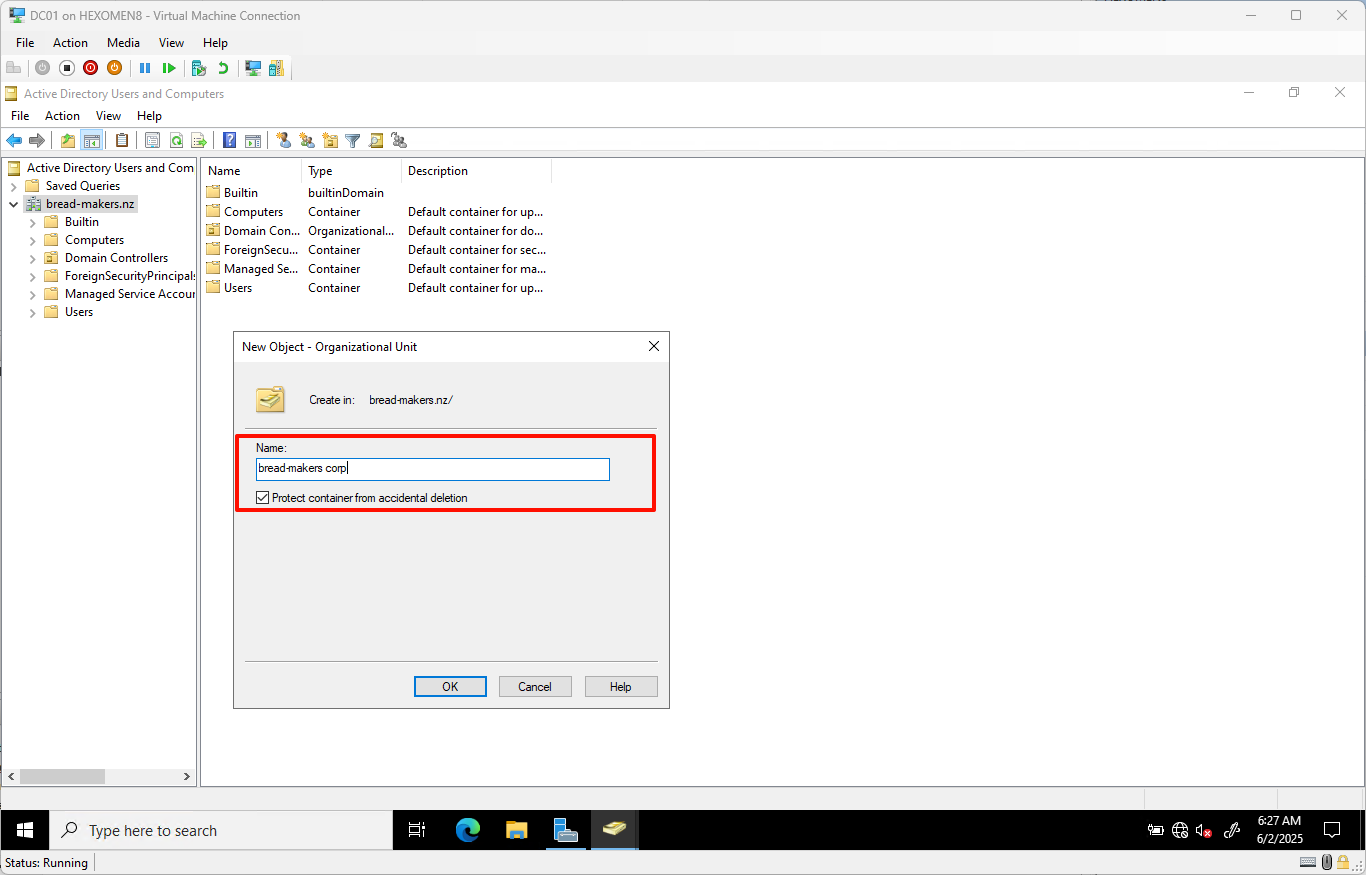
Enter a new OU name such as
bread-makers corp, then clickOK
-
Under
bread-makers corp, right-click again ->New->Organizational Unit, and addBake Department -
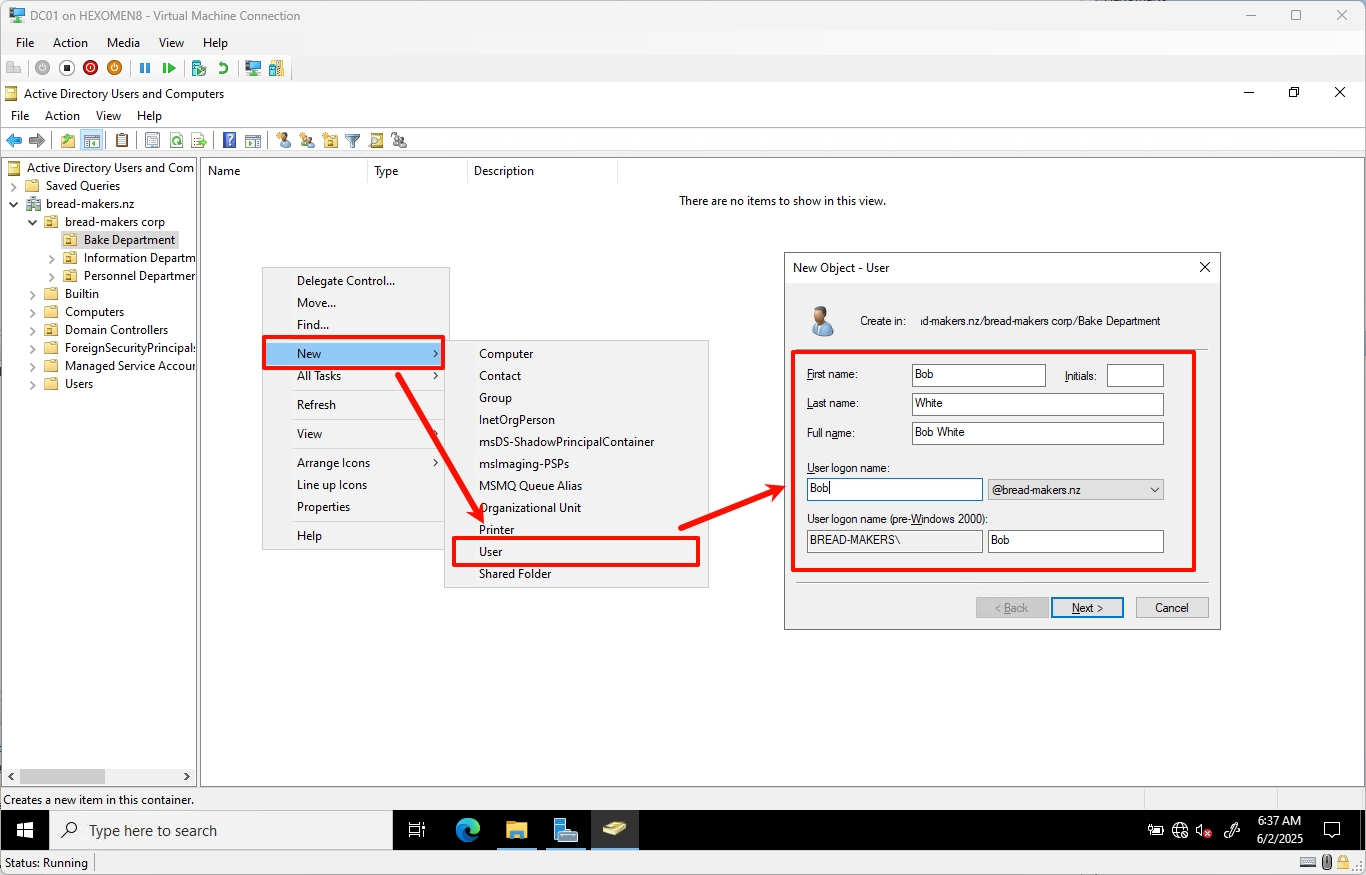
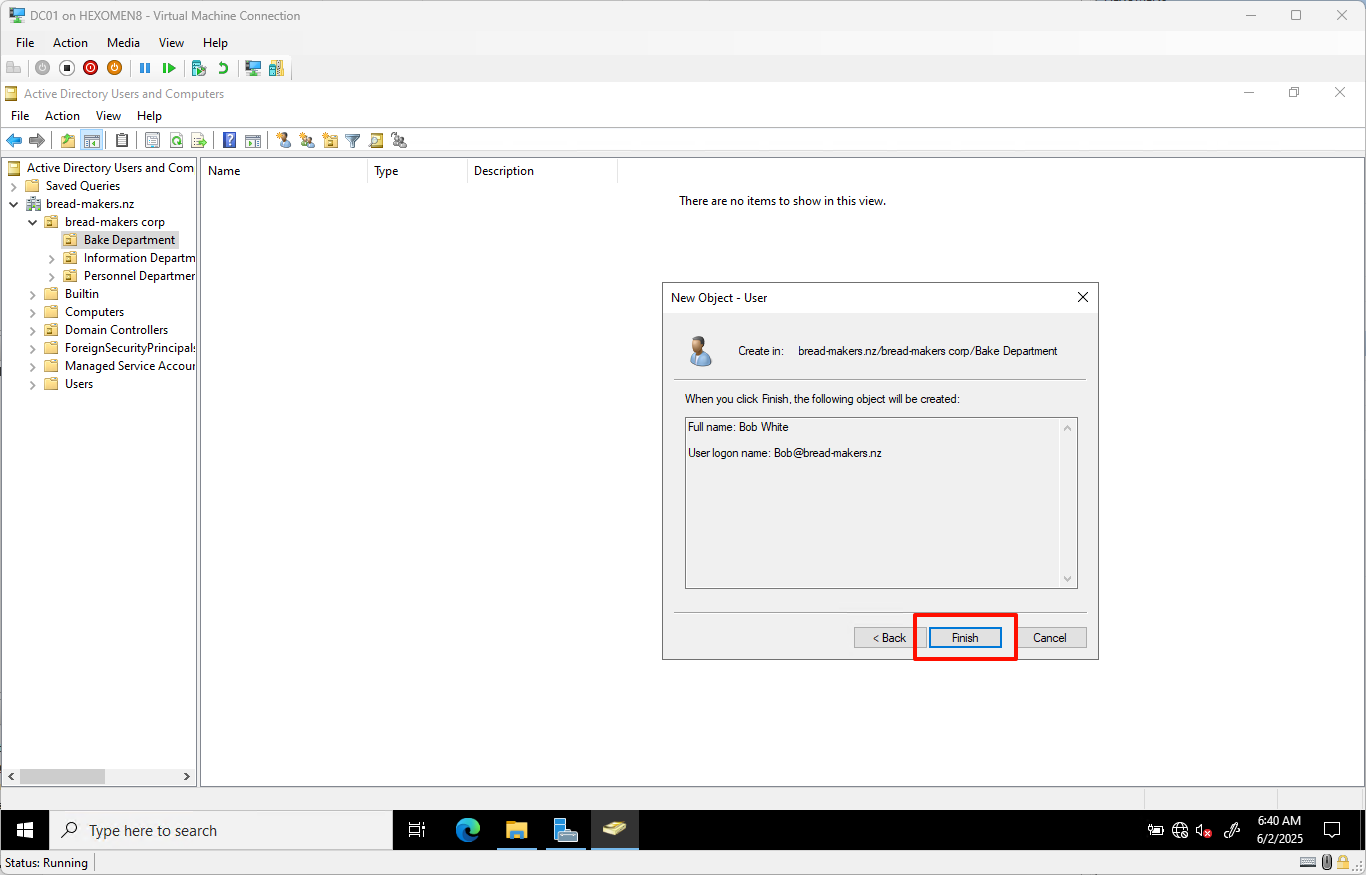
Under
Bake Department, right-click ->New->User, enter usernameBob, then clickNext
-
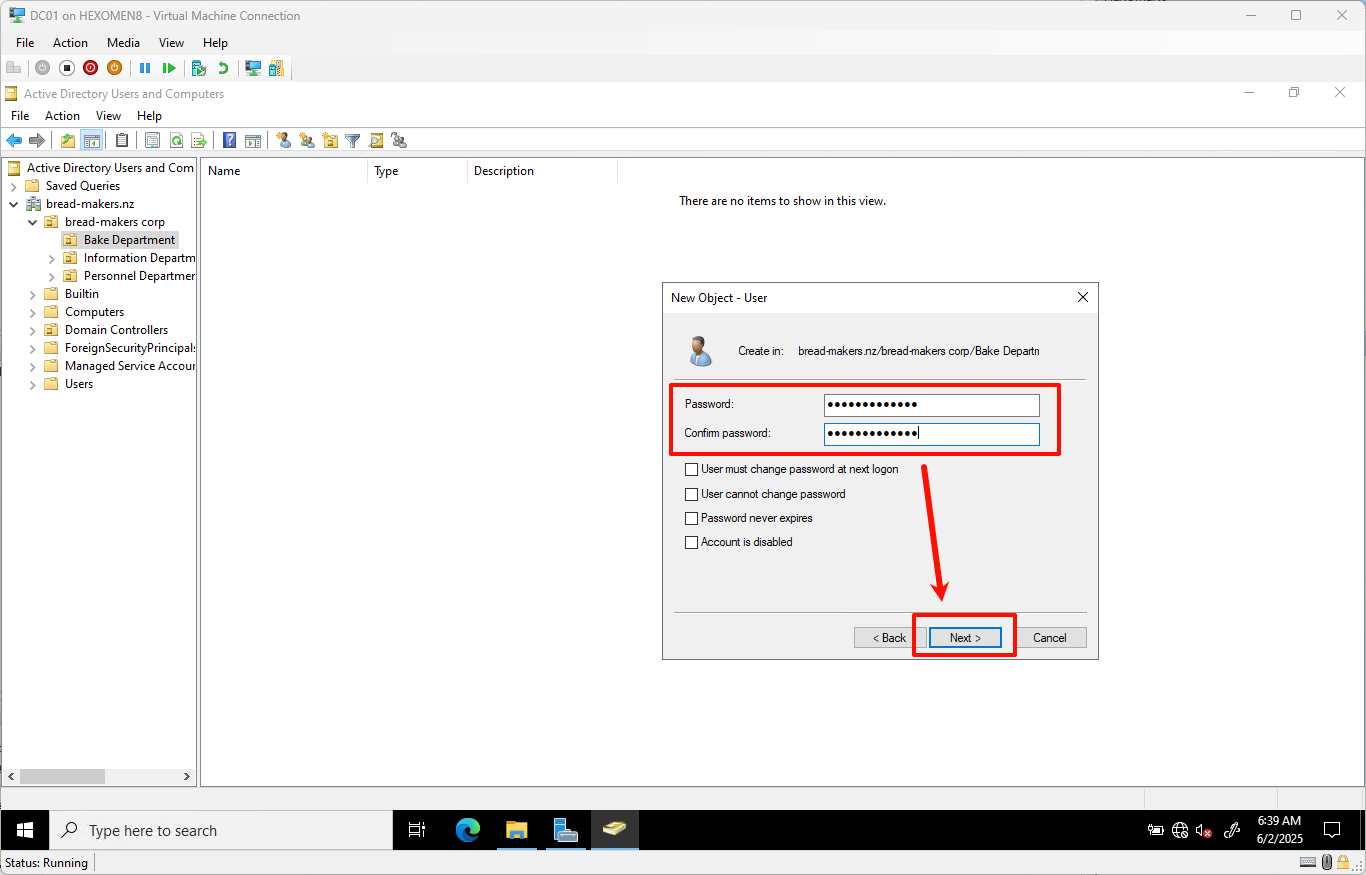
Set a password (ensure it meets complexity requirements), and optionally uncheck “User must change password at next logon”
ClickNext
-
Confirm details and click
Finish
-
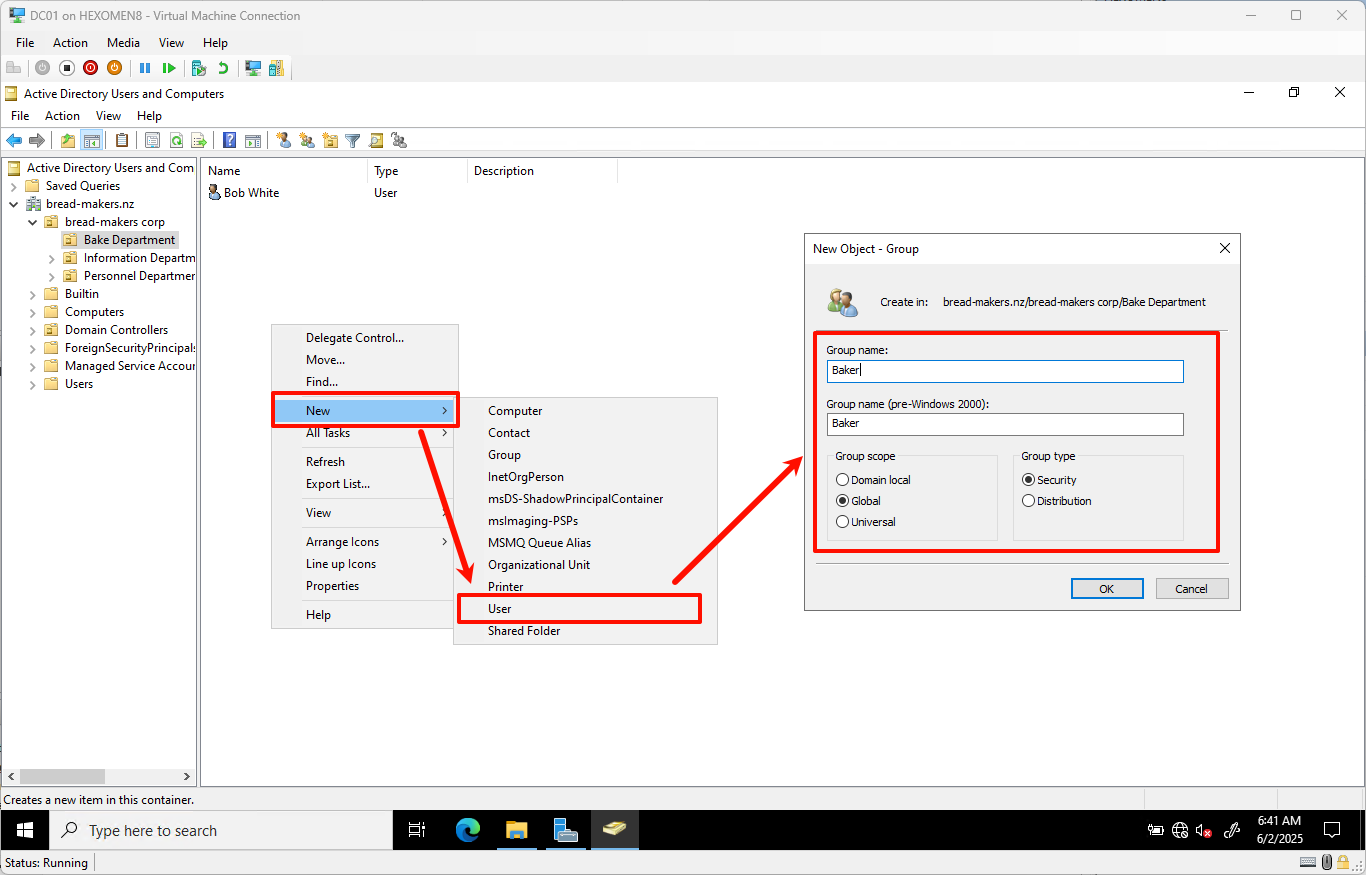
Back under
bread-makers corp, right-click ->New->Group, name itBaker, and clickOK
-
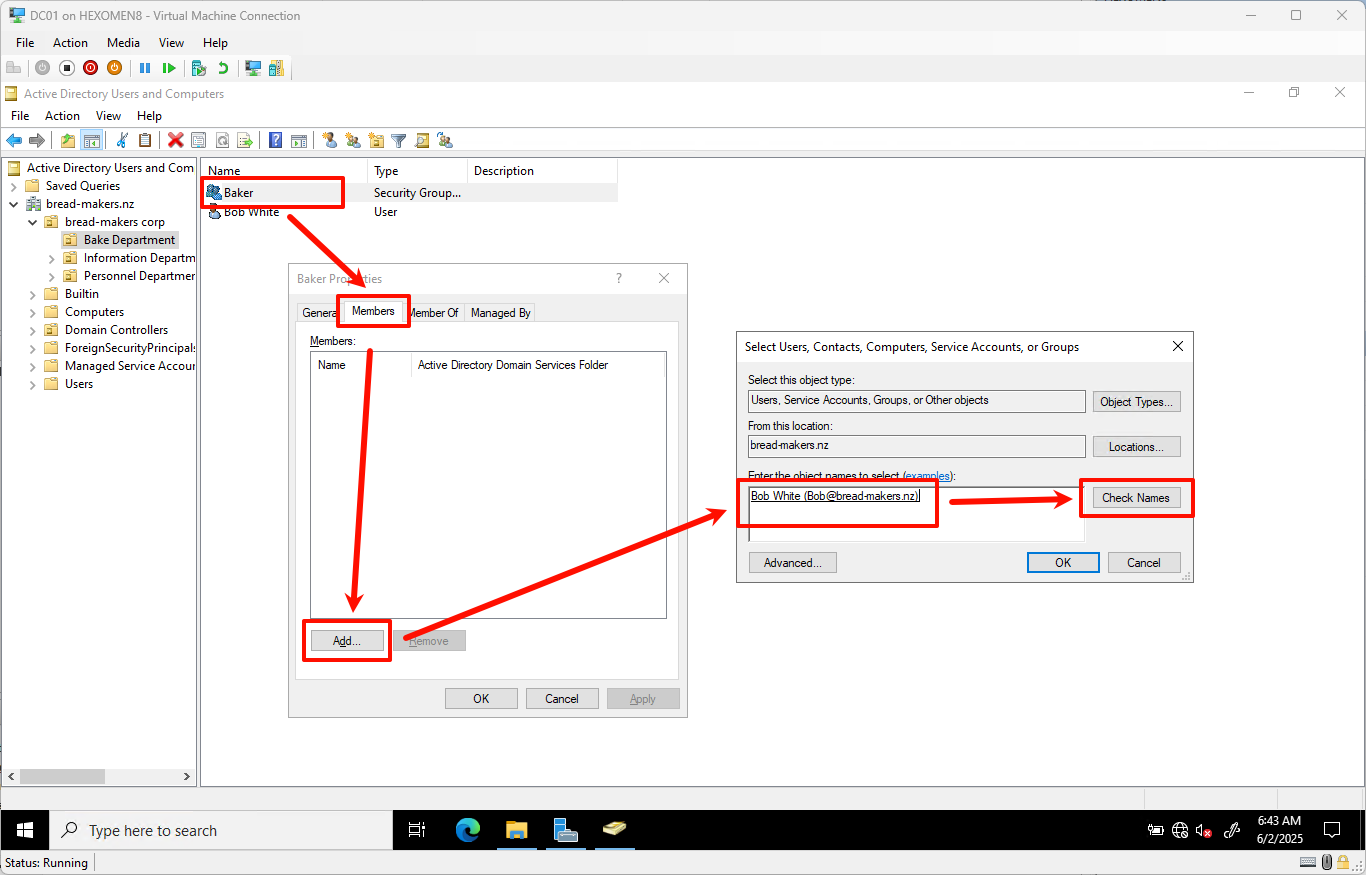
Double-click the
Bakergroup, go to theMemberstab, clickAdd, selectBobfromBake Department, then clickOK
-
Continue adding other departments and groups based on the following structure:
graph TD
    A[Bread-Makers Corp] --> K[all bread-makers staff]

    K --> B[Bake Department]
    K --> C[Information Department]
    K --> D[Personnel Department]

    B --> E[baker Group]
    C --> F[IT staff Group]
    D --> G[personnel Group]

    E --> H[Bob]
    F --> I[Alice]
    G --> J[Charlie]
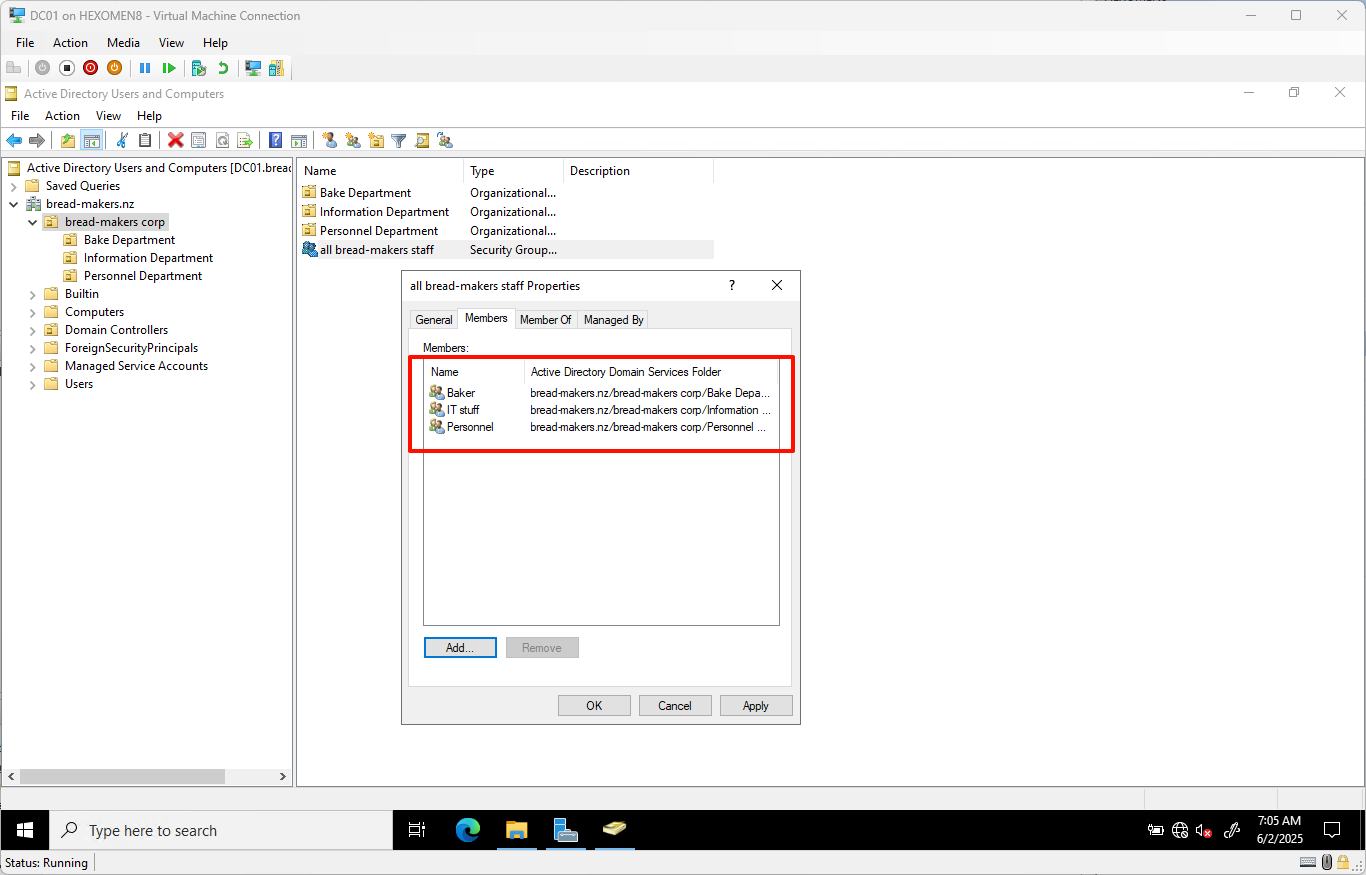
- Add all subgroups (
baker,IT staff,personnel) into theall bread-makers staffgroup
✅ Tip: It is recommended to use nested groups for permission management, which simplifies future policy assignments.
Domain User Login
-
Power on
PC01and log in using a local account
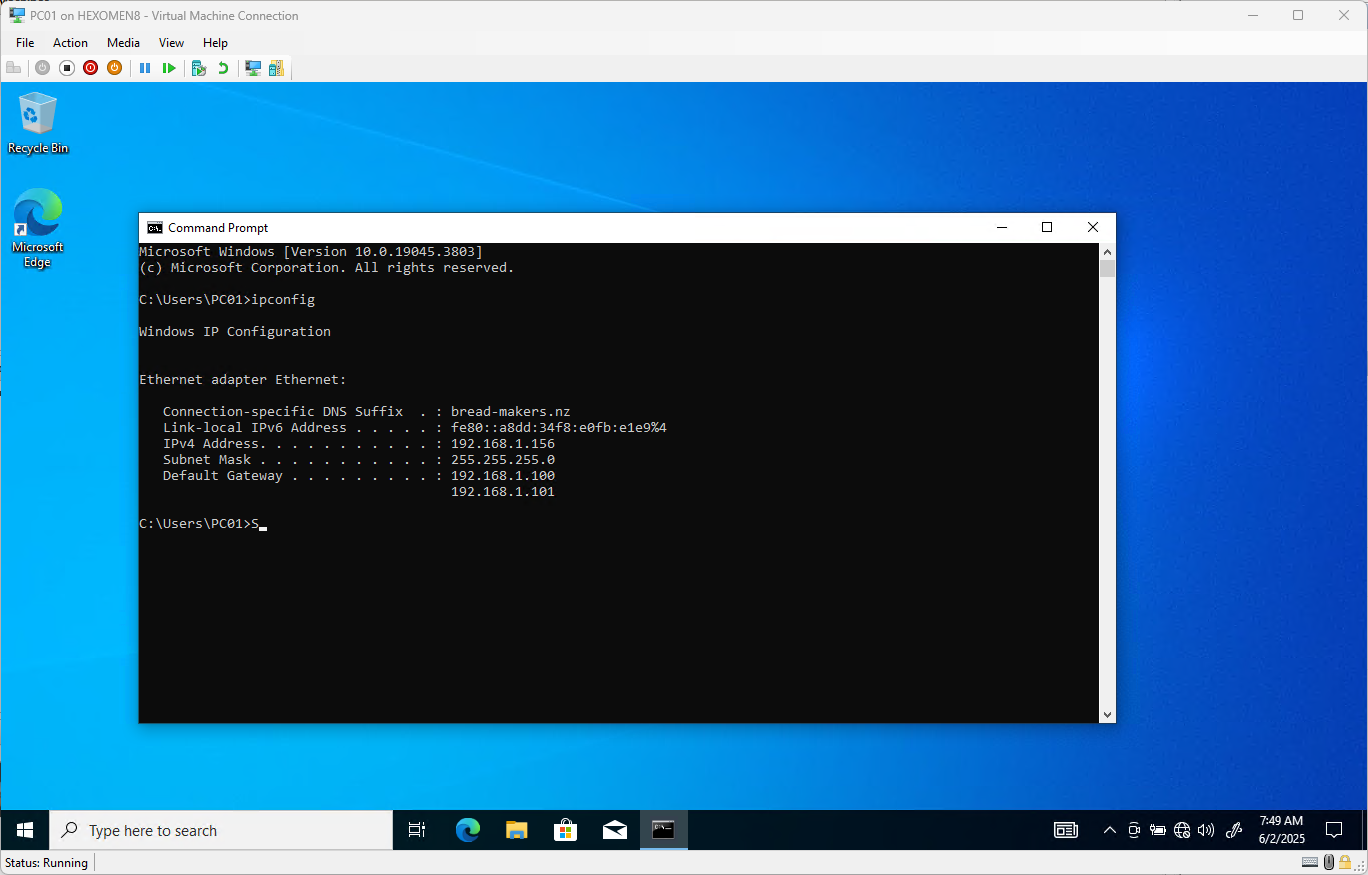
- Open Command Prompt and run the following command to verify network settings:
ipconfigIf the IP address does not point to the domain controller, refer to ## Fix Static IP Addresses for Both Domain Controllers to reconfigure the network
-
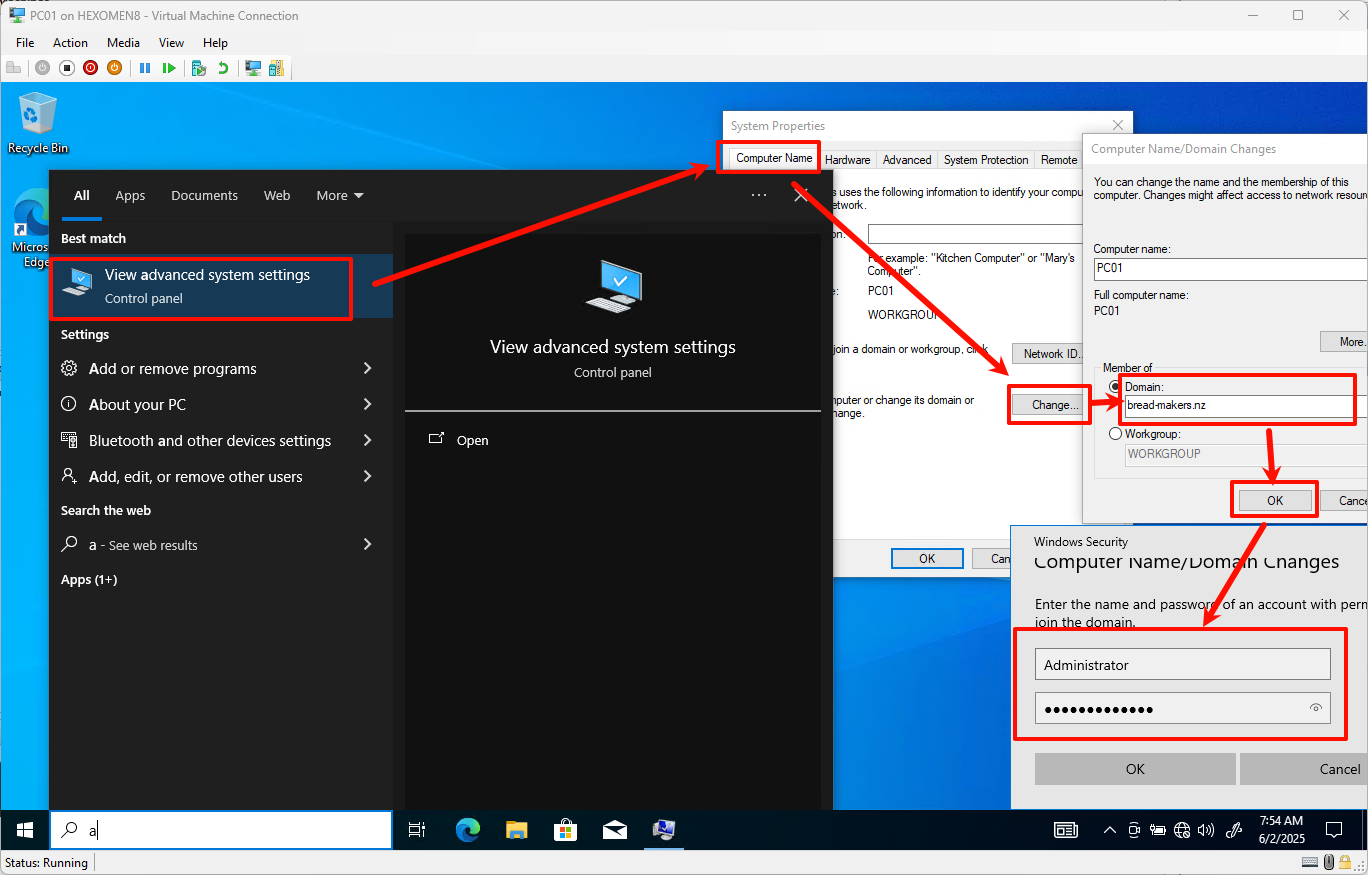
Search for and open
Advanced System Settings-> ClickChangenext toComputer Name
Enter the domain namebread-makers.nz, clickOK, and input the domain administrator credentials
-
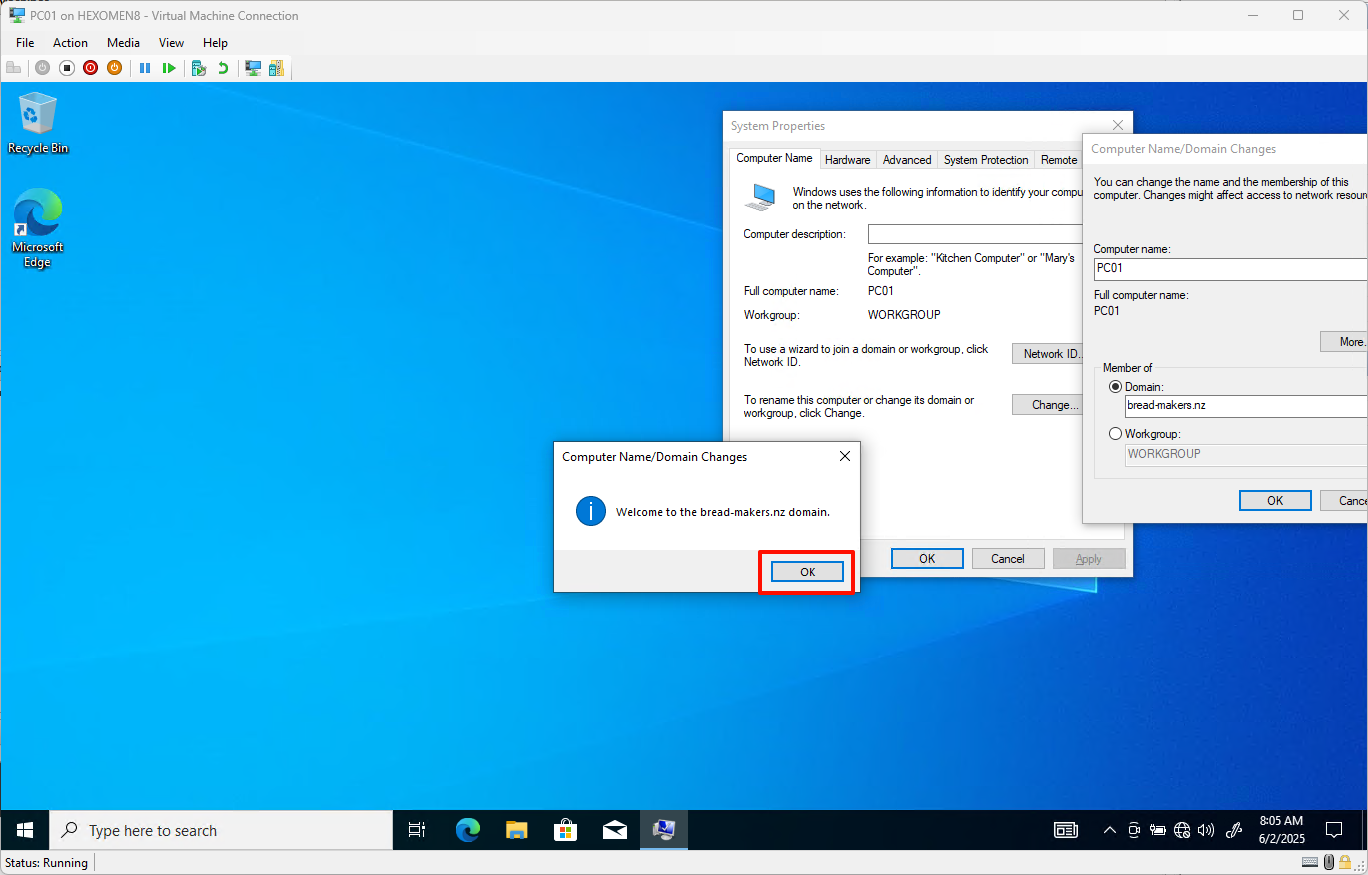
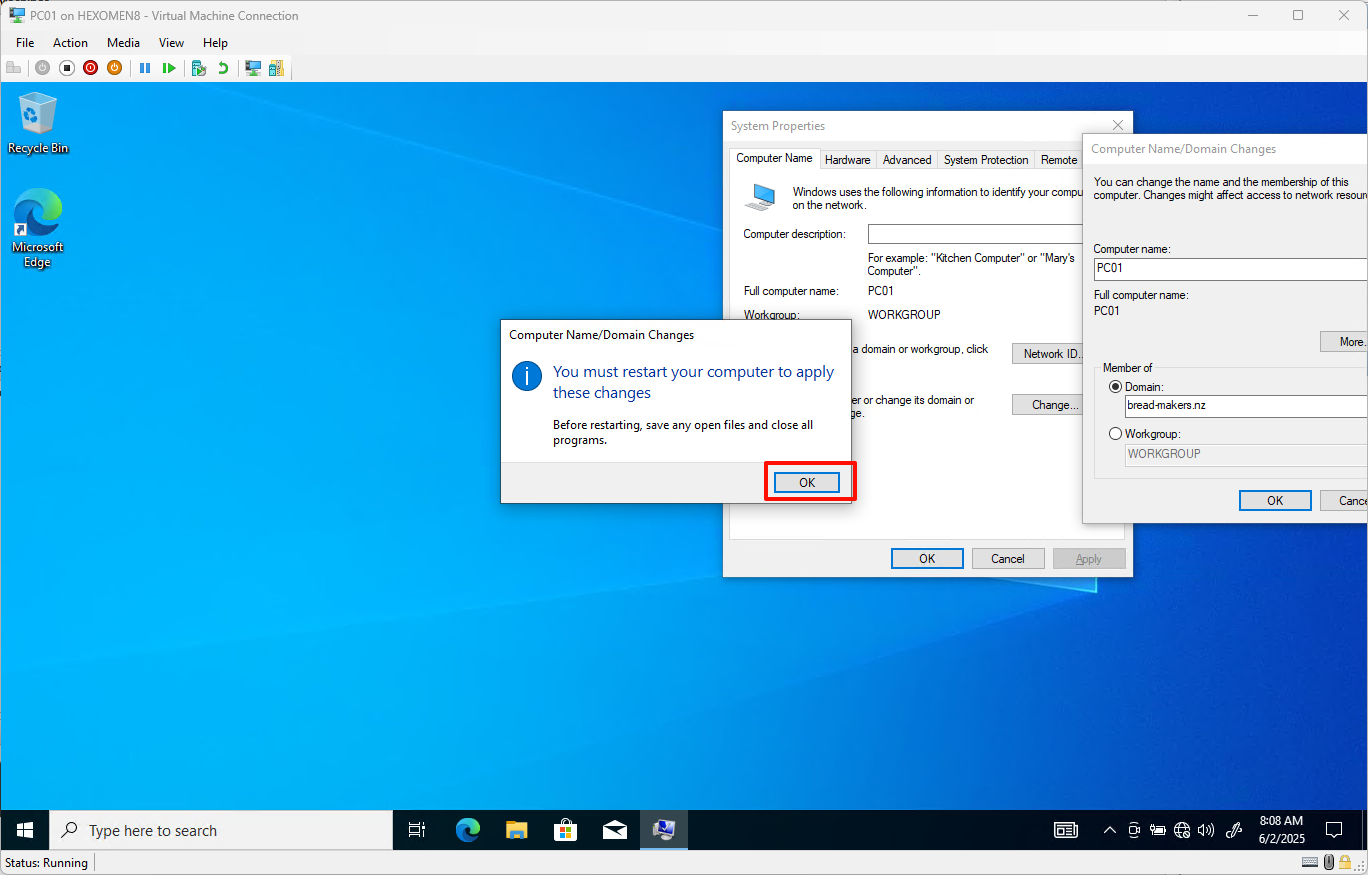
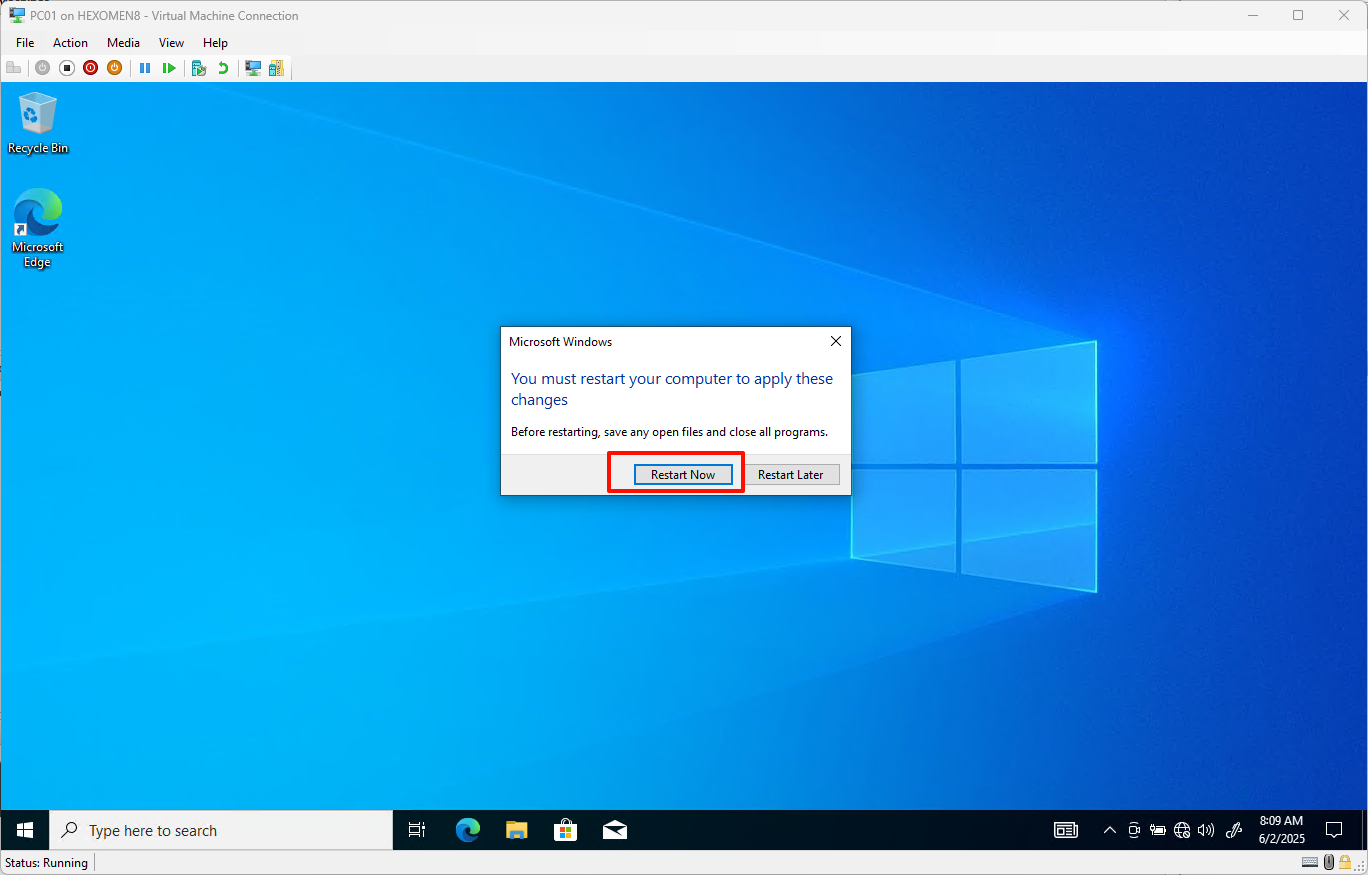
After successfully joining the domain, the system will prompt you to restart – click
OKand restart immediately
-
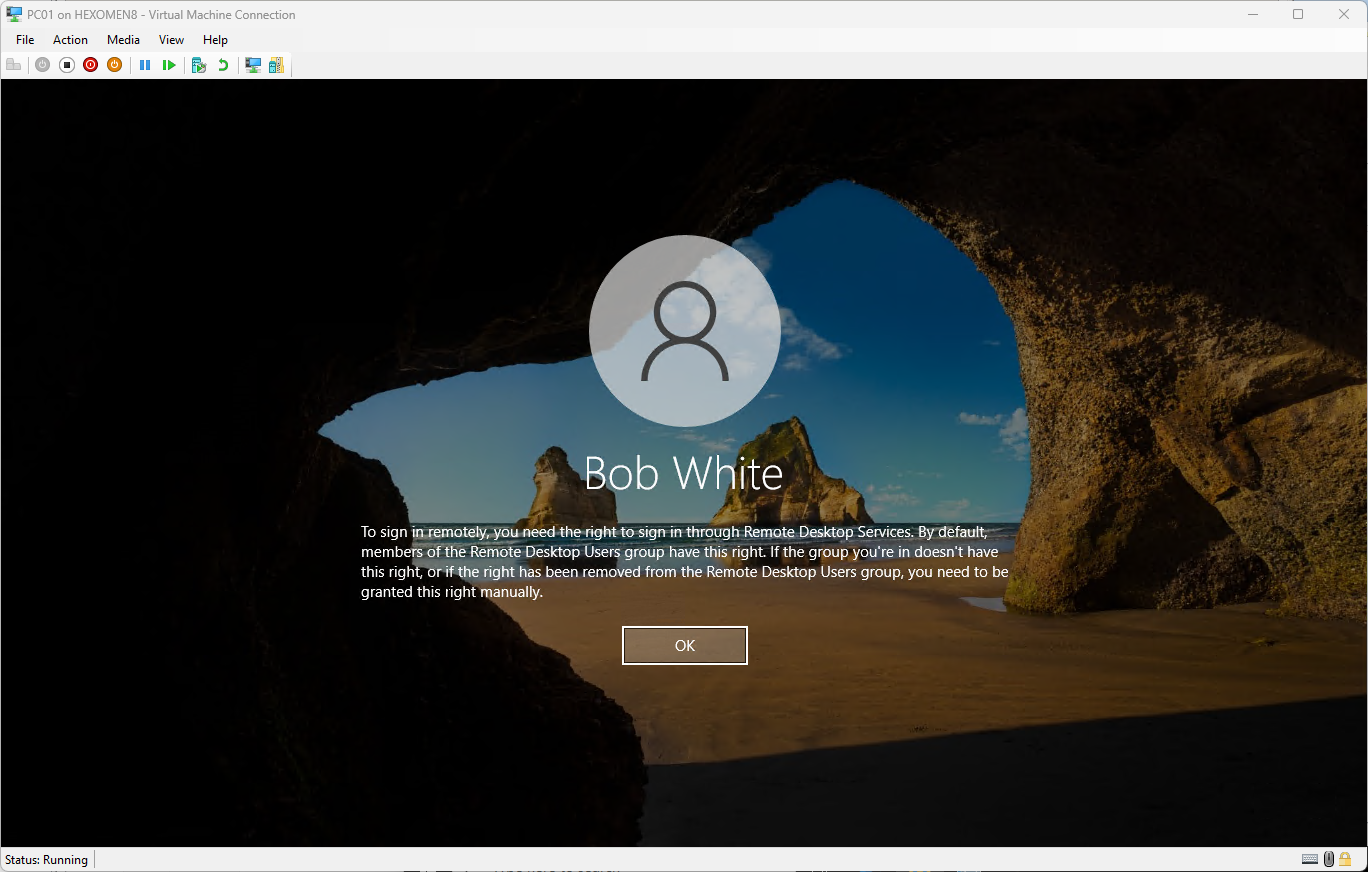
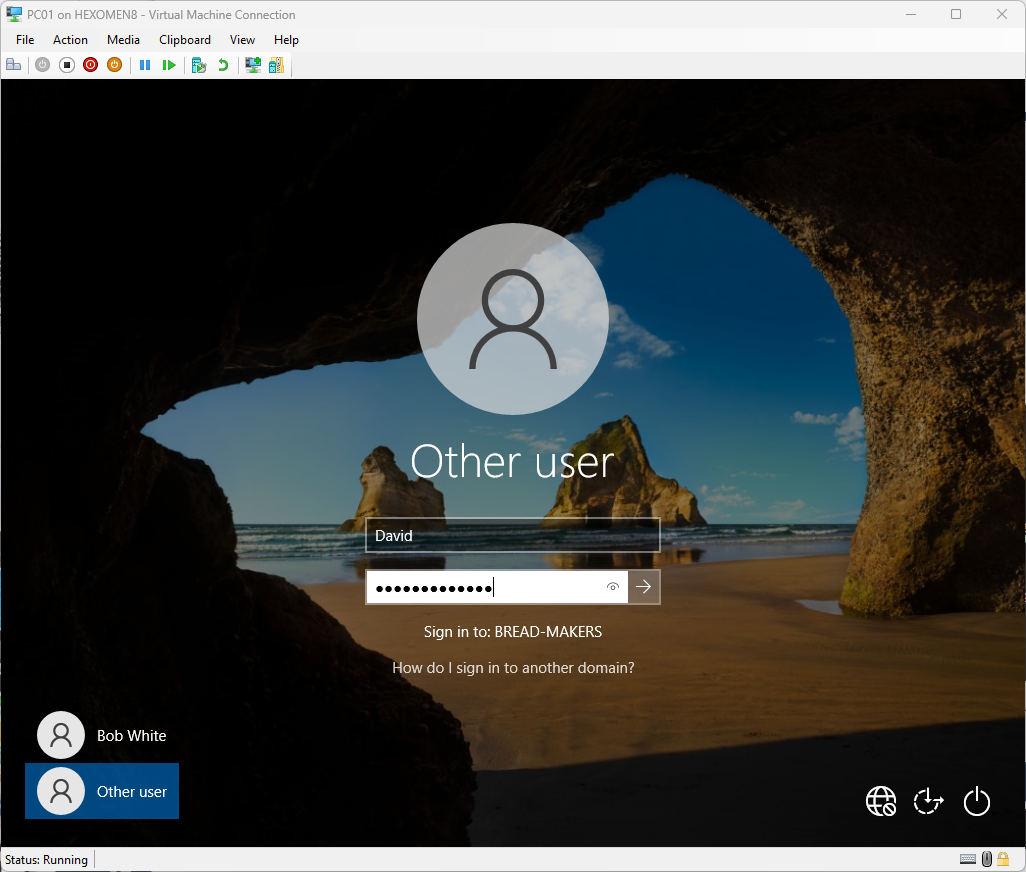
After rebooting, click
Sign in with another accountand enter Bob’s domain account information to log in
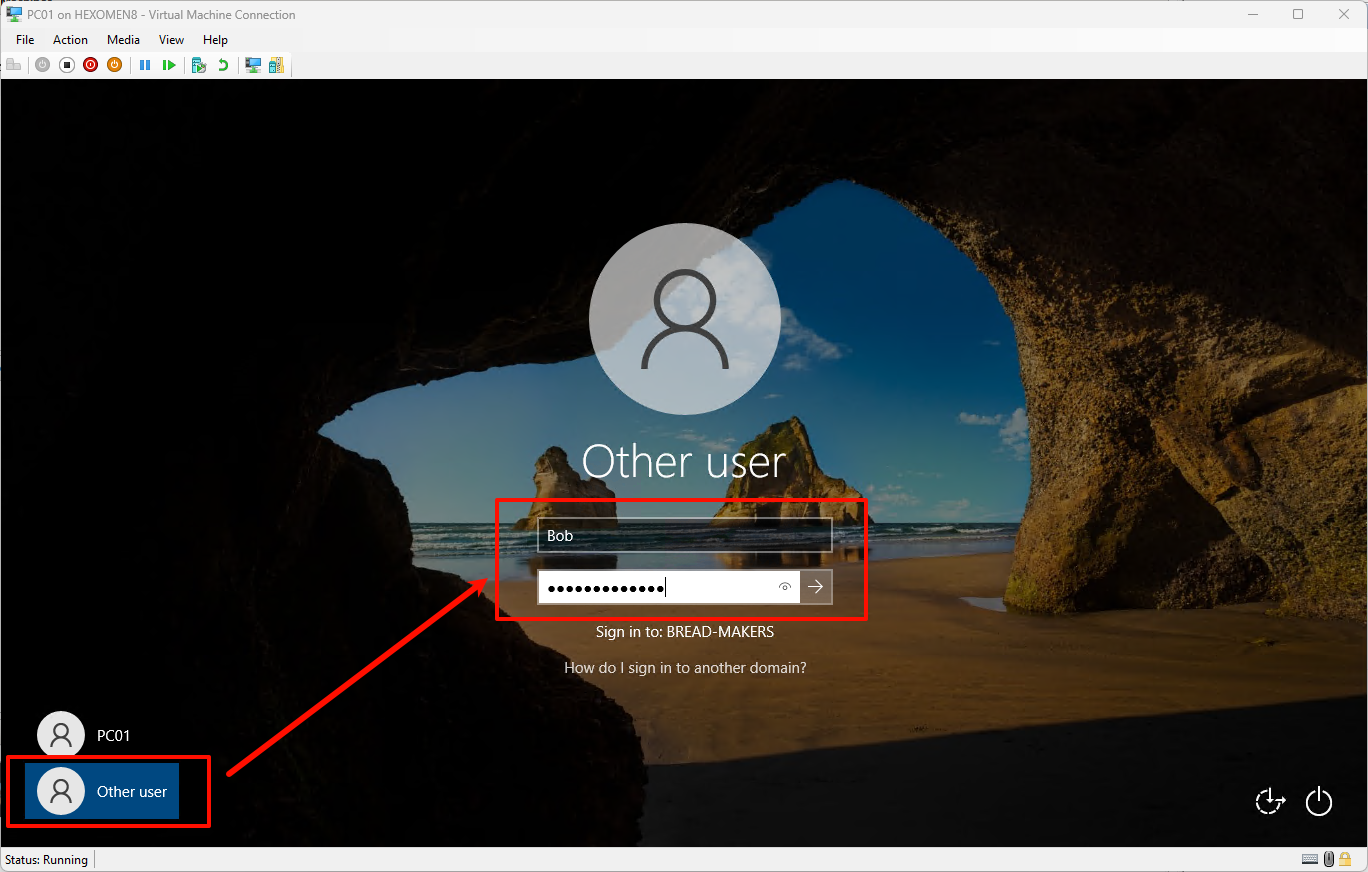
⚠️ If you receive an error saying “Log on to remote computer failed”, try logging in with a local account once, then sign out and try the domain login again (this may be due to Hyper-V connection delay)
-
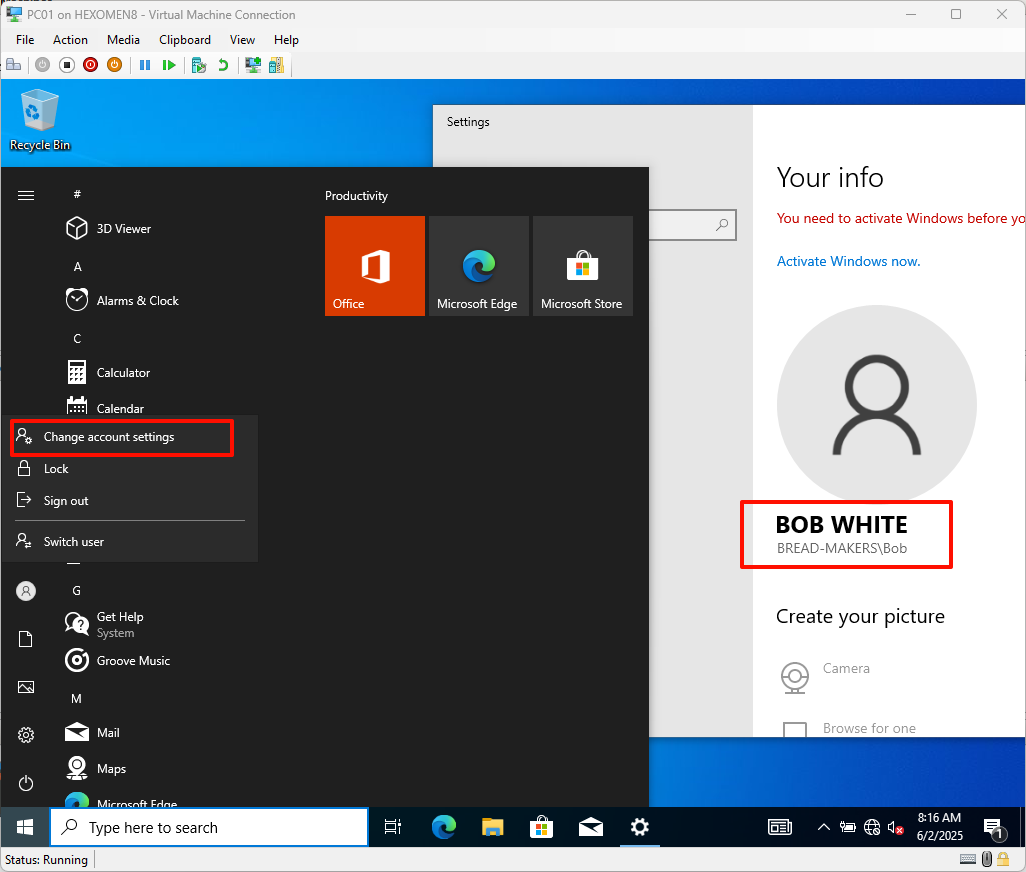
After successful login, click the Start menu -> Profile icon ->
Change account settingsto confirm you’re logged in as a domain user
-
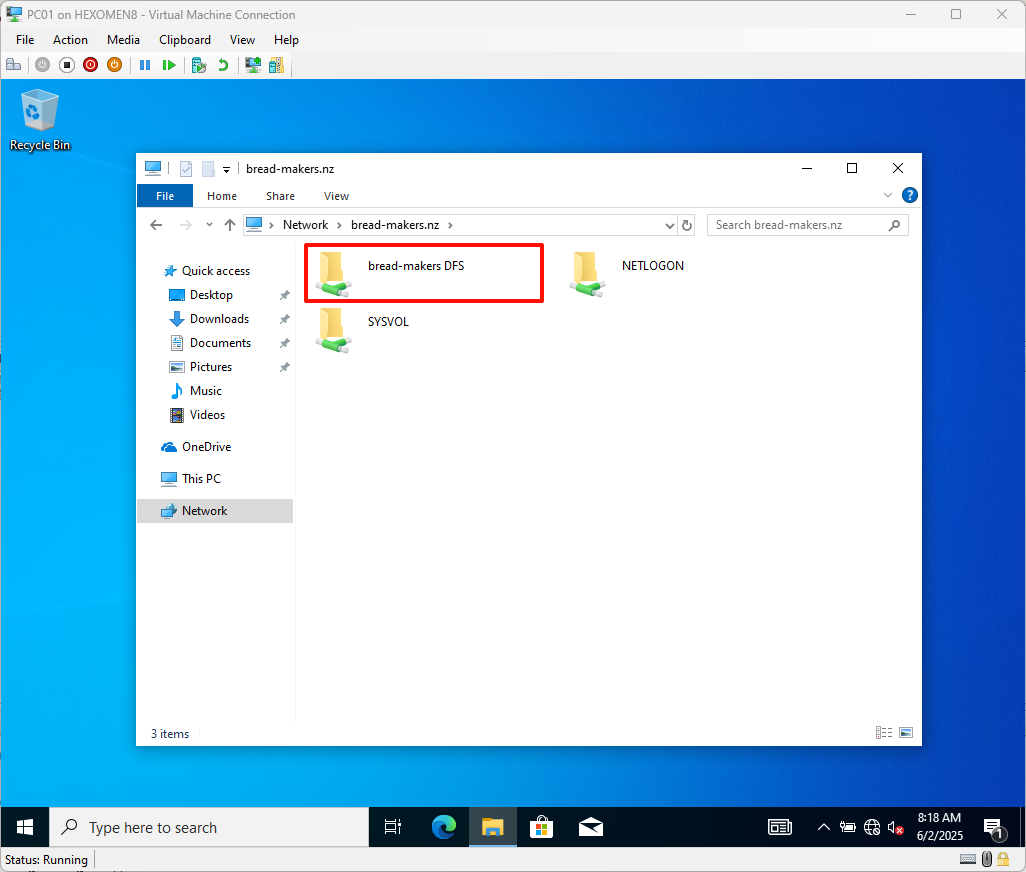
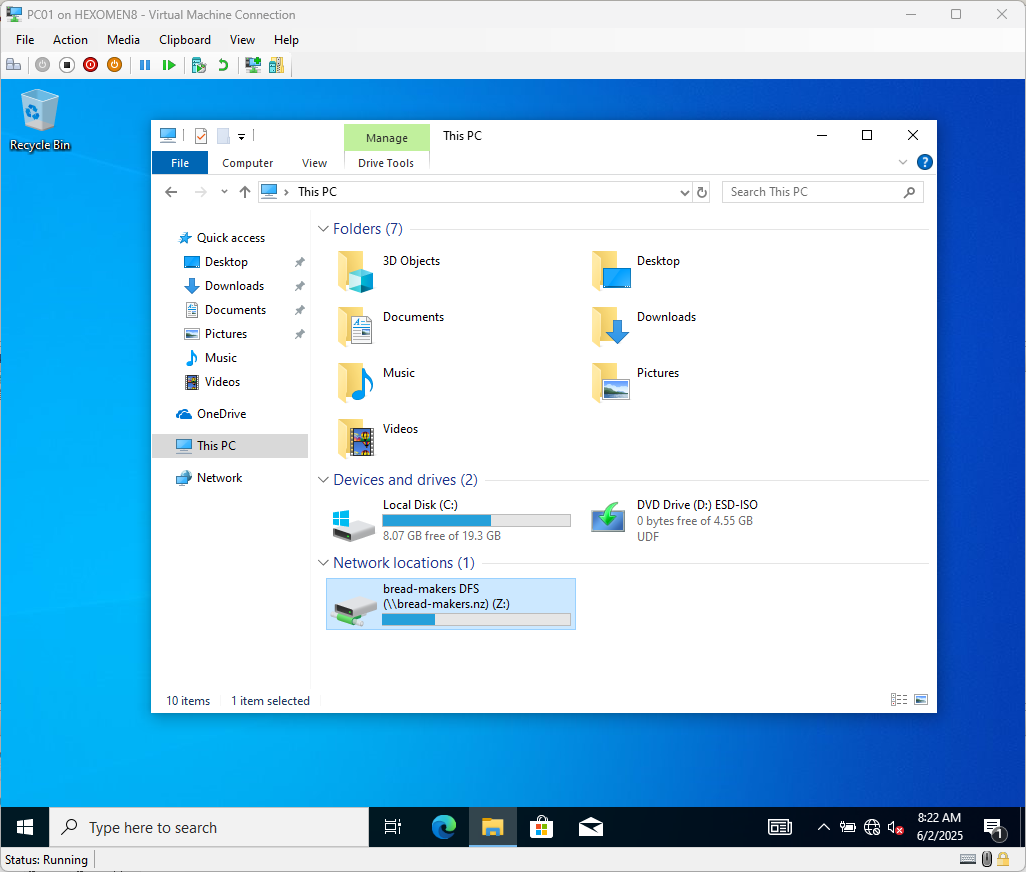
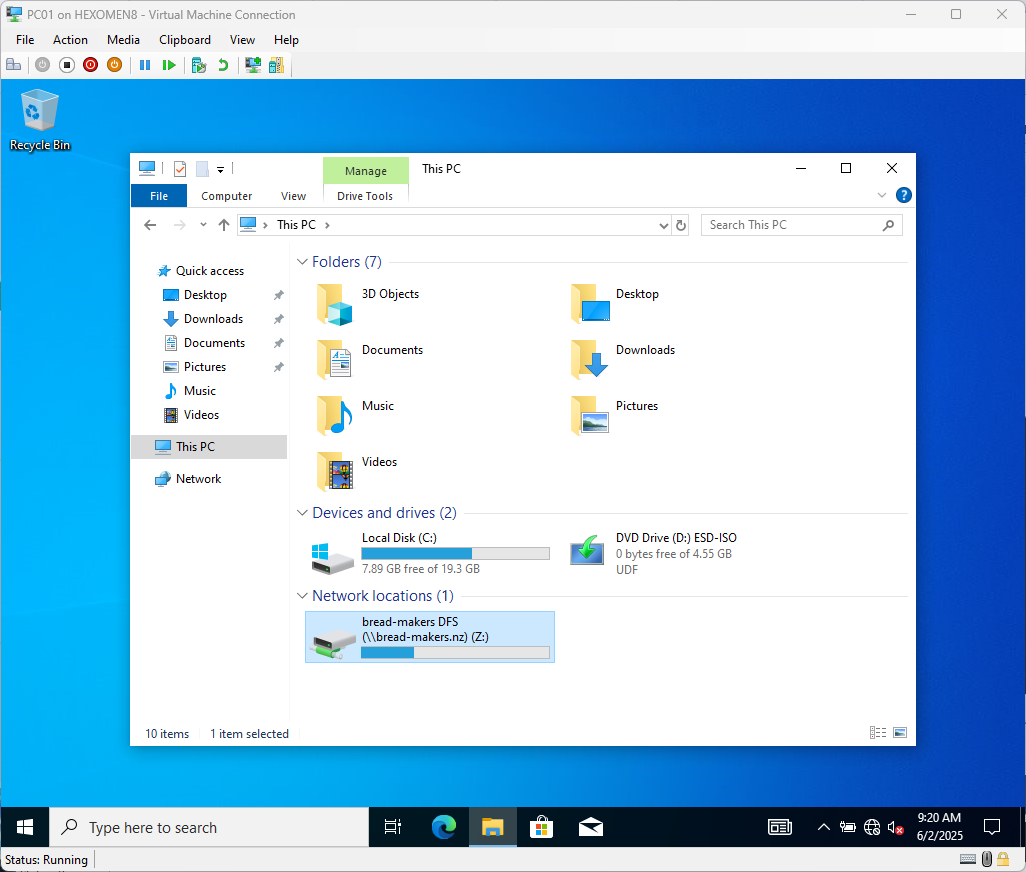
Open File Explorer and type
\\bread-makers.nzin the address bar to access the previously configured DFS shared folder
-
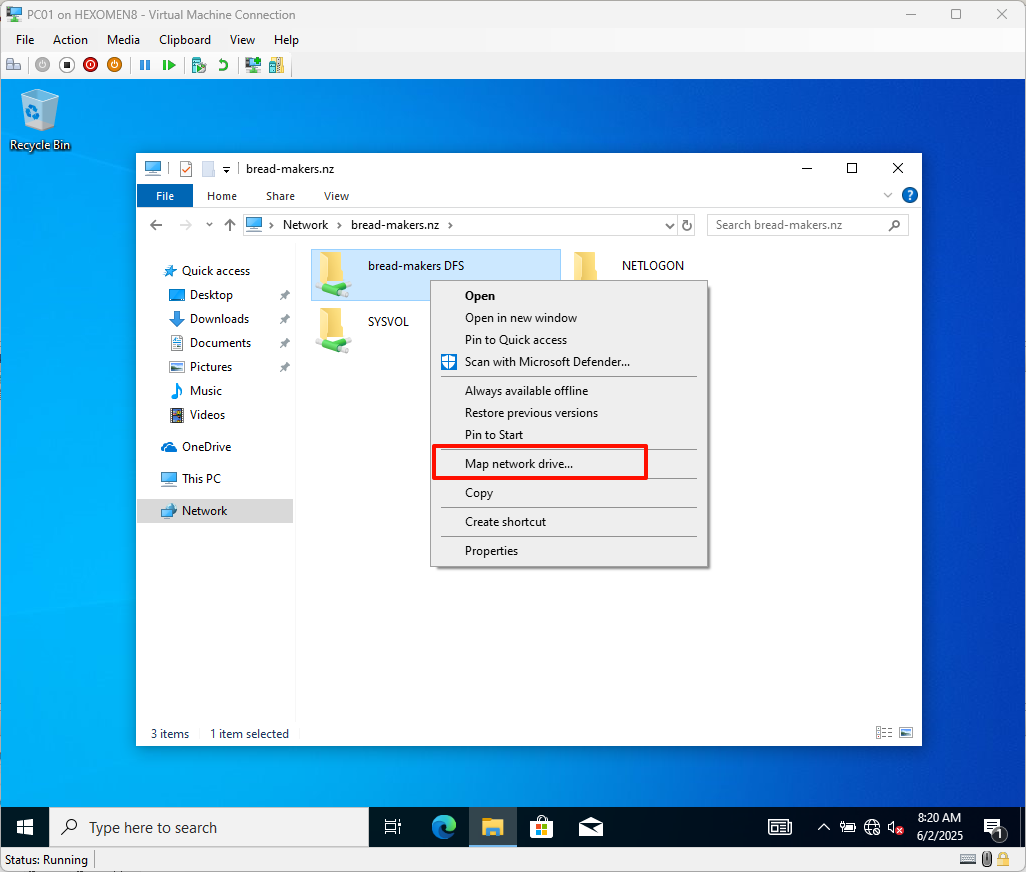
You can map the
bread-makers DFSfolder as a network drive: Right-click ->Map network drive
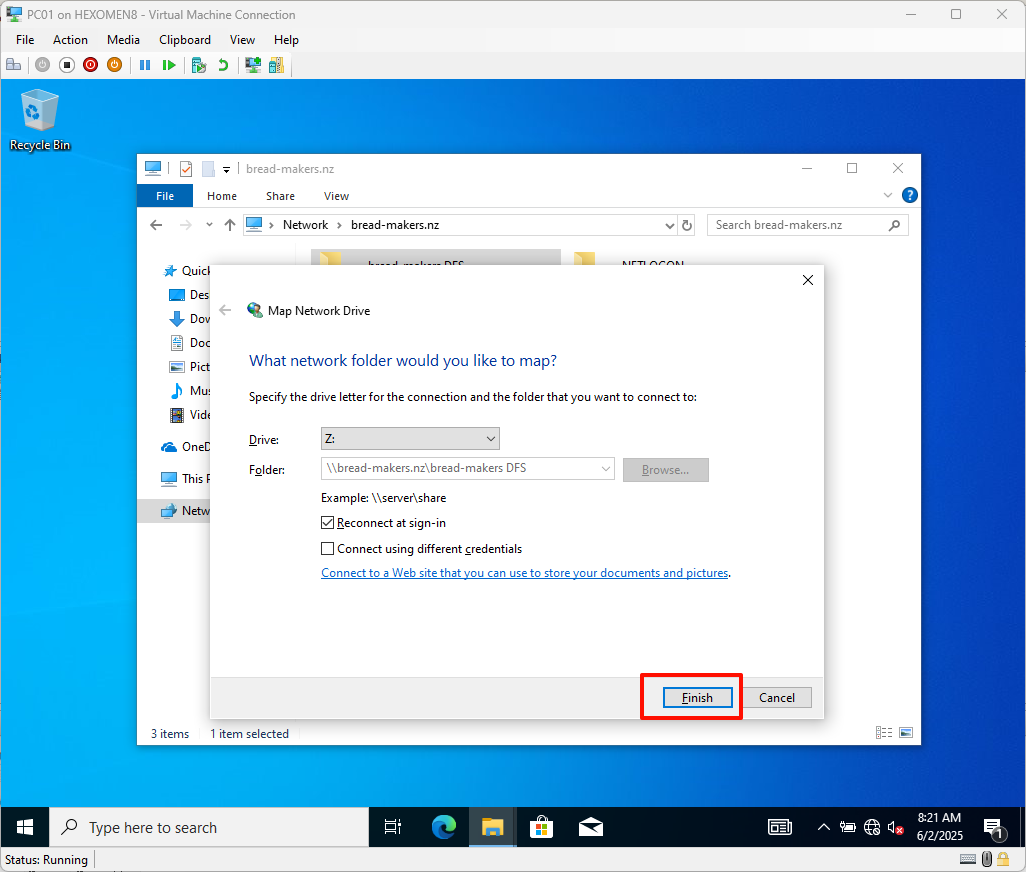
- Choose a drive letter (default is Z:), click
Finish, and the mapped folder will appear in File Explorer
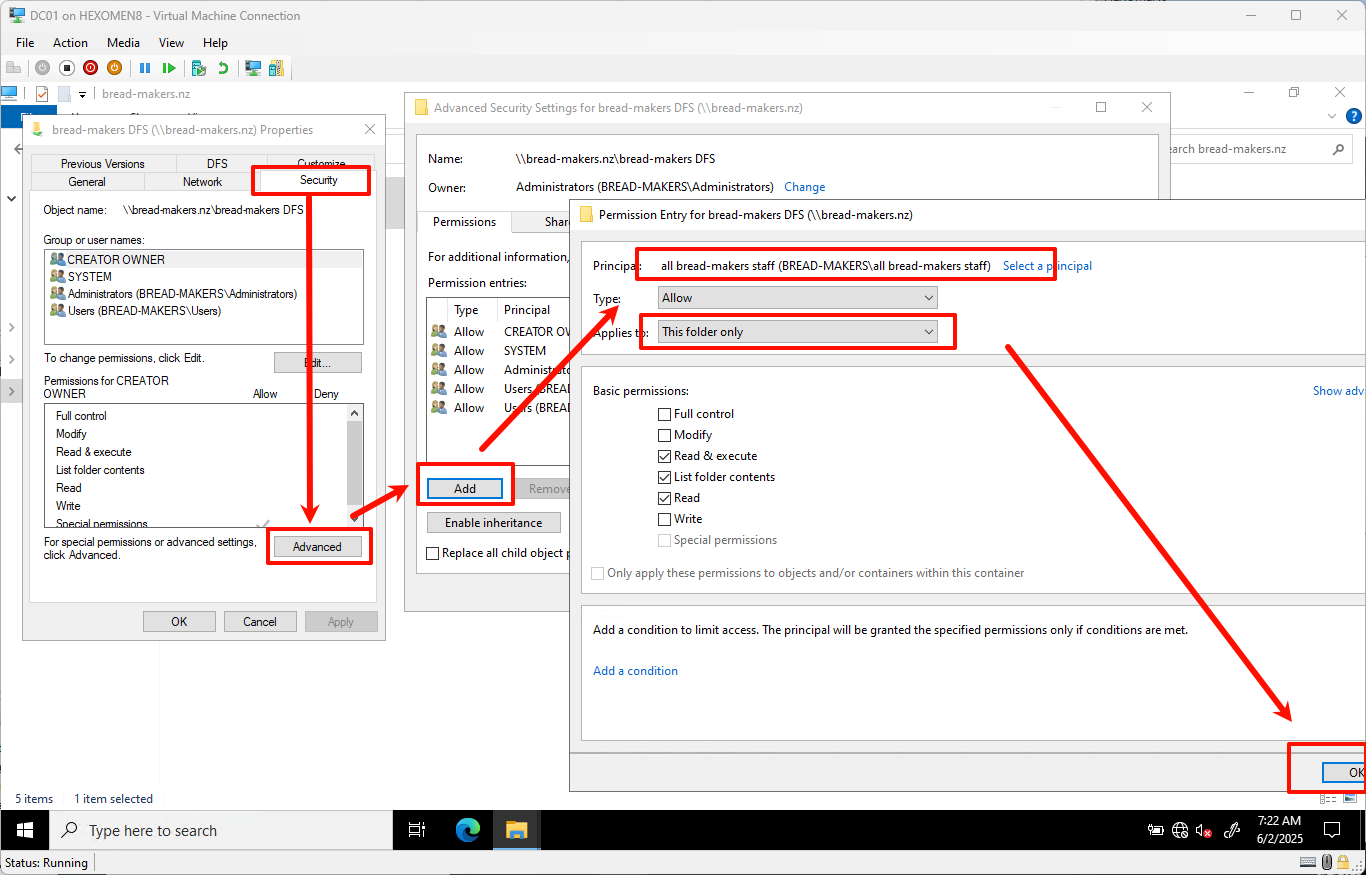
Configure File Sharing Permissions
In this step, we will set folder permissions to ensure that only authorized departments can access their corresponding directories.
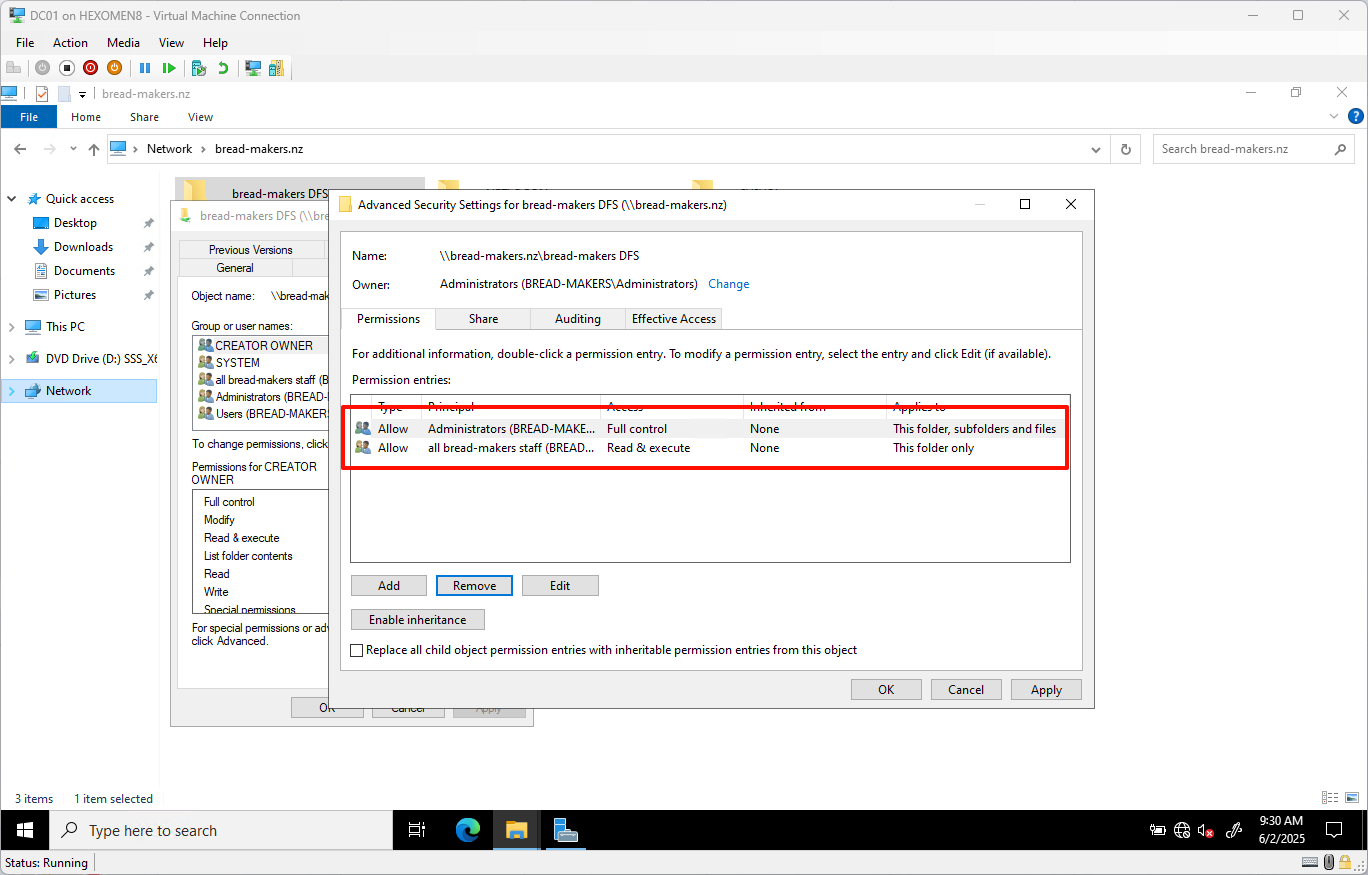
-
Set read permissions for all employees on the root directory
bread-makers DFS, and remove unnecessary permissions—only keepall bread-makers staffandAdministratorgroups
-
Set read permissions for the
Bake Departmentfolder specifically for thebakergroup
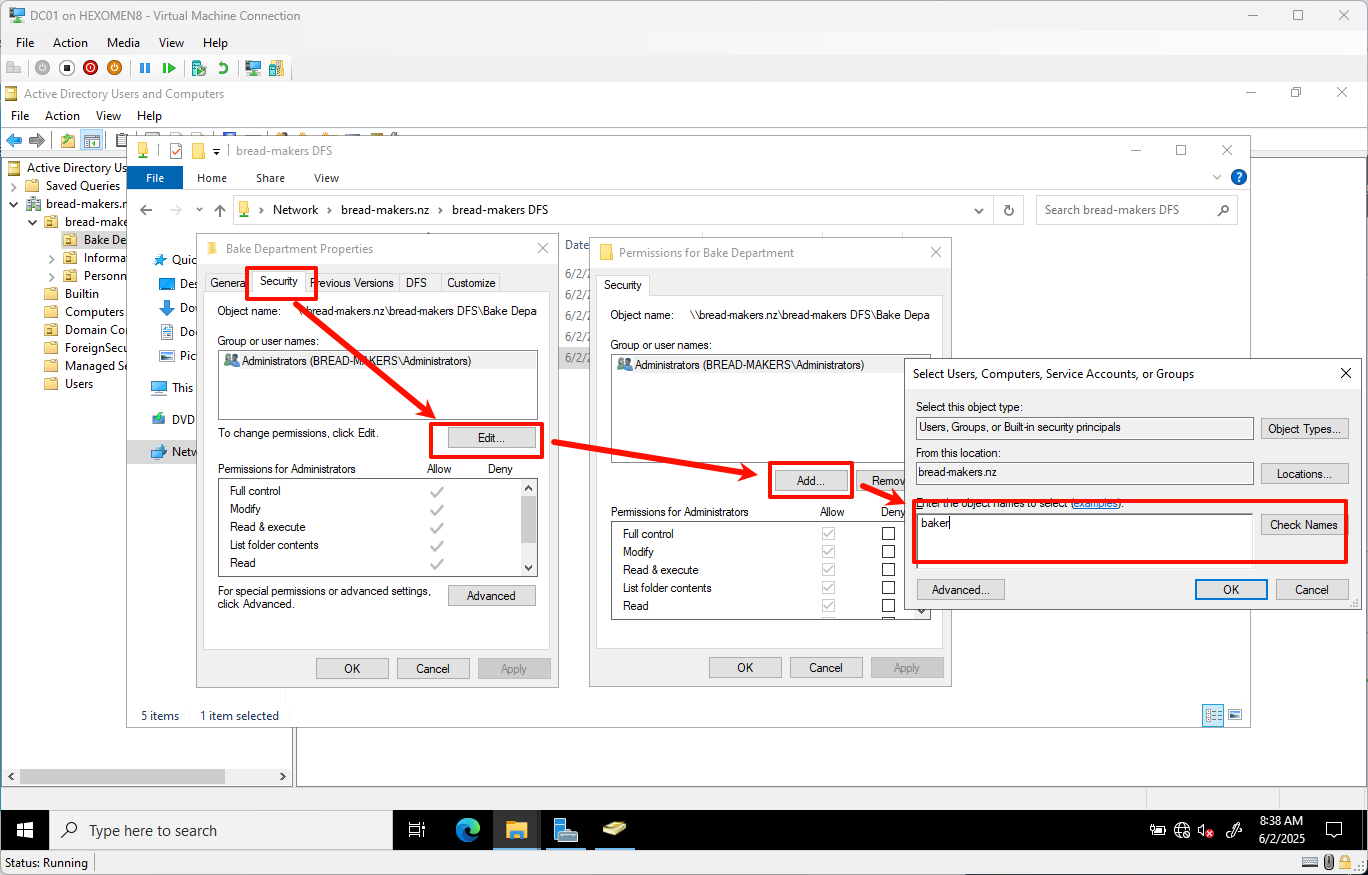
-
Similarly, configure permissions for other folders:
| Folder | Permission Group |
|---|---|
| Bake Department | baker |
| Information Department | IT staff |
| Personnel Department | personnel |
| Share Files | all bread-makers staff |
✅ Verification Steps:
- Log off and back in to refresh group policies
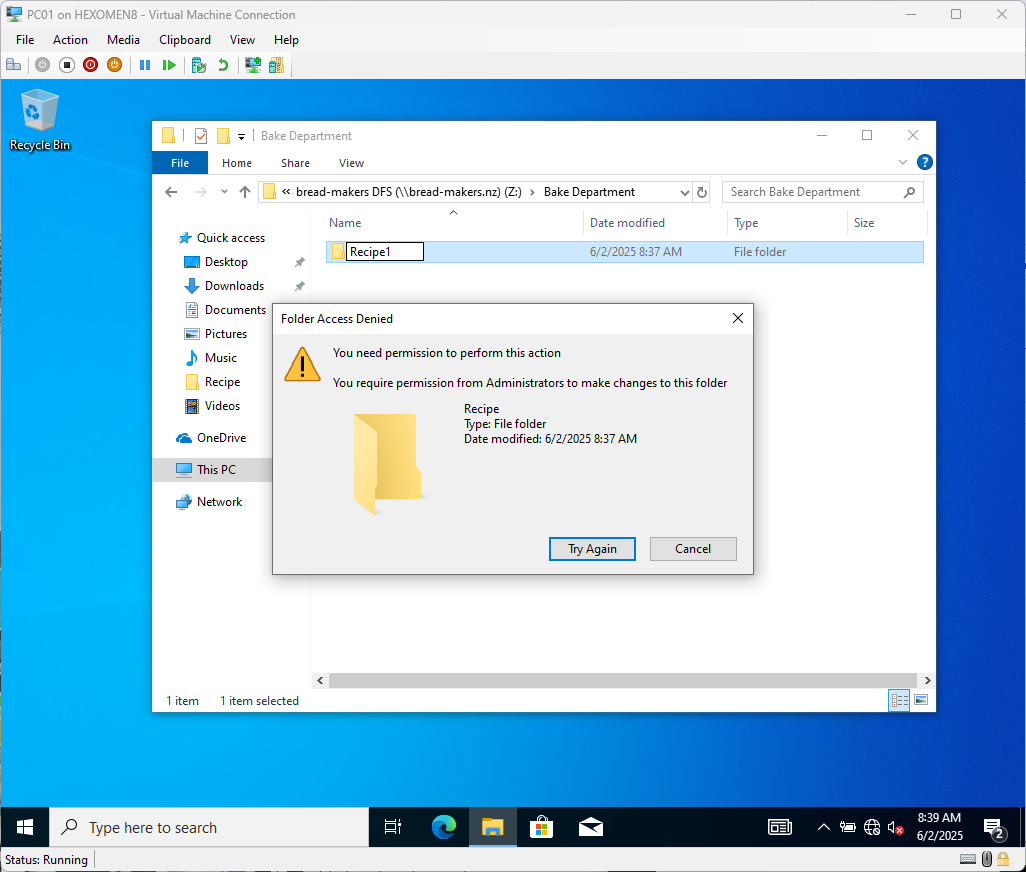
- After logging in as Bob, navigate to the
bread-makers DFSfolder — you should only see contents underBake Departmentand have read-only access
Automating User Creation, Group Policy Assignment & User Folder Setup
To improve efficiency, we can use PowerShell scripts to batch-create users, assign them to groups, and automatically generate personal folders.
Prerequisites
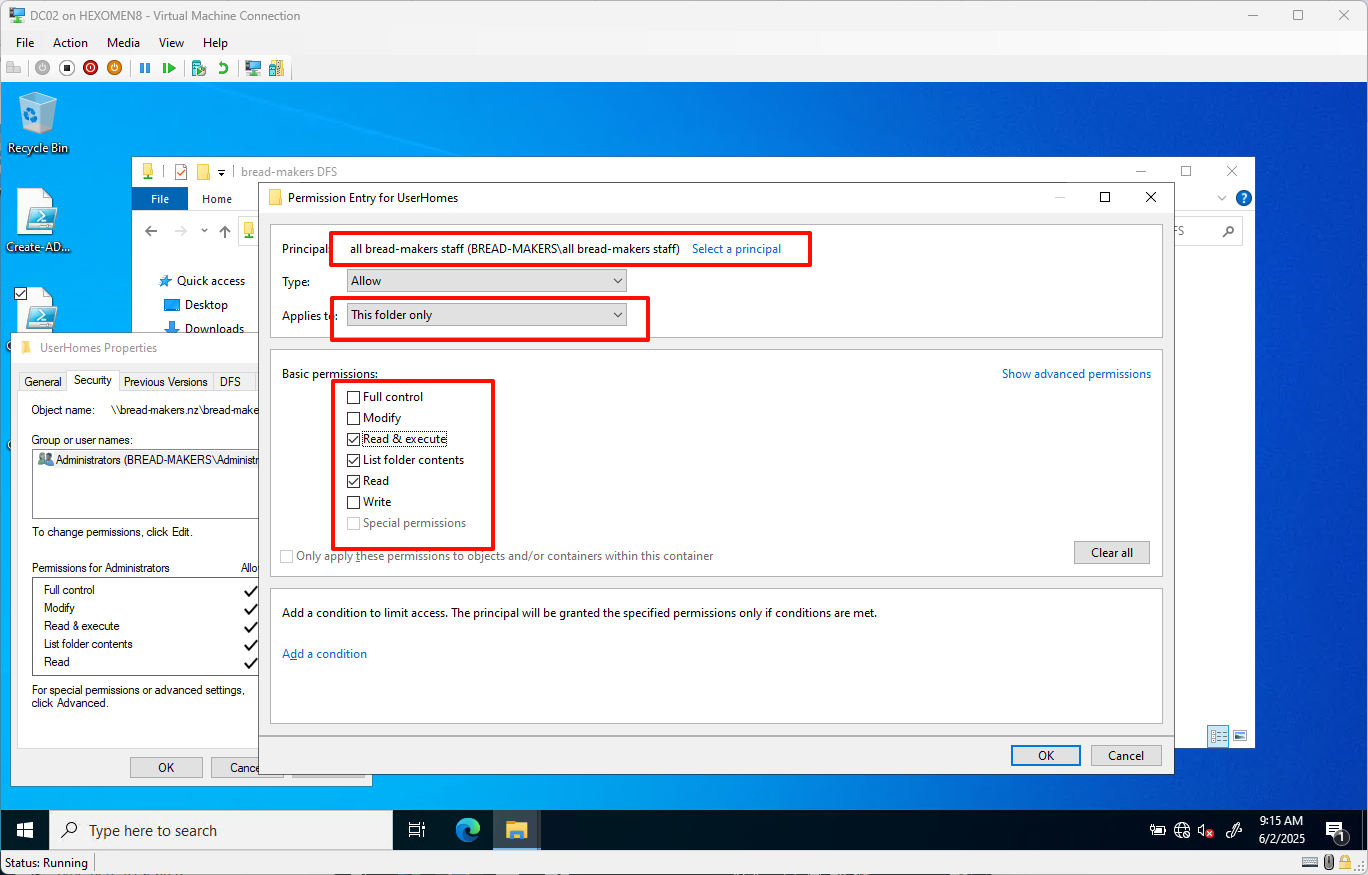
Before running the script, create a folder named UserHomes inside the shared folder and set the following permissions:
-
Disable inherited permissions
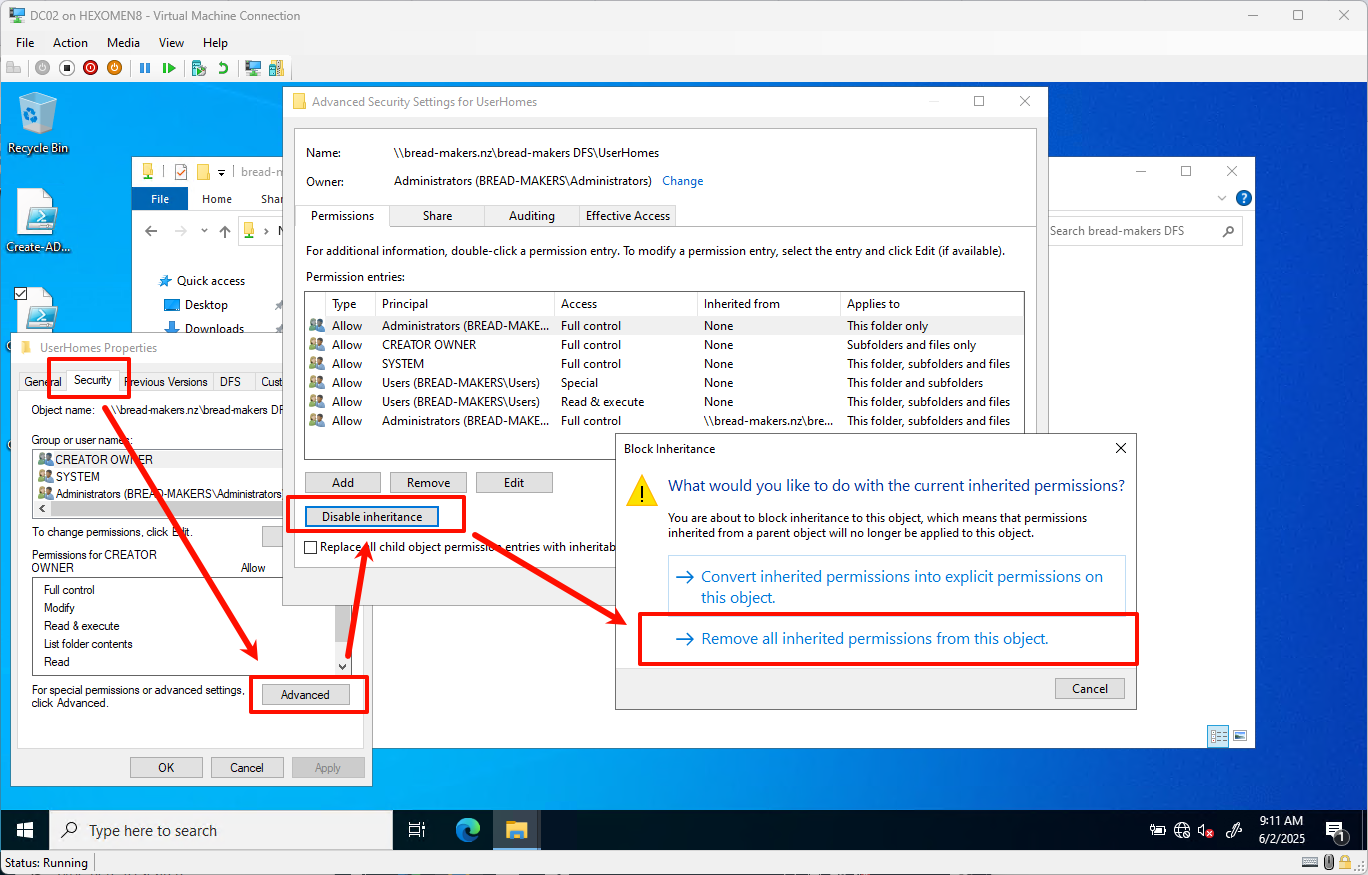
-
Grant the
all bread-makers staffgroup “Read” access to this folder only
PowerShell Script Examples
You can choose any of the following scripts depending on your needs:
✅ Basic Version (Manual Single User Creation)
- Script path:
scripts/Create-NewUser.ps1 - Create-NewUser.ps1
✅ CSV Batch Version (Import Users from CSV)
- Script path:
scripts/Create-ADUser-Batch.ps1 - Create-ADUser-Batch.ps1
- Example CSV format:
Username,FullName,Password,Department
David,Dave Smith,P@ssw0rd123,Personnel Department
Eve,Eve Johnson,P@ssw0rd456,Bake Department
Frank,Frank White,P@ssw0rd789,Information Department
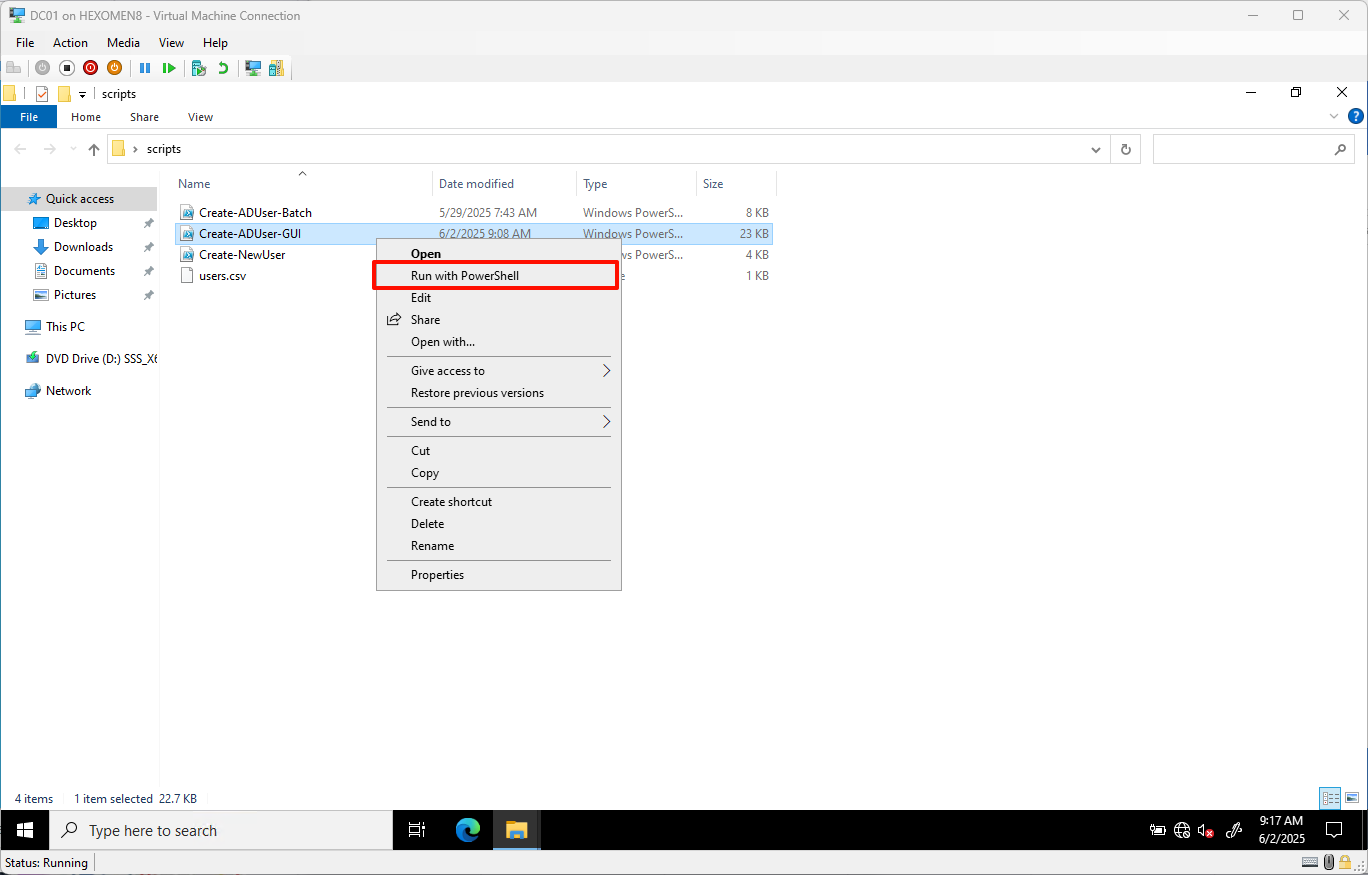
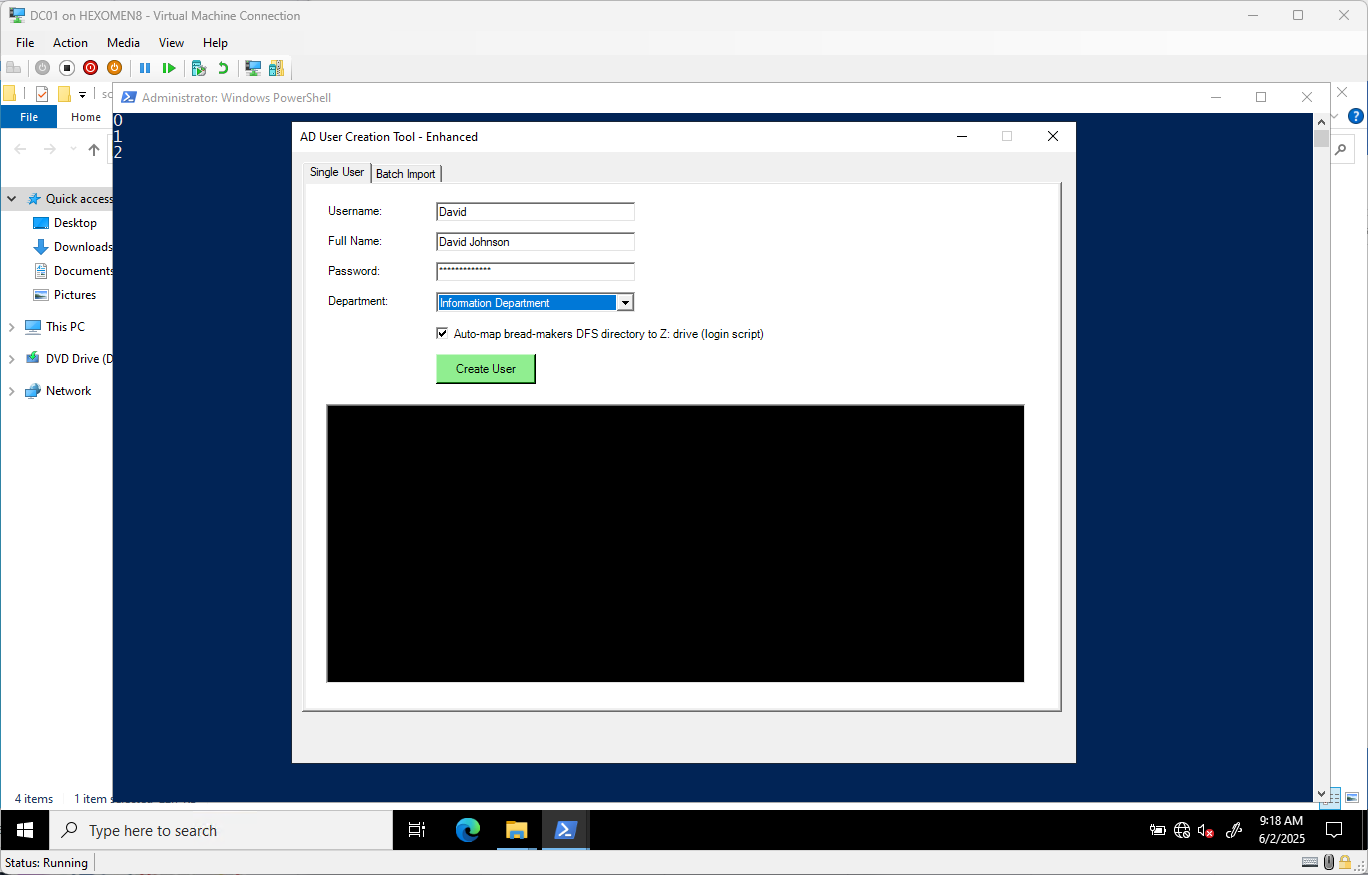
✅ GUI Version (Supports Single or Batch Creation)
- Script path:
scripts/Create-ADUser-GUI.ps1 - Create-ADUser-GUI.ps1
Usage Instructions:
-
Right-click the script ->
Run with PowerShell
-
Fill in user details and click
Create User
-
After creation, the result will be displayed below
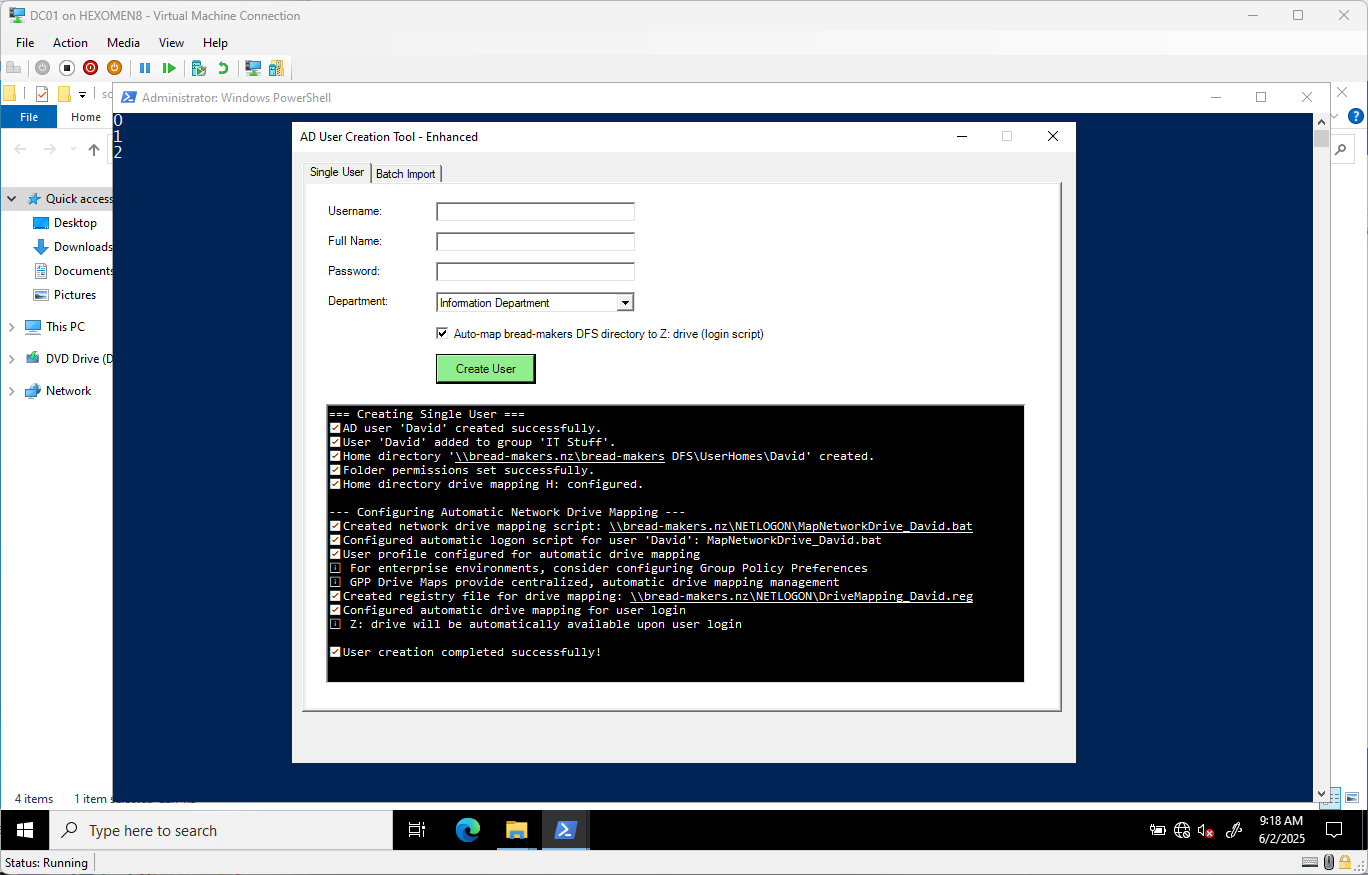
-
Try logging in with the newly created user to verify access
-
After logging in, open File Explorer and confirm that
bread-makers DFSis mapped as the Z: drive
-
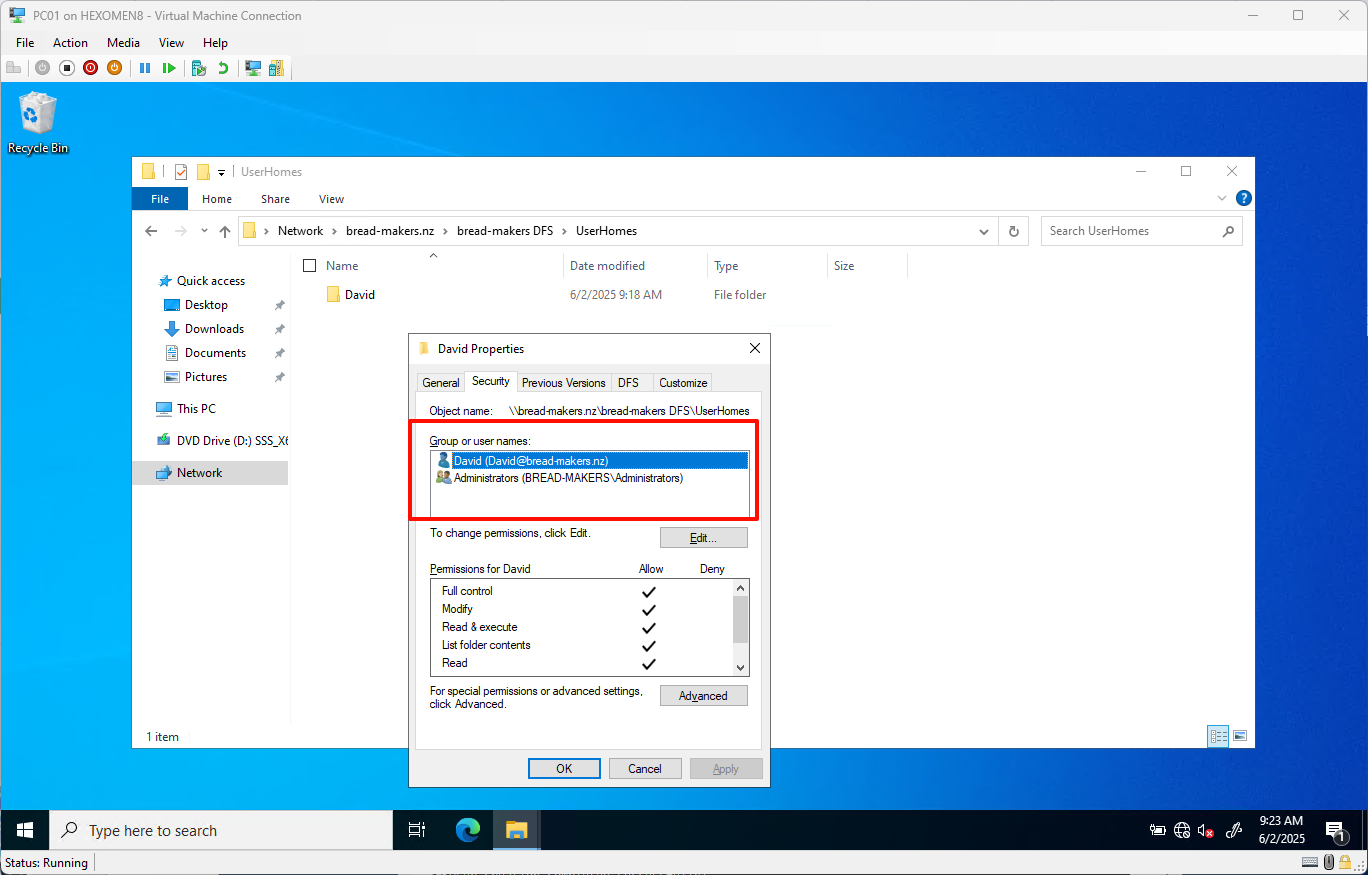
Navigate to the DFS folder and verify that a dedicated user folder has been created under
UserHomeswith correct permissions
Summary
In this chapter, we completed the following tasks:
- Created Organizational Units, users, and group structures in Active Directory
- Joined client machines to the domain and performed domain-based logins
- Configured DFS folder permissions to restrict access by department
- Used PowerShell scripts to automate user creation, group assignment, and personal folder setup
In the next chapter, we will continue with Group Policy Management, setting up centralized policies to enforce security and desktop configurations across the domain.